canon rebel t5 instruction manual

Welcome! This guide unlocks the full potential of your Canon Rebel T5, offering detailed explanations of its features and functionalities․

Explore comprehensive instructions, ensuring a rewarding photographic experience with this popular DSLR and its accompanying manual․

What’s in the Box

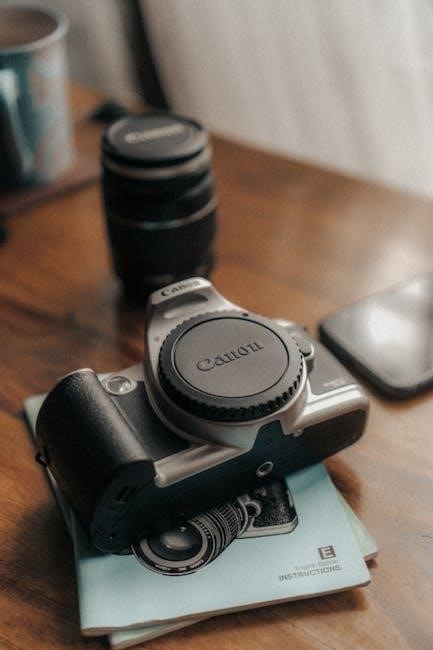
Upon unboxing your Canon Rebel T5, you’ll discover several essential components to begin your photographic journey․ Expect the Canon EOS Rebel T5 camera body itself, naturally! A standard kit typically includes the EF-S 18-55mm f/3․5-5․6 IS II zoom lens, providing versatile shooting options․

You’ll also find a Canon LC-E6 battery charger, a Canon LP-E10 battery, and a wide strap for comfortable carrying․ Essential documentation, such as the instruction manual and warranty card, are included for reference and peace of mind․ Finally, a body cap and lens cap protect your investment when not in use․

Key Features Overview

The Canon Rebel T5 boasts a 12․2-megapixel CMOS sensor, delivering detailed and vibrant images․ It features DIGIC 4 image processing for enhanced clarity and color reproduction․ Capture Full HD 1080p video at 30, 25, or 24 frames per second, offering cinematic quality․

A 9-point autofocus system ensures sharp focus on your subjects, while ISO settings up to 6400 allow for shooting in low-light conditions․ The 3․0-inch LCD screen provides a clear view for composing shots and reviewing images․ Enjoy creative control with various shooting modes and scene settings․

Understanding the Camera Body

Familiarize yourself with the Canon Rebel T5’s layout! This section details the location and function of all essential controls for optimal operation․

Front Panel Controls

The front of your Canon Rebel T5 houses several key controls․ You’ll find the lens release button, crucial for swapping lenses, and the depth-of-field preview button, allowing you to visualize the final image’s focus area․

Additionally, the autofocus point selection/FE lock button enables precise focus control, while the metering mode selector lets you choose how the camera measures light; These controls are essential for mastering manual settings and achieving desired photographic results․ Understanding their functions is paramount for creative control and efficient operation of your camera․

Rear Panel Controls

The rear panel of the Canon Rebel T5 is densely populated with controls․ The prominent LCD screen displays images and menu options․ Surrounding it are buttons for navigating menus, reviewing photos, and adjusting settings like white balance and picture style․

The multi-controller allows for precise selection, while the ‘Set’ button confirms choices․ Crucially, the Live View shooting button activates live preview on the LCD․ Mastering these controls unlocks full customization and efficient operation, enabling photographers to tailor the camera to their specific needs and creative vision․

Top Panel Controls

The Canon Rebel T5’s top panel houses essential controls for quick adjustments․ The power switch initiates camera operation, while the mode dial selects shooting modes – Auto, Program, Aperture Priority, Shutter Priority, and Manual․ The shutter button triggers image capture, and the control dial facilitates adjustments within selected modes․

Additionally, a dedicated video record button streamlines video shooting․ These intuitive controls provide direct access to frequently used settings, allowing photographers to respond swiftly to changing conditions and maintain creative control during every shot․

Setting Up Your Canon Rebel T5

Begin your journey! Properly insert the battery and a compatible memory card to power on and store your photos, initiating camera setup․

Inserting the Battery and Memory Card

Powering Up: Locate the battery compartment door on the bottom of your Canon Rebel T5․ Release the latch and gently insert the battery pack, ensuring it clicks securely into place․ For the memory card, find the card slot, typically near the battery compartment․

Push the card gently until it locks․ Confirm proper insertion; the camera won’t function without both correctly installed․ Always use Canon-approved batteries and SD cards for optimal performance and to avoid potential damage to your camera․

Initial Camera Settings

First-Time Setup: Upon powering on, the Canon Rebel T5 will guide you through initial settings․ Select your preferred language and region․ Configure the date and time accurately – crucial for proper image metadata․ Choose your image quality settings; beginners should start with JPEG for ease of use․

Explore the autofocus settings, initially accepting the default options․ Familiarize yourself with the menu system; customizing these settings later will enhance your shooting experience․ Remember to register your camera with Canon for warranty purposes and software updates․

Setting the Date and Time

Accurate Timekeeping: Correct date and time settings are vital for organizing and referencing your photos․ Access the date/time setting through the camera’s menu․ Use the directional buttons to adjust the year, month, day, hour, and minute․ Ensure you select the correct AM or PM designation․

Incorrect settings can lead to chronological errors in your image files․ Consider enabling automatic date/time setting if your camera supports it, utilizing GPS data when available․ Regularly verify the accuracy, especially after battery changes․

Shooting Modes Explained

Explore Creativity! The Canon Rebel T5 offers diverse shooting modes – from fully automatic simplicity to complete manual control – to suit every photographer’s skill level․

Auto Mode (GREEN)

Effortless Photography: The green Auto mode on your Canon Rebel T5 is designed for ultimate simplicity, making it perfect for beginners or situations demanding quick results․ In this mode, the camera handles all settings – aperture, shutter speed, ISO, and white balance – automatically, analyzing the scene to optimize image quality․

Simply point and shoot! The camera intelligently selects the best settings for most common shooting scenarios, ensuring well-exposed and properly focused photographs․ While offering convenience, Auto mode limits creative control, but it’s an excellent starting point for learning the fundamentals before exploring more advanced modes․

Program Mode (P)

Semi-Automatic Control: Program mode (P) on the Canon Rebel T5 offers a balance between convenience and creative control․ The camera automatically sets both aperture and shutter speed, but allows you to adjust other settings like ISO, white balance, and exposure compensation․ This mode is ideal when you want the camera to handle the technical aspects while still retaining some influence over the final image․

Program mode provides a good starting point for learning how different settings affect your photos, without the complexity of fully manual control․ It’s a versatile option for various shooting situations․

Aperture Priority Mode (Av)

Controlling Depth of Field: Aperture Priority mode (Av) on your Canon Rebel T5 lets you select the aperture (f-stop), while the camera automatically determines the appropriate shutter speed for correct exposure․ This is particularly useful for controlling depth of field – the area of your image that appears in focus․

A wider aperture (lower f-number) creates a shallow depth of field, ideal for portraits with blurred backgrounds․ A narrower aperture (higher f-number) increases depth of field, suitable for landscapes where you want everything sharp․

Shutter Priority Mode (Tv)

Freezing or Blurring Motion: In Shutter Priority mode (Tv) on your Canon Rebel T5, you set the shutter speed, and the camera automatically adjusts the aperture to achieve proper exposure․ This mode is essential for controlling motion in your photographs․

Fast shutter speeds (e․g․, 1/500s or faster) freeze action, perfect for sports or wildlife photography․ Slow shutter speeds (e․g․, 1/30s or slower) create motion blur, useful for conveying a sense of movement or capturing light trails․ Remember to use a tripod with slower shutter speeds to avoid camera shake․

Manual Mode (M)

Complete Creative Control: Manual Mode (M) on your Canon Rebel T5 grants you full control over both the aperture and shutter speed․ This mode is ideal for experienced photographers who want precise control over every aspect of the image․

You independently set the aperture (controlling depth of field) and shutter speed (controlling motion blur and exposure)․ The camera’s light meter assists in achieving proper exposure, but the final settings are entirely up to you․ Mastering Manual Mode unlocks your full creative potential, allowing for unique and artistic photographs․

Focusing and Image Quality

Achieve Sharpness: Explore autofocus modes and image quality settings like RAW versus JPEG to optimize your Canon Rebel T5’s performance․

Understand ISO for low-light situations․

Autofocus Modes

Selecting the Right Mode: Your Canon Rebel T5 offers several autofocus (AF) modes to suit various shooting scenarios․ One-Shot AF is ideal for stationary subjects, locking focus when you half-press the shutter button․ AI Servo AF continuously tracks moving subjects, adjusting focus as they change position – perfect for sports or wildlife․

AI Focus AF intelligently switches between One-Shot and AI Servo, attempting to determine the subject’s movement․ Explore the AF Point Selection options to choose specific focus points or let the camera automatically select them․ Understanding these modes is crucial for capturing sharp, well-focused images consistently․

Image Quality Settings (RAW vs․ JPEG)

Choosing Your Format: The Canon Rebel T5 allows you to capture images in either JPEG or RAW format․ JPEG files are compressed, resulting in smaller file sizes and are ready for immediate use – ideal for sharing․ However, RAW files contain unprocessed data, offering greater flexibility in post-processing․

With RAW, you can adjust white balance, exposure, and other settings without losing image quality․ While RAW files are larger, they provide significantly more control for editing and achieving optimal results․ Consider your workflow and editing needs when selecting your preferred image quality setting․

Understanding ISO

ISO Sensitivity Explained: ISO controls your camera’s sensitivity to light․ A lower ISO (like 100) is best for bright conditions, producing cleaner images with less noise․ As light decreases, you’ll need to increase the ISO (e․g․, 800, 1600, or higher)․

However, higher ISO settings introduce more digital noise, potentially reducing image quality․ The Canon Rebel T5 performs well at lower ISOs, but be mindful of noise levels when shooting in low light․ Experiment to find the optimal balance between brightness and image clarity for your specific shooting scenario․

Using the Built-in Flash

Integrated Illumination: The Rebel T5’s built-in flash provides convenient extra light for various shooting situations, enhancing image brightness and detail․

Flash Modes

Diverse Illumination Options: Your Canon Rebel T5 offers several built-in flash modes to suit different photographic scenarios․ Auto Mode lets the camera determine if flash is needed, ideal for general shooting․ Manual Flash allows full control over flash output, useful for creative effects․

Flash On forces the flash to fire with every shot, while Flash Off disables it entirely․ Red-Eye Reduction minimizes the red-eye effect in portraits by pre-flashes․ Experiment with these modes to achieve optimal lighting and enhance your images, understanding how each setting impacts the final result․

Red-Eye Reduction

Minimize Unwanted Reflections: The Canon Rebel T5’s Red-Eye Reduction feature combats the common issue of red pupils in flash photography․ This mode works by emitting a series of pre-flashes before the main flash fires, causing the subject’s pupils to constrict․

Effective Portraiture: This constriction reduces the amount of light reflected from the retina, minimizing the red-eye effect․ While effective, it may require subjects to look slightly away from the camera initially․ Explore the settings within the flash menu to optimize this feature for consistently pleasing portrait results․

Exploring the Menu System

Navigate with Ease: The Canon Rebel T5’s menu offers extensive customization․ Discover options for image quality, autofocus, and various camera settings for optimal control․

Customizing Menu Options

Personalize Your Experience: The Canon Rebel T5 allows for deep customization within its menu system․ Dive into the settings to tailor the camera to your specific shooting style and preferences․ You can adjust image quality settings, choosing between RAW and JPEG formats, or modify autofocus behavior for different subjects and scenarios․

Explore options for customizing the Quick Control screen, allowing quick access to frequently used settings; Further personalize by adjusting display settings, audio signals, and button functions․ Don’t hesitate to experiment – the menu system is designed to empower you to create a camera that perfectly suits your needs!

Understanding the Quick Control Screen

Instant Access to Settings: The Quick Control screen on your Canon Rebel T5 provides a streamlined way to adjust key shooting parameters without navigating through the full menu․ Accessed by pressing the ‘Q’ button, it displays frequently used settings like shooting mode, aperture, shutter speed, ISO, and autofocus points․

Use the cross keys or the rear dial to modify these settings directly on the screen․ This intuitive interface allows for rapid adjustments in response to changing lighting conditions or subject movement, ensuring you never miss a crucial shot․ Customize which settings appear for even faster access!

Connecting to a Computer

Seamless Transfer: Easily transfer your photos from the Canon Rebel T5 to your computer using a USB cable and Canon’s EOS Utility software for organization․

Transferring Photos via USB

Connecting for Transfer: Begin by ensuring your Canon Rebel T5 is powered off․ Connect the provided USB cable to the camera’s USB port and a USB port on your computer․ Power on the camera; a connection screen should appear․

Your computer will likely recognize the camera as a storage device․ You can then browse the camera’s DCIM folder to copy your photos and videos directly․ Alternatively, utilize Canon’s EOS Utility software for a more organized transfer process, allowing for image selection and renaming options before importing․

Remember to safely eject the camera from your computer before disconnecting the USB cable to prevent data corruption․

Using Canon’s Software (EOS Utility)

EOS Utility Power: Canon’s EOS Utility software, downloadable from their website, enhances photo transfer and camera control․ After installation, connect your Rebel T5 via USB․ Launch EOS Utility, and it will recognize your camera․

This software allows for remote live view shooting, adjusting camera settings directly from your computer, and downloading images with selective options․ You can preview images, choose specific files, and rename them during import․

EOS Utility also facilitates image editing and offers access to Canon’s Digital Learning Center for tutorials and support․

Troubleshooting Common Issues

Resolve Problems: This section addresses typical issues like the camera failing to power on or displaying error messages, offering quick solutions․

Camera Not Turning On

Initial Checks: If your Canon Rebel T5 fails to power on, first ensure the battery is correctly inserted and fully charged․ Try a different, known-good battery if possible to rule out a battery issue․ Verify the battery contacts within the camera compartment are clean and free from corrosion․

Power Switch & Mode Dial: Confirm the main power switch is in the “ON” position․ Also, check the mode dial isn’t set to a position that disables power, such as video mode without a card․ If problems persist, attempt to reset the camera by removing the battery and memory card for several minutes before reinserting them․

Error Messages

Understanding Error Codes: Your Canon Rebel T5 displays error messages to indicate specific problems․ Consult the camera’s LCD screen for the exact code․ Common errors include “Err 00” (shutter curtain issue), “Err 90” (memory card error), and “Lens Error” (communication problem)․

Troubleshooting Steps: For memory card errors, try a different card or reformat the existing one․ Lens errors often resolve by reattaching the lens securely․ If “Err 00” appears, avoid using the shutter and contact Canon support․ Always note the error code before attempting any fixes․

Lens Compatibility and Care

Canon EF and EF-S lenses are compatible with the Rebel T5․ Regular cleaning with a soft cloth ensures optimal image quality and longevity․

Compatible Lenses

The Canon Rebel T5 utilizes the Canon EF and EF-S lens mounts, offering a vast selection of lenses to suit various photographic needs․ EF lenses are compatible with both full-frame and APS-C sensor cameras, while EF-S lenses are specifically designed for cameras with APS-C sensors like the T5․

Popular choices include the EF 24-105mm for versatile shooting, and the renowned 85mm f/1․2 for stunning portraiture․ Wider options like the 14mm f/2․8 are available for landscape photography․ Remember to consider focal length, aperture, and image stabilization when selecting a lens for your specific shooting style and requirements․

Cleaning Your Lens

Maintaining your lens is crucial for optimal image quality․ Begin by using a blower to remove loose dust and debris․ For fingerprints or smudges, gently wipe the lens surface with a microfiber lens cloth․

If necessary, use a lens cleaning solution specifically designed for camera lenses – apply it to the cloth, not directly onto the lens․ Avoid harsh chemicals or abrasive materials․ Regularly cleaning prevents buildup that can degrade image clarity․ Protect your investment with careful handling and consistent maintenance for years of sharp, beautiful photos․

ge steam washer dryer combo manual

GE Steam Washer Dryer Combo Manual: A Comprehensive Guide

Welcome! This detailed manual provides essential guidance for your GE Profile Washer Dryer Combo, offering insights into operation and maximizing its innovative features․

This resource, compiled by Andrea Barnes and Liam, will help you navigate the latest advancements in all-in-one laundry solutions, including heat pump technology․

GE washer dryer combos represent a significant evolution in laundry appliances, particularly gaining traction in North America after decades of popularity in Europe and Asia․ These all-in-one units offer a compelling solution for individuals facing space constraints, eliminating the need for separate washing and drying machines․

Unlike traditional setups, GE combos seamlessly integrate both functions into a single appliance, streamlining the laundry process․ The emergence of new, larger combo units, incorporating advanced heat pump technology, provides efficient and effective cleaning and drying capabilities․

This manual focuses on GE steam washer dryer combos, highlighting their unique features and benefits․ These appliances are designed for convenience, offering a complete laundry solution in a single footprint․ Understanding the capabilities of your GE combo will ensure optimal performance and longevity, as detailed by experts like Andrea Barnes․

Understanding Combo Unit Benefits

Space Optimization: The primary advantage of a GE washer dryer combo is its compact design, ideal for apartments, condos, or homes with limited laundry room space․ Eliminating the need for two separate appliances frees up valuable floor space․

Convenience: Combo units streamline the laundry process․ Clothes can transition directly from the wash cycle to the dry cycle without manual transfer, saving time and effort․ This is particularly beneficial for busy lifestyles․

Cost Savings: While the initial investment might be higher, combos can potentially reduce costs associated with purchasing and maintaining two separate machines․ Furthermore, advanced heat pump technology, as found in newer models, enhances energy efficiency․

Simplified Laundry Routine: A single appliance simplifies laundry management, reducing the number of tasks and steps involved․ As noted by reviewers, this all-in-one solution is a “dream” for those seeking a hassle-free laundry experience․

Key Features of GE Steam Washer Dryer Combos

Steam Technology: GE Steam Washer Dryer Combos utilize steam to sanitize clothes, reduce wrinkles, and refresh fabrics․ Steam cycles penetrate deeply, offering a more thorough clean and minimizing the need for ironing․

Smart Connectivity: Many models boast Wi-Fi connectivity, enabling remote control and monitoring via smartphone apps․ This allows users to start or pause cycles, receive notifications, and access smart features from anywhere․

Advanced Wash Cycles: These combos offer a variety of specialized wash cycles tailored to different fabric types and soil levels, including delicate, heavy-duty, and quick wash options․

Heat Pump Drying: Newer GE combos incorporate heat pump technology, known for its energy efficiency and gentle drying capabilities․ This technology recycles heat, reducing energy consumption and protecting clothes from excessive heat damage․

Getting Started: Installation & Setup

Preparation is key! Carefully unpack your GE combo, inspect for damage, and ensure proper water supply, electrical connections, and leveling for optimal performance․

Unboxing and Initial Inspection

Carefully unpack your new GE Steam Washer Dryer Combo, taking inventory of all included components․ Begin by removing the outer packaging, then gently lift away the protective materials inside the drum․ Inspect the unit thoroughly for any signs of shipping damage – dents, scratches, or broken parts․

Compare the contents against the included parts list to ensure everything is present․ This typically includes the combo unit itself, a water inlet hose, a drain hose, an owner’s manual, and potentially leveling feet or accessories․ Document any damage immediately with photographs and contact the retailer or GE customer support․

Retain all packaging materials until you are completely satisfied with the condition of the appliance․ Do not discard the shipping bolts until the unit is properly leveled and secured, as these were used to stabilize the drum during transport․ Proper initial inspection prevents future issues!

Water Supply Connection

Connect the water inlet hose to a cold water supply with adequate pressure – typically between 20 and 120 psi․ Ensure the connection is secure to prevent leaks, using Teflon tape on the threads if necessary․ Do not use hot water, as this unit is designed for cold water intake only․

Attach the other end of the hose to the designated inlet valve on the back of the combo unit, again ensuring a tight connection․ Check for kinks or bends in the hose that could restrict water flow․ Consider using a new hose to avoid potential issues with older, worn-out connections;

Slowly turn on the water supply and inspect the connections for any leaks․ Tighten connections further if needed․ Proper water connection is crucial for optimal washing performance and preventing water damage․

Electrical Requirements and Grounding

This GE combo unit requires a dedicated 120V, 60Hz electrical circuit with a 15-amp breaker․ Do not use extension cords or adapters; plug directly into a grounded outlet․ Improper electrical connection can pose a safety hazard and void the warranty․

Grounding is essential for safety․ The unit must be properly grounded to prevent electric shock․ The power cord includes a grounding wire – do not remove or alter it․ If the outlet is not grounded, consult a qualified electrician to install a grounded outlet․

Verify the voltage matches the unit’s specifications․ Never attempt to modify the plug to fit a different outlet․ Regularly inspect the power cord for damage and replace it if necessary․ A safe electrical setup is paramount for reliable operation;

Leveling the Unit

Proper leveling is crucial for optimal performance and to minimize vibration and noise during operation․ Use a bubble level to check the unit’s stability on the floor․ Adjustable feet are located at each corner of the appliance; rotate them clockwise to raise the unit and counterclockwise to lower it․

Ensure all four feet are firmly in contact with the floor․ If the floor is uneven, use shims under the feet to achieve a level position․ Continuously check with the bubble level as you adjust each foot․ A properly leveled unit will prevent excessive movement during the wash and dry cycles․

Tighten the lock nuts on the adjustable feet after leveling to prevent accidental movement․ Re-check the leveling periodically, especially after moving the unit․ A stable base contributes to the longevity and efficiency of your GE combo․

Operating Your GE Combo: Wash Cycles

Explore diverse wash cycles – Normal, Delicates, Heavy Duty, and Quick Wash – alongside innovative Steam Wash options, designed for optimal cleaning and fabric care․

Normal/Regular Wash Cycle

The Normal/Regular Wash Cycle is your go-to setting for everyday laundry loads․ This cycle is expertly calibrated to effectively clean moderately soiled items, including clothing, towels, and linens․ It utilizes a balanced combination of wash actions and water temperatures to deliver consistently fresh results․

Load Capacity: This cycle performs optimally with medium-sized loads․ Avoid overloading the drum to ensure thorough cleaning and prevent damage to your garments․ Refer to the capacity guidelines in the full manual for specific weight recommendations․

Water Temperature: The default water temperature for the Normal cycle is typically warm, but you can customize this setting based on your fabric care needs․ Colder water is gentler on colors and helps conserve energy, while warmer water is more effective at removing stubborn stains․

Soil Level: Adjust the soil level setting to match the level of dirt and grime in your laundry․ For lightly soiled items, select a lower soil level to conserve water and energy․ For heavily soiled items, choose a higher soil level for a more intensive cleaning action․

Delicates/Hand Wash Cycle

The Delicates/Hand Wash Cycle is specifically designed for your most fragile garments, offering a gentle cleaning experience․ This cycle utilizes a slow wash action and cool water temperatures to protect delicate fabrics like lingerie, silk, lace, and hand-washables․

Gentle Action: The cycle’s tumbling action is significantly reduced compared to the Normal cycle, minimizing friction and preventing stretching or damage to delicate fibers․ This ensures your treasured items remain in pristine condition․

Water Temperature: Cool water is automatically selected for this cycle, as warm or hot water can cause shrinkage or color fading in delicate fabrics․ This preserves the vibrancy and integrity of your clothes․

Load Size: It’s crucial to wash small loads on the Delicates cycle to allow garments ample space to move freely and receive thorough cleaning․ Overloading can compromise the gentle wash action and potentially damage items․

Heavy Duty/Bulky Items Cycle

The Heavy Duty/Bulky Items Cycle is engineered to tackle your toughest laundry challenges – think bedding, towels, jeans, and work clothes․ This cycle employs a powerful wash action and extended wash times to effectively remove deep-seated dirt and grime․

Robust Cleaning: Expect vigorous tumbling and a higher spin speed to extract more water, ensuring thorough cleaning and efficient drying․ This cycle is ideal for items that require a more intense cleaning process․

Water Levels & Temperature: The washer automatically adjusts water levels to accommodate bulky loads, while maintaining optimal water temperatures for effective stain removal․ Hot water is typically used, but adjustments may be possible․

Load Considerations: While designed for large items, avoid overloading the machine․ Ensure items have enough room to move freely for optimal cleaning․ Distribute the load evenly around the drum to maintain balance during the cycle․

Quick Wash Cycle

The Quick Wash Cycle is your go-to solution for lightly soiled items that need a refresh․ Designed for convenience, this cycle delivers a satisfactory clean in a significantly reduced timeframe – typically under 30 minutes․ It’s perfect for everyday clothes, gym wear, or items you need in a hurry․

Speed & Efficiency: This cycle utilizes a faster wash and spin speed, minimizing water usage and cycle duration․ While prioritizing speed, it still maintains effective cleaning performance for lightly soiled loads․

Load Size: The Quick Wash cycle is best suited for smaller loads․ Overloading can compromise cleaning effectiveness․ For larger or heavily soiled items, opt for a more comprehensive wash cycle․

Temperature Settings: Typically, the Quick Wash cycle uses cold water to conserve energy and protect delicate fabrics; However, some models may offer temperature adjustments․

Steam Wash Options & Benefits

Harnessing the Power of Steam: GE Steam Washer Dryer Combos offer innovative steam wash options designed to elevate your laundry experience․ Steam penetrates fabrics more effectively than water alone, resulting in superior cleaning and sanitization․

Sanitize Cycle: Utilizing high-temperature steam, the sanitize cycle eliminates 99․9% of common household bacteria, providing peace of mind for items like bedding, baby clothes, and towels․ This is especially beneficial for allergy sufferers․

Allergen Cycle: Specifically engineered to remove allergens like dust mites and pet dander, the allergen cycle is ideal for sensitive skin and those prone to allergies․

Wrinkle Care: Steam helps relax fibers, reducing wrinkles and minimizing the need for ironing․ This feature is particularly useful for delicate garments and dress shirts․

Operating Your GE Combo: Dryer Cycles

Explore Drying Options: Your GE combo offers diverse dryer cycles – Normal, Delicates, Heavy Duty, and Air Fluff – alongside beneficial Steam Dry features for optimal results․

Normal/Medium Heat Drying

Utilizing the Normal/Medium Heat Drying cycle is ideal for everyday laundry loads, encompassing items like cottons, linens, and durable synthetics․ This setting provides a balanced approach to drying, effectively removing moisture without subjecting fabrics to excessive heat that could cause shrinkage or damage․

The medium heat level ensures efficient drying while preserving the integrity of your clothes․ For optimal results, avoid overloading the drum, as this can hinder proper airflow and extend drying times․ Ensure items are adequately spun during the wash cycle to minimize drying duration․

Consider the fabric care labels on your garments; this cycle is generally safe for most washable items, but always prioritize the manufacturer’s recommendations․ Monitoring the load during the cycle is also advisable, especially for larger or denser items, to prevent over-drying․ This cycle is a cornerstone of efficient and reliable laundry care with your GE combo․

Delicates/Low Heat Drying

The Delicates/Low Heat Drying cycle is specifically engineered for sensitive fabrics requiring gentle care․ This includes items like lingerie, silk, lace, and loosely woven synthetics․ Utilizing a lower temperature minimizes the risk of shrinkage, stretching, or damage to these delicate materials․

This setting prioritizes fabric preservation over rapid drying, extending the cycle time as needed to ensure thorough yet gentle moisture removal․ Avoid combining delicate items with heavier fabrics, as this can compromise the effectiveness of the low heat setting․ Consider using a mesh laundry bag for added protection during both washing and drying․

Always check garment care labels before selecting this cycle․ Regularly cleaning the lint filter is crucial when drying delicates, as lint buildup can increase drying time and potentially damage sensitive fabrics․ This cycle is essential for maintaining the quality and longevity of your most cherished garments․

Heavy Duty/High Heat Drying

The Heavy Duty/High Heat Drying cycle is designed for robust fabrics like towels, jeans, and durable work clothes․ This setting utilizes higher temperatures to efficiently remove moisture from thicker materials, ensuring they are thoroughly dried․ It’s ideal for items that can withstand significant heat without damage or shrinkage․

However, caution is advised! Never use this cycle for delicate fabrics or items with heat-sensitive components like elastic or plastic embellishments․ Overdrying can cause excessive wear and tear, so monitor the cycle and adjust as needed․ Ensure the load is balanced to prevent uneven drying and potential damage to the unit․

Regular lint filter cleaning is paramount with this cycle, as heavier fabrics tend to produce more lint․ Consider removing items promptly after the cycle completes to minimize wrinkling․ This powerful cycle delivers effective drying for your toughest laundry loads, extending the life of your durable items․

Air Fluff/No Heat Drying

The Air Fluff/No Heat Drying cycle provides a gentle method for refreshing items or drying heat-sensitive materials․ Utilizing room temperature air circulation, this setting is perfect for delicate garments, items with embellishments, or those prone to shrinking․ It’s an excellent option for fluffing pillows or refreshing clothes that don’t require heat to remove moisture․

This cycle is not intended for rapid drying; it relies on extended air exposure․ Ensure items are adequately wrung out before selecting this cycle to expedite the process․ Avoid overloading the drum to allow for optimal air circulation․ This setting minimizes the risk of damage and preserves the integrity of delicate fabrics․

Regularly check the lint filter, even with no-heat drying, as some fibers may still be released; Consider using this cycle for items that have been line-dried but need a final fluff to restore softness․ It’s a safe and effective way to care for your most cherished garments․

Steam Dry Options & Benefits

GE Steam Washer Dryer Combos offer innovative steam dry cycles designed to refresh and sanitize your clothes․ Steam Refresh gently reduces wrinkles and odors without washing, ideal for lightly worn items․ Sanitize utilizes higher steam temperatures to eliminate bacteria and allergens, providing a deeper clean for items like bedding and baby clothes․

The benefits of steam drying extend beyond cleanliness; it helps to preserve fabric integrity and reduce the need for frequent washing․ Steam penetrates fibers, relaxing wrinkles and leaving clothes feeling softer․ These cycles are particularly effective for items that are difficult to wash, such as delicate silks or woolens․

Always check garment care labels before using steam cycles․ Ensure the water reservoir is adequately filled for optimal steam generation․ Regularly clean the steam generator, following the maintenance instructions in this manual, to ensure peak performance and longevity․

Maintenance & Troubleshooting

Regular upkeep ensures optimal performance! This section details cleaning procedures for the drum, lint filter, and condenser, alongside solutions for common error codes and drainage issues․

Cleaning the Washer Drum

Maintaining a fresh drum is crucial for laundry hygiene․ Regularly cleaning the washer drum prevents mildew and odor buildup, ensuring consistently clean clothes․ GE recommends performing a drum clean cycle monthly, or more frequently with heavy use․

To initiate the drum clean, ensure the drum is empty․ Add the appropriate amount of GE Washer Cleaner, or a comparable washing machine cleaner, directly into the dispenser․ Select the ‘Washer Clean’ cycle on your GE combo unit and press start․

For a deeper clean, consider wiping down the drum’s interior with a diluted solution of white vinegar and water after the cycle completes․ Pay attention to the rubber gasket around the door, as this area can trap debris and moisture․ Always leave the door slightly ajar after cleaning to allow for proper ventilation and prevent mildew growth․

Cleaning the Dryer Lint Filter

Regular lint filter cleaning is paramount for dryer efficiency and safety․ A clogged lint filter restricts airflow, increasing drying times and posing a potential fire hazard․ GE recommends cleaning the lint filter after every load to maintain optimal performance․

Locate the lint filter, typically found inside the dryer drum near the door opening․ Remove the filter and use your fingers or a soft brush to gently remove accumulated lint․ Avoid using water or chemical cleaners on the filter, as this can damage the material․

Periodically, you may also want to vacuum the lint filter housing to remove any lingering lint particles․ Inspect the filter for any tears or damage and replace it if necessary․ A clean lint filter ensures efficient drying and contributes to the longevity of your GE combo unit․

Cleaning the Condenser (if applicable)

Certain GE steam washer dryer combos utilize a condenser to cool and condense moisture during the drying cycle․ Over time, this condenser can accumulate lint and debris, reducing its efficiency and potentially impacting drying performance․ Regular cleaning is crucial for maintaining optimal operation․

Consult your specific model’s documentation to determine if it features a condenser and its location․ Typically, accessing the condenser involves removing a panel on the front or side of the unit; Carefully remove the condenser and use a vacuum cleaner with a brush attachment to gently remove lint and dust․

Avoid using water or harsh chemicals․ Reinstall the condenser securely, ensuring proper alignment․ A clean condenser promotes efficient moisture removal, resulting in faster drying times and reduced energy consumption for your GE combo․

Troubleshooting Common Error Codes

Your GE steam washer dryer combo utilizes error codes to diagnose potential issues․ These codes appear on the display panel, signaling a problem requiring attention․ Refer to your user manual for a comprehensive list of codes and their corresponding solutions․

Common codes might indicate issues with water supply, drainage, temperature sensors, or the door latch; Often, a simple reset – unplugging the unit for a few minutes – can resolve minor glitches․ However, persistent error codes suggest a more significant problem․

Do not attempt to repair the unit yourself if you are unfamiliar with appliance repair․ Contacting GE’s customer support or a qualified technician is recommended for complex issues․ Document the error code and any accompanying symptoms to assist the service professional in diagnosing the problem efficiently․

Dealing with Drainage Issues

Proper drainage is crucial for your GE steam washer dryer combo’s performance․ If you notice water remaining in the drum after a wash cycle, a drainage issue may be present; First, check the drain hose for kinks or obstructions․ Ensure it isn’t clogged or improperly positioned․

The drain pump filter may also be blocked with lint, debris, or small objects․ Locate and carefully clean this filter – consult your manual for its specific location․ A partially clogged filter restricts water flow, leading to incomplete drainage․

If the issue persists, verify that the drainpipe isn’t clogged․ Consider using a plumbing snake to clear any blockages․ If you suspect a more serious problem with the drain pump itself, contact a qualified technician for assistance․

Advanced Features & Settings

Explore smart capabilities! Utilize Wi-Fi connectivity, delay start, and control lock features for a customized laundry experience with your GE combo unit․

Wi-Fi Connectivity & Smart Features

Unlock a new level of convenience with your GE Steam Washer Dryer Combo’s integrated Wi-Fi connectivity․ This feature allows seamless integration with your home network, enabling remote control and monitoring through the SmartHQ app․

Remote Control: Start, stop, or pause cycles from anywhere, ensuring laundry is ready when you are․ Receive real-time notifications on cycle completion and any potential issues․

Voice Control: Compatible with voice assistants, allowing hands-free operation․ Simply use voice commands to initiate cycles or check the status of your laundry․

Smart Diagnosis: The app provides smart diagnosis capabilities, identifying potential problems and offering troubleshooting guidance, potentially avoiding service calls․

Downloadable Cycles: Expand your washing and drying options with downloadable cycles tailored to specific fabrics and needs, continuously updating your combo’s functionality․

Integration with Smart Home Ecosystems: Connect your GE combo with other SmartHQ-enabled appliances for a truly integrated smart home experience․

Delay Start Function

Maximize laundry convenience with the Delay Start function on your GE Steam Washer Dryer Combo․ This powerful feature allows you to schedule laundry cycles to begin at a later, more convenient time, even when you’re away from home․

Scheduling Options: Set a delay of up to 24 hours, tailoring the start time to fit your daily routine․ This is ideal for taking advantage of off-peak energy rates or ensuring fresh laundry is ready upon your arrival․

How it Works: Simply select your desired wash or dry cycle, then use the Delay Start button to specify the number of hours until the cycle should begin․ The combo will automatically start at the programmed time․

Preserving Freshness: Delay Start is particularly useful for delicate items or when you want to prevent laundry from sitting in the machine for extended periods․

Energy Savings: By scheduling cycles during off-peak hours, you can potentially reduce your energy consumption and lower your utility bills․

Child Lock/Control Lock

Ensure safety and prevent accidental operation with the Child Lock/Control Lock feature on your GE Steam Washer Dryer Combo․ This function disables the control panel buttons, preventing unintended cycle changes or interruptions, especially important in households with children․

Activating the Lock: Typically, activating the Control Lock involves pressing and holding a specific combination of buttons on the control panel – consult your model’s specific instructions for the exact procedure․ A lock icon will illuminate on the display to confirm activation․

Deactivating the Lock: Repeat the button combination to deactivate the lock and restore normal control panel functionality․

Peace of Mind: The Control Lock provides peace of mind, safeguarding against curious little hands altering settings or stopping a cycle mid-operation․

Preventing Disruptions: This feature is also useful to prevent accidental changes during a cycle, ensuring your laundry is completed as intended․

Customizing Wash & Dry Preferences

Tailor your laundry experience with the customizable wash and dry preferences available on your GE Steam Washer Dryer Combo․ These settings allow you to fine-tune cycles to perfectly suit your fabrics and needs, maximizing cleaning performance and garment care․

Adjustable Options: Explore options like water temperature, spin speed, soil level, and rinse cycles for wash programs․ For drying, customize heat levels, dryness settings, and extended tumble options․

Saving Settings: Many models allow you to save frequently used customized cycles as presets for quick and convenient access․ This eliminates the need to repeatedly adjust settings․

Smart Features: If your model features Wi-Fi connectivity, you may be able to customize preferences remotely through the GE Appliances app, offering even greater control and convenience․

Optimal Results: Experiment with different settings to discover the optimal combinations for your specific laundry loads, ensuring consistently excellent results․

ferdinand the bull pdf

Ferdinand the Bull PDF: A Comprehensive Guide (Updated 12/10/2025)

Discover convenient access to the Ferdinand the Bull PDF, offering a timeless tale for young readers and educators alike, readily available online!

Ferdinand the Bull, a beloved children’s story penned by Munro Leaf and beautifully illustrated by Robert Lawson, presents a gentle giant with unconventional preferences. This classic tale, frequently sought in PDF format for easy access, centers around a bull who prefers smelling flowers to engaging in bullfights.

The story’s enduring appeal lies in its powerful message of individuality and peaceful resistance. Finding a readily available Ferdinand the Bull PDF allows readers to share this heartwarming narrative with new generations, fostering empathy and challenging societal expectations. Its simplicity belies a profound exploration of character and choice.

The Story’s Core Themes

Ferdinand the Bull, easily accessible as a PDF, profoundly explores themes of non-conformity and the courage to be oneself. The narrative champions individuality, contrasting Ferdinand’s peaceful nature with the aggressive expectations placed upon him.

A central theme is the rejection of violence; Ferdinand’s refusal to participate in the bullfight presents a powerful anti-war message. The PDF version allows for widespread dissemination of this message, promoting empathy and understanding. Ultimately, the story celebrates choosing peace and pursuing personal happiness over societal pressures.

Availability of the Ferdinand the Bull PDF

Ferdinand the Bull PDF versions are widely available online, catering to diverse needs. Numerous websites offer digital copies, ranging from free downloads to paid, high-quality editions.

Accessibility is excellent, with the PDF format ensuring compatibility across various devices – computers, tablets, and smartphones. Educational institutions frequently utilize the PDF for classroom purposes. However, users should be mindful of copyright considerations when sourcing the PDF, opting for legitimate sources whenever possible.

Where to Find Free PDF Downloads

Finding a free Ferdinand the Bull PDF requires careful navigation. Several online repositories and digital libraries offer the book for free download. Websites specializing in classic children’s literature often host the PDF.

However, exercise caution; some sites may contain malware or offer low-quality scans. Internet Archive and similar platforms are generally reliable sources. Always verify the file’s safety before opening it, and be aware of potential copyright restrictions associated with free downloads.

Legality and Copyright Considerations

Downloading a Ferdinand the Bull PDF necessitates understanding copyright law. While the original work may be in the public domain, specific PDF versions—particularly those with new illustrations or introductions—might still be protected.

Ensure the source offering the free download has the legal right to distribute the material. Utilizing PDFs from reputable sources minimizes the risk of copyright infringement. Respecting intellectual property rights supports authors and publishers, fostering continued literary creation.

Paid Options for High-Quality PDFs

For pristine, high-resolution Ferdinand the Bull PDFs, consider purchasing from established online bookstores. These options often guarantee superior formatting, accurate scans, and enhanced readability compared to free downloads.

Paid PDFs may include bonus content like author notes or supplementary materials. Supporting these platforms ensures continued availability of quality digital literature and compensates the copyright holders appropriately, offering a legally sound and visually pleasing reading experience.

Understanding the Book’s History

Published in 1936, Ferdinand the Bull, penned by Munro Leaf and illustrated by Robert Lawson, quickly became a beloved classic. The story emerged during a period of growing global unrest, subtly advocating for peace and individuality.

Its enduring popularity has led to numerous reprints and digital adaptations, including various PDF versions. Understanding the book’s historical context enriches appreciation for its timeless message, resonating with readers across generations and solidifying its place in children’s literature.

Walter Dean Myers and the Adaptation

Notably, Walter Dean Myers penned a 1996 adaptation of Ferdinand the Bull, aiming to reintroduce the story to a new generation. This version, often found as a PDF, maintains the core themes of non-violence and embracing individuality.

Myers’ adaptation often features updated language and a slightly different narrative flow, while still honoring Leaf’s original intent. Finding PDF copies allows easy access to compare both versions and appreciate their unique contributions to this cherished tale.

Munro Leaf’s Original Conception

Munro Leaf’s 1936 classic, Ferdinand the Bull, originated from a simple observation – a friend’s frustration with aggressive tendencies. Leaf envisioned a bull preferring flowers to fighting, a radical concept at the time.

PDF versions of the original story allow readers to experience Leaf’s initial vision, complete with Robert Lawson’s iconic illustrations. The story’s enduring appeal lies in its gentle message, readily accessible through digital copies, promoting peace and celebrating unique personalities.

Character Analysis: Ferdinand

Ferdinand, the gentle giant, stands as a powerful symbol of non-conformity. He rejects the aggressive expectations placed upon him, choosing peaceful contemplation over violent spectacle. PDF versions of the book vividly portray his quiet dignity and unwavering preference for flowers.

Analyzing Ferdinand through digital access reveals a character advocating for individuality. His story, easily shared via PDF, encourages readers to embrace their true selves, even when differing from societal norms, making him a timeless literary icon.

The Significance of the Other Bulls

PDF access to Ferdinand the Bull highlights the stark contrast between Ferdinand and his peers. The other bulls embody societal expectations – aggression and a thirst for battle. They represent the pressure to conform, blindly accepting their predetermined roles.

Their eagerness for the bullfight underscores Ferdinand’s unique character. Examining them through readily available PDF copies reveals they serve as a foil, amplifying Ferdinand’s peaceful nature and challenging conventional notions of masculinity and purpose.

The Role of the Boy and the Bullfighter

Ferdinand the Bull PDF versions showcase the boy’s initial connection, representing innocent affection and a rejection of the bullfighting tradition. He sees Ferdinand not as a fighter, but as a gentle companion. Conversely, the bullfighter embodies societal expectations and the spectacle of violence.

Through PDF analysis, we see the bullfighter’s disappointment mirrors society’s inability to accept Ferdinand’s individuality. Both characters, readily available in digital format, highlight the conflict between peaceful existence and imposed aggression.

Illustrations and Artistic Style

Ferdinand the Bull PDF editions beautifully preserve Robert Lawson’s distinctive artistic style, characterized by detailed black-and-white drawings. These illustrations aren’t merely decorative; they amplify the story’s emotional impact, showcasing Ferdinand’s peaceful nature and the stark contrast with the bullfighting arena.

PDF viewers allow close examination of Lawson’s linework, enhancing appreciation for his skill. The artistic choices within the Ferdinand the Bull PDF contribute significantly to the book’s enduring appeal and message.

Robert Lawson’s Contribution

Robert Lawson’s illustrations are integral to the Ferdinand the Bull PDF’s success, elevating Munro Leaf’s story with expressive and detailed artwork. His style, employing black-and-white drawings, perfectly captures Ferdinand’s gentle spirit and the dramatic setting of the bullfight.

The Ferdinand the Bull PDF allows readers to fully appreciate Lawson’s artistic talent. His contribution wasn’t simply illustrative; it fundamentally shaped the book’s emotional resonance and lasting legacy, making the PDF a treasured resource.

Impact of the Illustrations on the Story

Robert Lawson’s illustrations within the Ferdinand the Bull PDF profoundly amplify the story’s core message. The stark black-and-white imagery contrasts Ferdinand’s peaceful nature with the aggressive world of bullfighting, enhancing the narrative’s anti-violence theme.

The PDF format allows for close examination of these details. Lawson’s depictions of Ferdinand’s gentle expressions and the imposing figures of the matadors create a powerful visual dialogue, making the Ferdinand the Bull PDF a compelling and emotionally resonant experience.

Educational Applications of Ferdinand the Bull

The Ferdinand the Bull PDF serves as a valuable tool in classrooms for fostering discussions on individuality and non-violence. Educators can utilize the PDF to explore themes of acceptance, challenging societal expectations, and peaceful resolutions.

The accessible PDF format facilitates easy sharing and annotation for group activities. Analyzing the story’s characters and symbolism encourages critical thinking, while the simple narrative makes it suitable for various age groups, promoting empathy and understanding through literature.

Using the Book in Classrooms

Integrating the Ferdinand the Bull PDF into lesson plans offers diverse educational opportunities. Teachers can employ read-aloud sessions, followed by discussions on Ferdinand’s choices and the reactions of others. The PDF’s visual elements, through illustrations, enhance comprehension and engagement.

Creative writing prompts, asking students to rewrite the story from different perspectives, are effective. Furthermore, art projects inspired by Robert Lawson’s style can be undertaken. The readily available PDF simplifies classroom implementation and resource sharing.

Themes for Discussion: Non-Violence and Individuality

The Ferdinand the Bull PDF sparks crucial conversations about non-violence and embracing individuality. Ferdinand’s preference for flowers over fighting challenges societal expectations and promotes peaceful resolutions. Discussions can center on the consequences of forcing conformity and the importance of respecting diverse interests.

Analyzing the reactions to Ferdinand’s behavior encourages critical thinking about prejudice and acceptance. The PDF serves as a springboard for exploring empathy and understanding different perspectives, fostering a compassionate classroom environment.

Ferdinand the Bull and its Cultural Impact

The Ferdinand the Bull PDF represents a significant cultural touchstone, inspiring numerous adaptations, including a beloved animated film. Its anti-bullfighting message resonated globally, prompting discussions about animal welfare and challenging traditional spectacles.

The story’s enduring appeal lies in its universal themes of peace and self-acceptance. Accessing the PDF allows exploration of its historical context – Spanish culture and bullfighting – and its lasting influence on children’s literature and beyond, fostering critical engagement.

Adaptations: Film and Animation

The story of Ferdinand the Bull has blossomed beyond its original PDF form, notably through a vibrant animated film adaptation. This brought the gentle giant to a new generation, expanding the story’s reach and impact.

These adaptations often retain the core message of non-violence and individuality, while updating the visual presentation. Accessing the original PDF provides a valuable comparison point, highlighting how the narrative has evolved across different mediums and continues to inspire creative interpretations.

The Book’s Enduring Message

Despite being initially released decades ago, the Ferdinand the Bull PDF continues to resonate with readers of all ages. Its central theme – choosing peace over conflict – remains powerfully relevant. The story champions individuality and encourages empathy, urging us to question societal expectations.

Downloading the PDF allows easy access to this timeless message, fostering discussions about kindness and acceptance. It’s a simple yet profound tale, proving that strength isn’t always about physical power.

Comparing Different PDF Versions

When seeking a Ferdinand the Bull PDF, variations in quality exist. Some versions prioritize image resolution, crucial for appreciating Robert Lawson’s illustrations. Others focus on text clarity and formatting, enhancing readability for young learners.

Accessibility features, like tagged PDFs for screen readers, differ between sources. PDF size can also vary, impacting download speed. Comparing previews reveals print quality and potential formatting issues before committing to a download.

Print Quality and Formatting

Ferdinand the Bull PDF print quality hinges on the source’s resolution. High-resolution PDFs retain Robert Lawson’s delicate illustrations, vital for the story’s charm. Formatting impacts readability; well-formatted versions maintain page layout and font consistency.

Poorly formatted PDFs may exhibit distorted images or text. Consider margins and spacing for comfortable reading. Previewing before printing ensures satisfactory results, especially for classroom use or personal enjoyment of this classic tale.

Accessibility Features in PDFs

Ferdinand the Bull PDF accessibility is crucial for inclusive reading. Features like tagged PDFs enable screen readers to interpret text order correctly, benefiting visually impaired readers. Alt-text for images describes Lawson’s illustrations, enhancing understanding.

Adjustable font sizes and color contrast options improve readability for diverse needs. Reflowable text adapts to different screen sizes. Checking for accessibility compliance ensures everyone can enjoy this beloved story, promoting equal access to literature.

Troubleshooting PDF Download Issues

Downloading the Ferdinand the Bull PDF can sometimes present challenges. Common errors include corrupted files or slow connection speeds. Clear your browser cache and cookies, then retry the download. Ensure your PDF reader (like Adobe Acrobat Reader) is updated.

If issues persist, try a different browser or download source. Check file permissions and antivirus software interference. A stable internet connection is vital. Consider a direct download link if available, bypassing potential redirects.

Common Errors and Solutions

Encountering problems with your Ferdinand the Bull PDF? Frequent errors include “file not found,” corrupted downloads, or compatibility issues. Solutions involve verifying the download link’s validity and ensuring sufficient storage space. Try a different browser or PDF viewer like Adobe Acrobat Reader.

If the file appears damaged, re-download it. Disable browser extensions that might interfere. For compatibility, update your PDF reader to the latest version. A stable internet connection is also crucial for successful downloads.

Ensuring PDF Security

Downloading a Ferdinand the Bull PDF requires caution. Prioritize reputable sources to avoid malware or viruses embedded within the file. Scan the downloaded PDF with updated antivirus software before opening it. Be wary of links promising “free” copies from unknown websites.

Look for secure website connections (HTTPS). Avoid clicking suspicious pop-up ads during the download process. Regularly update your operating system and PDF reader for enhanced security features, protecting your device from potential threats.

Related Books and Authors

Readers enjoying Ferdinand the Bull might appreciate other works promoting peace and individuality. Explore titles by authors like Leo Lionni, known for Swimmy and Frederick, celebrating unique qualities. Consider books emphasizing non-violence, such as those by Jacqueline Woodson.

Munro Leaf’s other stories offer similar gentle narratives. Discover Walter Dean Myers’ contributions to children’s literature, though he adapted Ferdinand, his original works are also noteworthy. These authors champion empathy and understanding through compelling storytelling.

Exploring Similar Themes in Children’s Literature

Ferdinand’s message resonates with numerous children’s books exploring non-conformity and peaceful resolutions. Titles like The Giving Tree by Shel Silverstein delve into selfless love, while Corduroy by Don Freeman celebrates individuality. Elmer the patchwork elephant, by David McKee, champions self-acceptance.

These stories, like Ferdinand, encourage young readers to question societal expectations and embrace their unique selves. They promote empathy, kindness, and the courage to be different, fostering a more compassionate worldview.

Further Reading for Young Readers

Beyond Ferdinand, explore books reinforcing themes of peace and individuality! The Peace Book by Todd Parr celebrates diversity and harmony. Enemy Pie by Derek Munson demonstrates overcoming prejudice through friendship. Each Kindness by Jacqueline Woodson highlights the impact of small acts.

For budding animal lovers, consider Click, Clack, Moo: Cows That Type by Doreen Cronin, showcasing peaceful protest. These selections complement Ferdinand’s message, nurturing empathy and critical thinking in young minds.

The Book’s Setting: Spain and Bullfighting

Ferdinand’s story unfolds in Spain, a nation deeply intertwined with the tradition of bullfighting. While the book doesn’t glorify the practice, it acknowledges its cultural presence. Bullfighting, historically significant, involves skilled matadors and powerful bulls in a ritualized contest.

Understanding this context enriches the narrative, highlighting Ferdinand’s peaceful defiance. The setting isn’t merely geographical; it’s a backdrop for exploring themes of non-violence and challenging societal expectations within a specific cultural landscape.

Historical Context of Bullfighting

Bullfighting’s roots trace back to ancient Iberian bull rituals, evolving over centuries into the spectacle known today. Initially a display of equestrian skill, it transitioned to footwork by the 18th century, becoming a formalized art form.

Historically, it held symbolic weight, representing courage and dominance. However, it’s also faced criticism for animal welfare concerns; Ferdinand the Bull, published in 1936, subtly questions this tradition, presenting a gentle alternative to the aggressive expectations of the arena.

Representations of Spanish Culture

Ferdinand the Bull, while a children’s story, subtly incorporates elements of Spanish culture, primarily through the backdrop of bullfighting; The narrative acknowledges bullfighting’s presence as a recognized tradition within Spain, even while questioning its inherent values.

The story doesn’t offer a comprehensive cultural portrayal, but uses the setting to frame Ferdinand’s unique character. It presents a simplified view, focusing on the spectacle rather than the broader cultural nuances, prompting reflection on societal expectations.

Ferdinand the Bull: A Symbol of Peace

Ferdinand the Bull transcends a simple children’s story, becoming a potent symbol of peace and non-violent resistance. His preference for flowers over fighting directly challenges the aggressive expectations placed upon him. The PDF version readily available allows widespread access to this message.

Ferdinand’s gentle nature embodies a rejection of conflict, advocating for peaceful coexistence. He represents the courage to be different and the power of individual choice, resonating with readers of all ages seeking a world free from violence.

The Anti-War Message

Ferdinand the Bull’s narrative subtly critiques the glorification of violence inherent in traditions like bullfighting, presenting a powerful anti-war message accessible through the readily available PDF. The story questions the purpose of conflict and the societal pressures that perpetuate it.

By showcasing Ferdinand’s peaceful disposition, the book implicitly condemns the needless suffering inflicted in the name of spectacle. Downloading the PDF allows for easy sharing of this timeless message, promoting critical thinking about war and aggression.

Promoting Empathy and Understanding

Ferdinand the Bull’s PDF version facilitates discussions about embracing individuality and challenging societal norms, fostering empathy among readers. The story encourages understanding for those who deviate from expectations, promoting acceptance of different perspectives.

Accessing the PDF allows educators and parents to easily share this valuable lesson with children, cultivating compassion and tolerance. Ferdinand’s gentle nature inspires viewers to consider the feelings of others, building a foundation for peaceful interactions.

PDF Readers and Compatibility

Ferdinand the Bull PDF files are generally compatible with most modern PDF readers. Adobe Acrobat Reader remains the industry standard, offering reliable viewing and functionality, available as a free download.

However, alternative options like Foxit Reader, Sumatra PDF, and even most web browsers (Chrome, Firefox, Edge) can seamlessly open and display the PDF. Compatibility shouldn’t be an issue, ensuring broad accessibility to this beloved children’s story across various devices and operating systems.

Adobe Acrobat Reader

Adobe Acrobat Reader is the premier choice for viewing Ferdinand the Bull PDFs, offering optimal rendering and feature support. As a free software, it ensures accessibility for all users. It reliably displays text, images, and formatting, preserving the book’s intended presentation.

Beyond basic viewing, Acrobat Reader enables printing, searching, and digital signatures. Its widespread adoption guarantees compatibility and a consistent experience when enjoying this classic tale on any computer or device.

Alternative PDF Viewing Options

Beyond Adobe Acrobat Reader, several alternatives exist for accessing the Ferdinand the Bull PDF. Web browsers like Chrome, Firefox, and Edge natively support PDF viewing, offering a convenient, no-installation option.

Foxit Reader provides a lightweight, feature-rich experience. SumatraPDF is another excellent choice, known for its speed and minimal resource usage. These alternatives ensure broad compatibility, allowing readers to enjoy the story regardless of their preferred software.

soundarya lahari sanskrit pdf

Soundarya Lahari: A Comprehensive Guide

Soundarya Lahari, a revered text by Adi Shankaracharya, is readily available in PDF format, offering Sanskrit lyrics, transliterations, translations, and insightful commentaries for dedicated study.

Numerous online repositories and official sources provide access to these valuable resources, catering to diverse learning preferences and scholarly pursuits.

Explore options like the Internet Archive and dedicated websites for comprehensive PDF versions, enhancing your understanding of this profound spiritual work.

Soundarya Lahari, meaning “Waves of Beauty,” is a seminal work in the Shakta tradition, penned by the revered philosopher and theologian, Adi Shankaracharya. This hymn, composed in Sanskrit, is a devotional poem dedicated to the Divine Mother, specifically Goddess Lakshmi and Saraswati, embodying the essence of Shakti – the dynamic feminine energy inherent in the universe.

The text is structured as a series of 100 verses, divided into two sections: Ananda Lahari (Waves of Bliss) and Soundarya Lahari proper. Access to the original Sanskrit text, alongside transliterations and translations, is crucial for a deeper understanding. Fortunately, numerous resources offer PDF versions of Soundarya Lahari, facilitating study and recitation.

These PDFs often include commentaries from various scholars, providing interpretations of the verses and their underlying philosophical significance. The availability of these digital resources makes this ancient text accessible to a wider audience, fostering a renewed appreciation for its poetic beauty and spiritual depth.

Historical Context and Authorship

Attributed to Adi Shankaracharya, a prominent figure in Advaita Vedanta philosophy (8th century CE), the precise dating of Soundarya Lahari remains a subject of scholarly debate. However, its composition is generally placed within this timeframe, reflecting the flourishing of Tantric traditions and the reverence for the Divine Feminine in India.

Shankaracharya’s authorship is widely accepted, though some interpretations suggest potential contributions or revisions by later scholars. The text’s existence in various manuscripts and its transmission through oral tradition highlight its enduring significance. Fortunately, digitized versions, often available as PDFs, preserve these ancient texts.

These PDF versions, frequently sourced from institutions like the Internet Archive, offer access to the original Sanskrit alongside transliterations and translations. Studying these resources allows researchers to trace the text’s evolution and understand its historical context, deepening appreciation for its philosophical and devotional richness.

Shankaracharya and the Tradition

Adi Shankaracharya, a pivotal figure in Hindu philosophy, consolidated the Advaita Vedanta school and revitalized Vedic traditions. His profound understanding of Shakti – the divine feminine energy – is beautifully expressed in Soundarya Lahari. The text isn’t merely philosophical; it’s a devotional hymn, a stava, invoking the Goddess in exquisite poetic form.

Shankaracharya’s lineage and his establishment of the four major mathas (monasteries) ensured the preservation and propagation of texts like Soundarya Lahari. Today, access to these teachings is greatly facilitated by the availability of PDF versions of the Sanskrit text, often accompanied by commentaries.

These PDF resources, downloadable from various online sources, allow practitioners and scholars to connect directly with Shankaracharya’s vision. They represent a vital link to a rich spiritual tradition, enabling deeper exploration of the Goddess and the path to liberation.

The Structure of Soundarya Lahari

Soundarya Lahari comprises 100 verses, traditionally divided into two sections: the Ananda Lahari (Waves of Bliss) and the Soundarya Lahari proper (Waves of Beauty). The initial 33 verses form the Ananda Lahari, focusing on the bliss experienced through the Goddess’s grace, while the remaining 67 verses detail her captivating beauty and power.

Many PDF versions of the Sanskrit text maintain this structural division, often including transliterations and translations alongside the original verses. This allows for a comprehensive study, appreciating both the poetic artistry and the philosophical depth.

Accessing a well-structured PDF is crucial for understanding the flow of thought and the progression of devotion within the text. Scholarly editions often include detailed notes on the meter and poetic devices employed by Shankaracharya, enriching the reading experience.

Ananda Lahari and Soundarya Lahari – Distinction

While often presented together, the Ananda Lahari and Soundarya Lahari possess distinct focuses. The Ananda Lahari, the first 33 verses, emphasizes the devotee’s ecstatic experience of divine bliss, a spontaneous outpouring of joy arising from communion with the Goddess.

Conversely, the Soundarya Lahari (verses 34-100) meticulously describes the Goddess’s physical and spiritual beauty, employing rich imagery and symbolism. PDF versions frequently highlight this division, sometimes offering separate commentaries for each section.

Understanding this distinction is vital for proper interpretation. Many PDF resources provide comparative analyses, clarifying how the bliss experienced in Ananda Lahari prepares the devotee for appreciating the profound beauty detailed in Soundarya Lahari. Accessing a PDF with such annotations enhances comprehension.

Sanskrit Text and Availability

The original Soundarya Lahari is composed in Sanskrit, demanding access to the Devanagari script or transliteration for study. Fortunately, numerous PDF versions offer the Sanskrit text alongside transliterations (IAST or similar) facilitating recitation and understanding for those unfamiliar with the script.

Several online sources, including the Internet Archive and dedicated websites, provide downloadable PDFs containing the complete Sanskrit text. These often include variations in typesetting and formatting.

When seeking a PDF, consider the clarity of the Sanskrit font and the accuracy of the transliteration. Resources like Anshuman Pandey’s transliteration are highly regarded. Availability in PDF format ensures widespread access to this sacred text.

Accessing Soundarya Lahari in PDF Format

Soundarya Lahari in PDF format is easily accessible through official sources and online repositories, offering Sanskrit text, transliterations, and translations for study.

Official Sources for PDF Downloads

Finding authentic Soundarya Lahari PDF versions begins with exploring dedicated websites associated with traditional Hindu organizations and temples. The Hindu Temple of Greater [location omitted for brevity] often provides downloadable resources, including the Sanskrit text alongside English translations.

While a single, universally “official” source is elusive, several sites curate collections of scriptures, striving for accuracy. Look for websites maintained by respected scholars or lineages connected to Advaita Vedanta. Be cautious of sites with unclear origins or excessive advertising.

Direct links to PDF files can sometimes be found through scholarly articles or research papers referencing the Soundarya Lahari. These often include excerpts or complete texts for academic purposes. Remember to verify the source’s credibility before downloading any file. Websites like archive.org also host digitized versions, but careful vetting is crucial.

Always prioritize sources that clearly state the transliteration scheme used (e.g., IAST) and the edition of the text, ensuring consistency and accuracy in your study.

Reliable Online Repositories

Several online repositories offer Soundarya Lahari in PDF format, though discernment is key. The Internet Archive stands out, hosting digitized copies of texts like “Saundarya Lahari Sanskrit Commentary with Prayogas,” available for download or borrowing. However, verify the edition and transliteration used.

Websites specializing in Sanskrit literature often compile collections of scriptures. Look for repositories maintained by academic institutions or organizations dedicated to preserving Indian heritage. These tend to prioritize accuracy and completeness.

PDF versions of the Sanskrit lyrics, alongside English translations by P.R. Ramachander, are frequently found on various spiritual websites. Always cross-reference with other sources to confirm the translation’s fidelity.

Remember to check user reviews or comments associated with the PDF to gauge its quality and reliability. Prioritize repositories that offer multiple versions or editions, allowing for comparative study.

PDF Versions: Transliteration vs. Script

When downloading Soundarya Lahari in PDF format, a crucial distinction lies between versions presenting the original Sanskrit script and those utilizing transliteration. Sanskrit script PDFs display the verses in Devanagari, requiring familiarity with the alphabet for direct reading.

Transliterated PDFs, conversely, represent Sanskrit sounds using Roman characters, making the text accessible to those unfamiliar with Devanagari. However, transliteration schemes vary; IAST is generally preferred for its accuracy.

Some PDFs offer both script and transliteration side-by-side, catering to diverse learners. Consider your proficiency level when choosing. Beginners might benefit from transliteration, while those studying Sanskrit will prefer the original script.

Ensure the PDF clearly indicates the transliteration scheme used. Inaccurate transliteration can hinder proper pronunciation and understanding. Prioritize versions from reputable sources known for scholarly rigor.

Considerations When Choosing a PDF

Selecting the right Soundarya Lahari PDF requires careful consideration. Prioritize versions from established sources like reputable temples, scholarly institutions, or well-known translators like P.R. Ramachander. Beware of unverified uploads, as they may contain errors.

Check for completeness – a full PDF should include all 100 verses of the Soundarya Lahari, along with any accompanying commentaries. Examine the quality of the scan or digital rendering; clear text is essential for comfortable reading.

Assess the inclusion of helpful features like verse numbers, chapter divisions, and a table of contents. Consider whether you prefer a searchable PDF for easy navigation.

Finally, verify the date of the latest update to ensure you have a relatively current version, incorporating any corrections or improvements. A PDF with proofreading credits is a positive sign.

Understanding the Content of Soundarya Lahari

Soundarya Lahari, accessible via PDF, beautifully invokes the divine feminine, exploring Shakti through 100 verses of profound Sanskrit poetry and spiritual insight.

The Deities Invoked

Soundarya Lahari, often accessed through convenient PDF versions containing the original Sanskrit text, primarily invokes the supreme goddess Lalita Tripurasundari, a powerful manifestation of Shakti. The verses are structured as a hymn of praise and supplication directed towards her, detailing her cosmic form and divine attributes.

However, the text doesn’t limit itself to a single deity. Throughout the 100 verses, numerous other deities are invoked and honored as aspects of the divine feminine, including Parvati, Durga, and various forms of Devi representing different energies and powers; These invocations are intricately woven into the descriptions of Lalita, highlighting the interconnectedness of all divine forces.

The PDF documents often include detailed explanations of these deities and their significance within the Tantric tradition, providing context for understanding the complex symbolism and imagery employed in the verses. Studying the Sanskrit text alongside these commentaries, readily available in PDF format, deepens appreciation for the rich pantheon honored within Soundarya Lahari.

Key Concepts: Shakti and Divine Feminine

Soundarya Lahari, frequently studied via accessible PDF resources containing the Sanskrit verses, centers around the concept of Shakti – the dynamic, creative power inherent in the universe, personified as the Divine Feminine. The text elevates the goddess as the ultimate reality, the source of all existence and consciousness.

The PDF versions often emphasize that Shakti isn’t merely a female counterpart to a male god, but rather the fundamental energy that animates everything. This energy manifests in countless forms, each representing a different aspect of the divine. The verses meticulously describe these forms, celebrating the power and beauty of the feminine principle.

Understanding Shakti is crucial for interpreting Soundarya Lahari. Many PDF commentaries delve into the Tantric philosophy underpinning the text, explaining how devotion to the Divine Feminine can lead to liberation and self-realization. These resources illuminate the profound significance of honoring Shakti.

The Significance of the 100 Verses

Soundarya Lahari comprises 100 verses, meticulously crafted by Adi Shankaracharya, and widely available in PDF format for detailed study. These verses aren’t simply poetic expressions; they are considered a potent spiritual practice, a ‘stotra’ designed to awaken divine energy.

The first 50 verses, known as the ‘Ananda Lahari’ (waves of bliss), focus on describing the beauty and glory of the goddess. PDF versions often highlight the intricate imagery and symbolism used to evoke her presence. The subsequent 50 verses, the ‘Soundarya Lahari’ proper, detail the goddess’s energetic structure and the associated mantras.

Studying these verses, often through PDF resources with transliteration and translation, is believed to purify the mind and body, paving the way for spiritual growth. Each verse is a carefully constructed invocation, designed to resonate with specific energies within the practitioner.

Commentaries and Interpretations

Understanding Soundarya Lahari deeply necessitates exploring its numerous commentaries, often found accompanying PDF versions of the Sanskrit text. These interpretations, penned by various scholars over centuries, illuminate the verses’ subtle meanings and practical applications.

Many PDF resources include commentaries that delve into the Tantric context of the stotra, explaining the symbolism of the deities and mantras invoked. Some commentaries focus on the philosophical underpinnings, connecting the verses to Advaita Vedanta and other schools of thought.

Resources like those available on the Internet Archive offer access to commentaries alongside the Sanskrit text, facilitating comparative study. Examining multiple interpretations within a single PDF allows for a nuanced understanding of this complex and powerful text, enriching the spiritual journey.

Prayogas and Practical Applications

Beyond textual understanding, Soundarya Lahari is renowned for its prayogas – practical applications and rituals. Certain PDF resources, particularly those focusing on Tantric traditions, detail these applications, often alongside the Sanskrit text and commentaries.

These prayogas range from mantra recitation and visualization techniques to elaborate yantric practices and deity invocation ceremonies. Accessing these details within a PDF format allows for structured learning and safe practice, guided by traditional instructions.

However, it’s crucial to approach these practices with proper guidance from a qualified teacher. Some PDFs, like those from SUVRATSUT on the Internet Archive, specifically include commentary with prayogas, offering a more complete resource for dedicated practitioners.

Resources for Studying Soundarya Lahari

Soundarya Lahari study benefits from Sanskrit dictionaries, English translations, and online forums; readily available PDF versions enhance access to the Sanskrit text.

Scholarly articles and research further illuminate this sacred text, deepening understanding for devoted students.

Sanskrit Dictionaries and Tools

Successfully navigating the Soundarya Lahari’s Sanskrit verses requires robust linguistic tools. Monier-Williams’ Sanskrit-English Dictionary remains a cornerstone, offering comprehensive definitions and grammatical insights crucial for deciphering complex terminology.

Spoken Sanskrit resources, while not directly translation aids, can improve pronunciation and understanding of the phonetic nuances within the verses, especially when utilizing PDF versions with Sanskrit script.

Digital Sanskrit tools, like those offering sandhi splitting and morphological analysis, prove invaluable for breaking down compound words common in the text. Websites providing Devanagari fonts and input methods are essential for working with the original Sanskrit PDFs.

Furthermore, online Sanskrit grammar resources and tutorials can bolster comprehension, enabling a deeper engagement with the text’s poetic and philosophical layers.

English Translations and Explanations

Accessing the profound wisdom of the Soundarya Lahari often necessitates reliable English translations alongside the Sanskrit PDF. P.R. Ramachander’s translation is widely respected, offering a clear and accessible rendering of the verses, readily available online.

However, multiple translations exist, each with unique interpretations; comparing them enriches understanding. Look for translations that include detailed explanations of the symbolism and philosophical underpinnings of each verse.

Commentaries by scholars provide further context, illuminating the subtle nuances and deeper meanings embedded within the text. These resources are often found accompanying PDF versions or as separate publications.

Exploring various interpretations fosters a more comprehensive grasp of the Soundarya Lahari’s multifaceted layers, enhancing the study experience.

Online Forums and Communities

Engaging with online forums and communities dedicated to the Soundarya Lahari significantly enhances the learning process, especially when studying from a PDF version of the Sanskrit text. These platforms offer spaces for discussion, clarification, and shared insights.

Participants often share their interpretations, translations, and experiences with the verses, fostering a collaborative learning environment. Seeking guidance on challenging verses or specific concepts becomes easier within these communities.

Many forums provide access to supplementary materials, including commentaries, audio recitations, and links to relevant resources. This collective knowledge base proves invaluable for deeper understanding.

Active participation encourages critical thinking and a more nuanced appreciation of the Soundarya Lahari’s profound teachings.

Scholarly Articles and Research

Delving into scholarly articles and research papers provides a deeper, academically-grounded understanding of the Soundarya Lahari, complementing the study of the Sanskrit text in PDF format. These resources offer critical analyses of the verses, historical context, and philosophical interpretations.

Researchers often explore the text’s connections to broader Tantric traditions and the philosophy of Shakti, enriching one’s comprehension beyond basic translations.

Accessing these articles, often available through academic databases, reveals diverse perspectives and nuanced interpretations of the Soundarya Lahari’s symbolism and significance.

Such research illuminates the text’s enduring relevance and its impact on spiritual and cultural landscapes, fostering a more informed and critical engagement with its teachings.

harley torque specs pdf

Harley-Davidson Torque Specifications: A Comprehensive Guide

Harley-Davidson torque specifications are crucial for maintaining optimal engine performance and reliability; readily available PDF documents, like service manuals and online databases, provide detailed values․

Accessing these PDF resources ensures correct fastener tightening, preventing damage and ensuring a safe, enjoyable riding experience for all Harley enthusiasts․

Harley-Davidson torque specifications represent the precise amount of force applied to fasteners – bolts, nuts, and screws – during assembly and maintenance․ These aren’t arbitrary numbers; they are meticulously calculated by Harley-Davidson engineers to ensure proper clamping force, preventing loosening, component failure, and ultimately, engine damage․ Understanding and adhering to these specifications is paramount for any Harley owner undertaking repairs or modifications․

Finding the correct torque specs often involves consulting the official Harley-Davidson service manual, frequently available in PDF format․ These manuals provide model-specific charts detailing the torque values for every fastener on the motorcycle․ Numerous online databases also compile this information, offering a convenient alternative, though verifying the source’s accuracy is crucial․ Ignoring these specs can lead to stripped threads, warped components, and compromised safety․ Proper torque application guarantees longevity and peak performance from your Harley-Davidson machine․

Why Accurate Torque Specs Matter for Harley-Davidson

Harley-Davidson engines, renowned for their power and distinctive rumble, demand precise assembly, making accurate torque specifications absolutely critical․ Under-torquing fasteners can lead to loosening due to vibration, potentially causing leaks, component failure, and even catastrophic engine damage․ Conversely, over-torquing can stretch or break bolts, strip threads, and warp delicate parts like cylinder heads․

Accessing the correct torque values, often found in PDF service manuals or reputable online databases, ensures optimal clamping force․ This force creates a secure connection between components, preventing movement and maintaining proper sealing․ Utilizing these PDF resources minimizes risks and maximizes engine longevity․ Ignoring specified torque values compromises the structural integrity of the motorcycle, impacting performance, safety, and the overall riding experience․ Investing in a quality torque wrench and referencing accurate Harley-Davidson specifications is a small price to pay for peace of mind․

Harley-Davidson Model-Specific Torque Charts

Harley-Davidson PDF charts detail unique torque specifications for each model—Sportster, Dyna, Softail, and Touring—ensuring precise assembly and optimal performance․

Torque Specs for Harley-Davidson Sportster Models

Harley-Davidson Sportster models, renowned for their agility and classic styling, require precise torque specifications for optimal performance and longevity․ Accessing detailed PDF service manuals is paramount for owners and mechanics alike․ These manuals contain comprehensive charts outlining the correct torque values for various components, including cylinder head bolts (typically ranging from 35-45 ft-lbs in stages), rocker box covers (around 8-12 ft-lbs), and primary chain adjuster locknuts (often around 20-25 ft-lbs)․

Downloading these PDF documents ensures accurate tightening, preventing potential issues like oil leaks, stripped threads, or even catastrophic engine failure․ Different Sportster years and engine configurations (Evolution, Revolution) may have slightly varying specifications, so referencing the correct PDF for your specific model is crucial․ Online databases also offer convenient access to these values, but always cross-reference with an official Harley-Davidson service manual PDF for verification․

Torque Specs for Harley-Davidson Dyna Models

Harley-Davidson Dyna models, celebrated for their robust construction and versatile performance, demand strict adherence to specified torque values․ Obtaining the correct information from a PDF service manual is essential for any maintenance or repair work․ Key torque specifications for Dyna models include cylinder head bolts (typically staged to 70-85 ft-lbs), primary chain adjuster locknuts (around 30-35 ft-lbs), and axle nuts (ranging from 85-100 ft-lbs depending on the model)․

Accessing these PDF resources ensures proper fastener tension, preventing component failure and maintaining the Dyna’s renowned reliability; Variations exist between Dyna sub-models (Low Rider, Wide Glide, Street Bob), so always consult the PDF specific to your motorcycle’s year and configuration․ While online databases can be helpful, verifying the data against an official Harley-Davidson PDF service manual is highly recommended for accuracy and peace of mind․

Torque Specs for Harley-Davidson Softail Models

Harley-Davidson Softail models, known for their classic styling and comfortable ride, require precise torque application for optimal performance․ A comprehensive PDF service manual is indispensable for any maintenance or repair․ Critical torque values include cylinder head bolts (typically staged, reaching 75-85 ft-lbs), camshaft plate bolts (around 80-90 ft-lbs), and rear axle nuts (ranging from 85-100 ft-lbs)․

Downloading the correct PDF ensures accurate fastener tightening, preventing potential damage and maintaining the Softail’s smooth operation․ Different Softail sub-models (Heritage, Fat Boy, Breakout) have unique specifications, so referencing the PDF specific to your year and model is crucial․ While online resources exist, cross-referencing with an official Harley-Davidson PDF manual guarantees the most reliable and accurate torque information for your motorcycle․

Torque Specs for Harley-Davidson Touring Models

Harley-Davidson Touring models, encompassing Road Glide, Street Glide, and Electra Glide, demand meticulous torque adherence due to their complex systems and heavier loads․ Accessing a detailed PDF service manual is paramount for any maintenance or repair work․ Key torque specifications include cylinder head bolts (typically staged, reaching 70-80 ft-lbs), engine mounting bolts (around 50-60 ft-lbs), and front/rear axle nuts (ranging from 85-100 ft-lbs)․

A readily available PDF provides the precise values needed to prevent component failure and ensure a safe, comfortable ride․ Different Touring sub-models and model years have varying specifications; therefore, consulting the PDF specific to your motorcycle is essential․ While online databases offer some data, relying on an official Harley-Davidson PDF manual guarantees the most accurate and reliable torque information․

Key Harley-Davidson Engine Components & Torque Values

Harley-Davidson engine components require precise torque; PDF service manuals detail critical values for cylinder heads, camshafts, and axles, ensuring optimal performance․

Cylinder Head Bolt Torque Specifications

Precise cylinder head bolt torque is paramount for maintaining proper engine compression and preventing leaks on Harley-Davidson motorcycles․ Accessing the correct specifications, often found within official Harley-Davidson service manual PDFs, is absolutely essential․ These manuals typically outline a multi-stage tightening process, beginning with an initial torque value, followed by angle tightening steps․

For example, many Twin Cam engines require an initial torque of around 25-30 ft-lbs, followed by tightening an additional 90 degrees․ Variations exist based on model year and engine type, so consulting the specific PDF for your motorcycle is critical․ Incorrect torque can lead to warped cylinder heads, blown head gaskets, or even catastrophic engine failure․ Online databases also offer torque specs, but verifying against an official Harley-Davidson source is always recommended for accuracy and peace of mind․

Camshaft Installation Torque Specifications

Correct camshaft installation torque is vital for proper valve timing and engine performance on Harley-Davidson motorcycles․ Detailed specifications are readily available in official Harley-Davidson service manual PDFs, outlining precise values for cam bearings, cam plates, and related components․ Typically, cam bearings require a torque around 8-12 ft-lbs, while cam plate bolts may range from 18-25 ft-lbs, depending on the model․

These PDF resources often specify a particular tightening sequence to ensure even pressure distribution․ Improper torque can lead to valve train noise, reduced engine power, or even camshaft damage․ While online databases can provide guidance, always cross-reference with the official Harley-Davidson PDF for your specific year and model․ Utilizing a calibrated torque wrench is crucial for achieving accurate results and preventing costly repairs․

Primary Chain Adjuster Torque Specifications

Maintaining correct primary chain tension and adjuster torque is essential for smooth shifting and preventing drivetrain issues on Harley-Davidson motorcycles․ Official Harley-Davidson service manuals, available in PDF format, provide precise torque specifications for primary chain adjuster locknuts and bolts․ Generally, adjuster locknuts require a torque between 20-30 ft-lbs, while the adjuster bolts fall within the 15-25 ft-lbs range, varying by model year․

These PDF documents emphasize the importance of proper chain adjustment before tightening to the specified torque․ Incorrect torque can lead to premature wear, chain failure, or difficulty shifting gears․ Online resources can offer supplemental information, but always prioritize the official Harley-Davidson PDF for your specific motorcycle․ A calibrated torque wrench is indispensable for accurate tightening and ensuring long-lasting drivetrain performance․

Axle Torque Specifications (Front & Rear)

Proper axle torque is paramount for wheel security and safe operation of your Harley-Davidson․ Official Harley-Davidson service manuals, conveniently available in PDF format, detail specific torque values for both front and rear axles, differing significantly by model and year․ Typically, front axle torque ranges from 25-35 ft-lbs, while rear axle specifications often fall between 50-85 ft-lbs, depending on wheel type and axle diameter․

These PDF guides stress the importance of using a calibrated torque wrench to achieve accurate tightening․ Under-torquing can lead to wheel instability, while over-torquing risks damaging axle threads or bearings․ Always consult the PDF for your exact model before any wheel maintenance․ Online databases can supplement, but the official Harley-Davidson PDF remains the definitive source for critical axle torque specifications․

Finding Harley-Davidson Torque Specs in PDF Format

Harley-Davidson service manuals, readily downloadable as PDF files, are the primary source for accurate torque specifications, ensuring proper maintenance and repair procedures․

Official Harley-Davidson Service Manuals

Harley-Davidson’s official service manuals represent the gold standard for obtaining precise torque specifications in PDF format․ These comprehensive guides, specific to each model and year, detail every nut and bolt’s tightening requirements, ensuring accurate assembly and preventing potential mechanical failures․

Available for purchase directly from Harley-Davidson dealerships or through authorized online retailers, these manuals offer a wealth of information beyond just torque values, including detailed exploded diagrams, troubleshooting guides, and step-by-step repair procedures․

While often an investment, the cost is justified by the peace of mind knowing you’re adhering to factory specifications․ Downloading a PDF version provides convenient access during maintenance, eliminating the need to constantly refer to a physical book․ Always verify the manual corresponds to your exact motorcycle model and year for accurate data․

Online Harley-Davidson Torque Spec Databases

Numerous online databases offer Harley-Davidson torque specifications in convenient PDF or web-based formats, providing a readily accessible alternative to purchasing physical service manuals․ Websites like Doc Harley and various Harley enthusiast forums compile extensive lists of torque values, often categorized by model and engine type․

However, it’s crucial to exercise caution when utilizing these resources․ Information accuracy can vary, and discrepancies may exist between different databases․ Always cross-reference data with multiple sources and, ideally, confirm with an official Harley-Davidson service manual whenever possible․

These online resources are excellent for quick reference, but should not be considered a substitute for the comprehensive detail and factory endorsement found in official documentation․ Prioritize verified information to ensure proper maintenance and avoid potential damage․

Tools for Accurate Torque Application

Accurate torque application requires calibrated torque wrenches and the correct sockets; referencing Harley-Davidson PDF specs ensures proper fastener tightening for optimal performance․

Torque Wrenches: Types and Calibration

Selecting the right torque wrench is paramount when working on a Harley-Davidson․ Several types are available, including clicker-style, beam-style, and digital wrenches, each offering varying levels of precision and ease of use․ Clicker wrenches are popular for their tactile and audible feedback when the desired torque is reached, while beam-style wrenches provide a visual reading․

Digital torque wrenches offer the highest accuracy and often include features like data logging․ Regardless of the type, regular calibration is essential․ Torque wrenches can lose accuracy over time due to wear and tear․ Harley-Davidson service manuals, often available as PDF downloads, emphasize the importance of using a calibrated wrench to ensure fasteners are tightened to the specified torque values․

Calibration should be performed annually or after a significant number of uses․ Many tool suppliers offer calibration services․ Using an uncalibrated wrench can lead to undertightening, causing components to loosen, or overtightening, potentially damaging threads or fasteners․ Always consult the Harley-Davidson PDF specifications for the correct torque values and wrench type for each application․

Importance of Using the Correct Socket

Employing the correct socket alongside a calibrated torque wrench is absolutely critical when adhering to Harley-Davidson torque specifications, often detailed in PDF service manuals․ Using the wrong size or type of socket can introduce inaccuracies, leading to improper fastener torque․ A loose fit allows the socket to slip, rounding off bolt heads or damaging threads, while an incorrect drive size prevents proper engagement․

Six-point sockets are generally preferred over twelve-point sockets for torque applications, as they provide a more secure grip and reduce the risk of rounding․ Impact sockets, designed for use with impact wrenches, should not be used with torque wrenches, as their construction differs and can affect torque readings․

Always refer to the Harley-Davidson PDF documentation for the specified socket size and type for each fastener․ Precision in socket selection, combined with a calibrated torque wrench, guarantees accurate tightening and contributes to the longevity and reliability of your motorcycle․

Harley-Davidson Racing & Performance Torque Considerations

Racing and modified Harley-Davidson engines often require adjusted torque specs, deviating from standard PDF values, to optimize performance and durability on the track․

King of the Baggers Racing Torque Specs

King of the Baggers racing demands significantly altered torque specifications compared to standard Harley-Davidson touring models, pushing engine components to their absolute limits․ Finding precise torque values for race-prepped baggers often necessitates delving beyond standard service manual PDFs․

Teams frequently rely on extensive dyno testing and engineering analysis to determine optimal fastener torque for components like cylinder heads, connecting rods, and crankshafts․ These values are often proprietary and not publicly available in typical PDF format documentation․

The increased stress from high horsepower and aggressive riding requires tighter tolerances and often, the use of specialized fasteners with unique torque requirements․ Accessing this information usually involves direct communication with racing component manufacturers or experienced race teams․ While base torque specs can be found in PDF service manuals, they serve as a starting point for extensive customization․

Torque Adjustments for Modified Harley-Davidson Engines

Modifying a Harley-Davidson engine necessitates a departure from factory torque specifications outlined in standard service manual PDFs․ Increased horsepower, altered compression ratios, and aftermarket components all demand revised fastener torque values to ensure reliability and prevent catastrophic failure․

Components like cylinder heads, connecting rods, and main bearings require re-evaluation․ Higher performance camshafts and upgraded valve springs often necessitate increased cylinder head bolt torque․ Aftermarket pistons and connecting rods may have specific torque requirements detailed by the manufacturer, overriding the PDF manual’s recommendations․

It’s crucial to consult with experienced engine builders and component manufacturers․ Simply relying on a PDF torque chart is insufficient․ Dyno testing and careful monitoring are essential to fine-tune torque values for optimal performance and longevity in a modified engine․

Harley-Davidson History and Manufacturing Location

Harley-Davidson, founded in 1903 in Milwaukee, Wisconsin, initially produced basic motorcycles; detailed torque specifications are found in service manuals, often available as PDFs․

The Founding and Evolution of Harley-Davidson

Harley-Davidson’s journey began in 1903 with William S․ Harley and Arthur Davidson in a small Milwaukee shed, initially crafting bicycle parts before evolving into motorcycle production․ Early models were simple, yet innovative, quickly gaining recognition for their durability and performance․ As demand grew, the company expanded, pioneering advancements in engine design and manufacturing techniques․

Throughout the 20th century, Harley-Davidson became synonymous with American motorcycle culture, fueled by iconic designs and a rebellious spirit․ The need for precise maintenance grew alongside this evolution, leading to comprehensive service manuals detailing critical specifications, including torque values․ These manuals, now frequently digitized and available as PDF documents, became essential resources for mechanics and enthusiasts alike․ Accessing these PDFs ensures correct fastener tightening, preserving the legacy of these machines․

Today, Harley-Davidson continues to innovate, blending tradition with modern technology, while maintaining a commitment to providing detailed technical information, often in convenient PDF format․

Harley-Davidson’s Milwaukee Manufacturing Base

Harley-Davidson’s enduring presence in Milwaukee, Wisconsin, is central to its identity and manufacturing process․ Since its inception, the city has served as the heart of the company’s operations, fostering a legacy of craftsmanship and innovation․ The Milwaukee facility isn’t just a factory; it’s a symbol of American manufacturing and a repository of technical expertise․

Maintaining the quality and performance of Harley-Davidson motorcycles requires meticulous attention to detail, particularly regarding torque specifications․ The Milwaukee base is where detailed service manuals, often distributed as PDF documents, are developed and refined․ These PDFs contain critical information for assembly and repair, ensuring every component is tightened to the correct specification․

Access to these PDF resources, originating from the Milwaukee engineering teams, is vital for mechanics and owners, guaranteeing the longevity and reliability of these iconic machines․

reverse manual valve body

Reverse manual valve bodies represent a significant modification to automatic transmissions, offering enhanced control and durability for demanding applications.

These specialized components, like those from TCI, fundamentally alter shifting behavior, eliminating automatic functions and placing control directly into the driver’s hands.

Common issues, such as complete failure or loss of reverse, have been reported, alongside concerns about shift quality and potential overlap between gears.

Despite these potential drawbacks, many enthusiasts praise the performance gains and reliability offered by a properly installed and maintained reverse manual valve body.

Understanding their function and potential problems is crucial for anyone considering this upgrade, especially with TH400 transmissions.

Regular maintenance, including fluid changes and filter replacements, is vital for longevity and preventing valve body problems.

What is a Valve Body?

The valve body is the hydraulic heart of an automatic transmission, a complex network of channels and valves responsible for directing fluid flow. This fluid pressure dictates gear selection and shift timing, essentially controlling when and how the transmission changes gears. It’s a crucial component, often overlooked until issues arise, as it manages the entire shifting process.

Within a standard automatic transmission, the valve body relies on a combination of governor pressure, throttle position, and vehicle speed to determine the optimal gear. However, a reverse manual valve body bypasses much of this automation. It replaces the intricate hydraulic circuitry with a more direct, mechanically controlled system.

Essentially, it transforms the transmission from a self-shifting unit into one where the driver dictates every gear change. This is achieved through the addition of a manual valve, allowing for precise control, but also requiring a more engaged driving experience. The valve body’s location is within the transmission itself, making diagnosis of problems challenging.

The Function of a Reverse Manual Valve Body

A reverse manual valve body fundamentally alters the automatic transmission’s operation by removing automatic shifting capabilities. Its primary function is to provide the driver with full, manual control over gear selection, bypassing the traditional hydraulic governor and throttle position sensors. This is accomplished by directly controlling fluid flow to different clutch packs and bands within the transmission.

Specifically, these valve bodies often eliminate the intermediate band and disable the reverse band in first gear, streamlining the shifting process for performance applications. The manual valve allows the driver to select gears at will, offering precise control for drag racing or spirited driving.

Importantly, it accomplishes shifting away from neutral and reverse, requiring deliberate driver input for each gear change. While offering enhanced control, it also means sacrificing the convenience of automatic operation, demanding a more engaged driving style.

Why Choose a Reverse Manual Valve Body?

Choosing a reverse manual valve body is often driven by a desire for increased control and performance, particularly in modified vehicles. Enthusiasts frequently opt for these systems to eliminate the unpredictability of automatic shifting, gaining precise command over gear selection for drag racing or aggressive street driving.

They are favored for their ability to accommodate factory shifters, offering a seamless integration for custom builds. Furthermore, a manual valve body can enhance durability, as it removes reliance on potentially failing automatic mechanisms.

However, it’s crucial to acknowledge the trade-offs; you lose automatic shifting convenience. Despite potential shift quality concerns, many drivers find the benefits outweigh the drawbacks, praising the enhanced responsiveness and reliability, especially when paired with appropriate cooling systems.

Components of a Reverse Manual Valve Body

Reverse manual valve bodies comprise several key parts: the manual valve, reverse valve, spool valves, check balls, and springs, all working in harmony for precise control.

These components dictate shift patterns and fluid flow, influencing performance and reliability within the transmission system.

Manual Valve

The manual valve is the central control element within a reverse manual valve body, directly operated by the driver’s shifter, bypassing the transmission’s original automatic selection mechanism.

Unlike factory valve bodies, this component allows for full, independent gear selection, eliminating automatic shifting and placing complete command in the hands of the operator.

This direct linkage is fundamental to the operation of these modified transmissions, enabling precise control over gear changes and facilitating performance-oriented driving styles.

Essentially, the manual valve acts as a mechanical interface, translating driver input into hydraulic pressure changes that engage the appropriate gears.

Proper adjustment and maintenance of this valve are critical for smooth, accurate shifts and preventing internal transmission issues.

It’s a core component for those seeking a more engaging and customizable driving experience.

Reverse Valve

The reverse valve within a reverse manual valve body is a critical component, often implicated in reported failures and requiring careful consideration during installation and operation.

Unlike standard automatic transmissions, reverse is often directly controlled and can be a point of vulnerability in these modified systems, as evidenced by instances of complete reverse gear loss.

Its function is to direct fluid flow to engage the reverse gear, but in these setups, it’s often subject to increased stress and potential wear due to the altered hydraulic pressures.

Reports indicate that failures of this valve can lead to a sudden and complete loss of reverse functionality, necessitating transmission disassembly and repair.

Therefore, selecting a high-quality valve body with robust reverse valve construction is paramount for reliability.

Regular inspection and preventative maintenance are also crucial to avoid unexpected issues.

Spool Valves and Their Role

Spool valves are integral to the operation of a reverse manual valve body, governing fluid distribution to control gear selection and shift timing. These valves precisely meter hydraulic pressure, dictating when and how gears engage.

A common issue reported with these valve bodies is spool valve sticking, which can lead to erratic shifting, delayed engagement, or even a complete inability to select certain gears.

The precision of these valves directly impacts shift quality; any binding or restriction can result in harsh or imprecise gear changes.

Proper lubrication and clean fluid are essential to ensure smooth spool valve operation and prevent sticking.

Manufacturers like Hughes Performance focus on valve body designs that minimize potential for spool valve issues.

Regular maintenance and fluid changes are vital for maintaining optimal performance.

Check Balls and Springs

Check balls and springs are fundamental components within a reverse manual valve body, acting as crucial regulators of hydraulic fluid flow. These small but vital parts ensure unidirectional fluid movement, enabling precise gear engagement and disengagement.

Wear and tear on check balls is a frequently cited issue, leading to internal leaks and diminished hydraulic pressure, ultimately affecting shift performance.

Over time, springs can lose their tension, compromising the check ball’s ability to seal effectively, resulting in similar symptoms.

Proper installation and regular inspection of these components are essential during valve body maintenance.

Replacing worn check balls and springs is a common practice when rebuilding or servicing a reverse manual valve body.

Maintaining fluid cleanliness is paramount to prevent accelerated wear of these critical parts.

Installation of a Reverse Manual Valve Body

Installing a reverse manual valve body requires meticulous preparation, careful removal of the original unit, and adherence to precise torque specifications for optimal performance.

Correct fluid type and level are also critical for proper operation and preventing potential damage.

Preparation and Removal of the Old Valve Body

Before embarking on the installation of a reverse manual valve body, thorough preparation is paramount. Begin by disconnecting the battery to prevent any electrical mishaps during the process. Drain the transmission fluid completely, ensuring a clean workspace to avoid contamination.

Carefully disconnect all lines and electrical connectors attached to the existing valve body, labeling them meticulously for reassembly. Remove the transmission pan, noting the location of any check balls or springs.

Then, cautiously remove the old valve body, paying attention to any remaining components that might be lodged within the transmission case. Inspect the transmission case for any debris or damage, cleaning it thoroughly before installing the new unit. A clean installation surface is crucial for a proper seal and optimal function.

Installing the New Reverse Manual Valve Body

With the old valve body removed and the transmission case clean, carefully position the new reverse manual valve body into place. Ensure proper alignment with all passages and mounting points. Begin installing new gaskets and O-rings, applying a light coating of transmission fluid for lubrication and sealing.

Reinstall any check balls and springs, referencing diagrams to ensure correct placement. Reconnect all previously disconnected lines and electrical connectors, utilizing the labels created during removal. Double-check all connections for security and proper fit.

Finally, reinstall the transmission pan, ensuring a tight seal. Before proceeding, visually inspect the entire assembly to confirm everything is correctly installed and secure. This meticulous approach minimizes potential issues post-installation.

Proper Torque Specifications

Achieving correct torque specifications is paramount during reverse manual valve body installation, preventing leaks and ensuring optimal function. The transmission pan bolts typically require a torque of 10-15 ft-lbs, applied in a crisscross pattern to evenly distribute pressure.

Valve body mounting bolts demand precise tightening, generally between 15-20 ft-lbs, again utilizing a crisscross sequence. Ignoring these specifications can lead to warped pans, damaged valve bodies, or internal leaks.

Consult your specific valve body’s instructions, as TCI and Pro Trans units may have unique requirements. Always use a calibrated torque wrench to guarantee accuracy. Over-tightening can strip threads, while under-tightening risks fluid seepage and component failure;

Fluid Type and Fill Level

Selecting the correct transmission fluid is critical for reverse manual valve body longevity and performance. Most manufacturers recommend a high-quality DEXRON III or DEXRON VI fluid, ensuring compatibility with the internal components and friction materials.

Avoid universal fluids, as they may lack the necessary additives for optimal lubrication and cooling. After installation, checking the fluid level is essential. With the engine running and the transmission in park, the fluid should reach the “full” mark on the dipstick.

Low fluid levels can cause slippage and overheating, while overfilling can lead to aeration and reduced efficiency. Regular fluid checks, alongside changes, are vital for preventing pump wear and maintaining consistent shift quality.

Common Issues with Reverse Manual Valve Bodies

Reverse manual valve bodies can experience failures of the reverse valve, spool valve sticking, and check ball wear, leading to no reverse conditions.

Pump wear is also a concern, alongside overlap between gears and internal leaks, impacting performance and requiring careful diagnosis.

Failure of the Reverse Valve

The reverse valve is a critical component within the reverse manual valve body, and its failure is a frequently reported issue. Several online accounts detail instances where a complete loss of reverse gear occurred suddenly, often traced back to this valve. This can manifest as an inability to engage reverse at all, or a weak, hesitant engagement that quickly fails.

Contributing factors to reverse valve failure can include wear and tear over time, debris within the transmission fluid contaminating the valve, or manufacturing defects. The valve’s precise movement is essential for proper operation, and any obstruction or damage can prevent it from fully engaging or disengaging.

Diagnosing a failed reverse valve often requires a thorough inspection of the valve body, checking for scoring, cracks, or stuck components. Replacement of the valve, along with a complete fluid flush and filter change, is typically necessary to restore functionality.

Spool Valve Sticking

Spool valve sticking is a common problem encountered with reverse manual valve bodies, impacting shift quality and overall transmission performance. These valves control fluid flow to different parts of the transmission, and any restriction due to sticking can cause harsh shifts, delayed engagement, or even prevent certain gears from engaging altogether.

Contamination within the transmission fluid is a primary cause of spool valve sticking. Debris, clutch material, or metal particles can accumulate around the valve, hindering its smooth movement. Additionally, varnish buildup from old, degraded fluid can contribute to the issue.

Symptoms of sticking spool valves can include erratic shifting, a noticeable delay when selecting a gear, or a feeling of “notchiness” during shifts. Addressing this issue typically involves a thorough cleaning of the valve body and replacement of the affected spool valves, alongside a complete fluid and filter service.

Check Ball Wear and Tear

Check ball wear and tear is a significant concern within reverse manual valve bodies, directly affecting hydraulic pressure and shift accuracy. These small, yet crucial, components seal passages within the valve body, regulating fluid flow for proper gear engagement. Over time, constant impact and fluid erosion cause them to lose their precise spherical shape and sealing ability.

Worn check balls can lead to pressure leaks, resulting in soft or delayed shifts, and potentially contribute to other valve body malfunctions. Symptoms include slipping gears, reduced performance, and an overall decline in transmission responsiveness. Identifying worn check balls requires a detailed inspection during valve body disassembly.

Replacing worn check balls with new, high-quality components is essential during any valve body repair or rebuild. Using a complete rebuild kit ensures all wear items are addressed simultaneously, restoring optimal hydraulic function and preventing future issues.

Pump Wear Concerns

Pump wear is a frequently discussed concern when installing a reverse manual valve body, particularly with high-performance applications. The altered hydraulic demands placed on the pump, due to the manual control and potentially higher pressures, can accelerate wear on internal components like the gerotor and housing.

Some users have reported increased pump wear after installing a manual valve body, especially without adequate cooling. However, others have driven thousands of miles without experiencing issues, utilizing auxiliary coolers to maintain optimal fluid temperatures. Proper fluid type and regular fluid changes are critical preventative measures.

Monitoring pump pressure and inspecting the pump during valve body service is recommended. Addressing any signs of wear, such as noise or reduced pressure, promptly can prevent catastrophic failure and protect the investment in the valve body upgrade.

Troubleshooting Reverse Manual Valve Body Problems

Diagnosing issues with reverse manual valve bodies requires a systematic approach, checking for no reverse conditions, poor shift quality, gear overlap, and internal leaks.

Careful inspection and testing are essential to pinpoint the root cause of any performance problems encountered after installation.

Diagnosing No Reverse Condition

A complete loss of reverse with a reverse manual valve body is a critical issue demanding immediate attention. Initial diagnosis should involve verifying sufficient fluid levels and ensuring the transmission cooler isn’t blocked, as low fluid pressure impacts valve operation.

Inspect the reverse valve itself for damage or sticking; reports indicate this valve is a frequent failure point. Carefully examine the spool valves for any obstructions or wear that could prevent proper engagement.

Check ball and spring functionality is also crucial – worn or broken components can disrupt fluid flow to the reverse circuit. A transmission tear-down may be necessary to visually inspect these internal parts. Remember, some users experienced complete failure after only a short period of use.

Consider if the issue arose suddenly, potentially indicating a catastrophic failure, or gradually, suggesting wear and tear.

Identifying Shift Quality Issues

Poor shift quality is a common concern with reverse manual valve bodies, often cited as a drawback alongside the loss of automatic shifting. Harsh or imprecise shifts can indicate improper valve body adjustment or internal component wear. Pay close attention to whether shifts are consistently problematic or intermittent.

Overlap between gears, specifically 2-3 as reported by some users, suggests a synchronization issue within the valve body. This can manifest as a momentary loss of power or a jarring transition. Examine the spool valves for proper function and ensure correct spring tension.

Evaluate if the issue occurs in all gears or is isolated to specific ranges. A gradual decline in shift quality often points to internal wear, while a sudden change may indicate a blockage or valve failure.

Remember, achieving optimal shift quality often requires careful tuning and experimentation.

Addressing Overlap Between Gears

Gear overlap, particularly between 2nd and 3rd, is a frequently reported issue with reverse manual valve bodies. This manifests as a momentary loss of power or a harsh transition during shifting. Addressing this requires a systematic approach to valve body inspection and adjustment.

Begin by verifying the proper functioning of the spool valves, ensuring they are moving freely and sealing correctly. Check the spring tensions associated with these valves; weakened springs can contribute to timing inaccuracies. Internal leaks within the valve body can also cause overlap.

Carefully examine the reverse valve for any signs of wear or damage, as its operation directly impacts shift sequencing. Consider adjusting the modulator valve to fine-tune shift firmness and timing.

Remember, precise adjustments are crucial; small changes can significantly impact performance.

Checking for Internal Leaks

Internal leaks within a reverse manual valve body can drastically affect performance, causing sluggish shifts, loss of reverse, and even pump wear. Identifying these leaks requires a meticulous inspection process. Begin by checking for external seepage around the valve body gasket, indicating a potential breach in the housing.

Next, perform a pressure test at various points within the transmission to pinpoint pressure drops. Pay close attention to the reverse and forward clutches, as leaks in these areas are common. Inspect the check balls and springs for wear or damage, as they are critical for maintaining pressure.

Carefully examine the valve bores for scoring or corrosion, which can create leak paths. A thorough cleaning and inspection of all valve body components are essential for accurate diagnosis.

Remember, even minor leaks can lead to significant performance issues.

Brands and Models of Reverse Manual Valve Bodies

TCI, Pro Trans, and Hughes Performance are leading manufacturers, offering diverse reverse manual valve bodies for various transmissions, notably the TH400.

Each brand provides unique features and performance characteristics, catering to different driving styles and power levels.

Selecting the right model depends on your specific needs and transmission setup.

TCI Reverse Manual Valve Bodies

TCI Automotive is a highly recognized name in the performance transmission parts industry, and their reverse manual valve bodies (RMVBs) are particularly popular. Many users, dating back to 2006, have lauded TCI RMVBs as a significant upgrade, often describing them as “the greatest thing since sliced bread.”

However, experiences haven’t been universally positive. Reports from late 2020 indicate potential issues with quality control, with some users receiving valve bodies that were completely dysfunctional upon arrival. These failures often involved complete valve body destruction, necessitating replacement.

Despite these reported problems, TCI RMVBs remain a common choice, offering a direct path to full manual control. Users emphasize the importance of careful inspection and potentially addressing any initial issues promptly. Proper installation and maintenance are crucial for reliable performance.

The TCI RMVB eliminates automatic shifting, requiring the driver to manage all gear selections, offering a more engaging and controlled driving experience.

Pro Trans Valve Bodies

Information specifically detailing Pro Trans reverse manual valve bodies is less readily available online compared to TCI, but they are a respected builder of performance transmissions and components. Pro Trans focuses on delivering robust and reliable solutions for high-performance applications, often catering to serious racers and enthusiasts.

While direct user testimonials are scarce in the provided snippets, the general consensus within the performance transmission community suggests Pro Trans valve bodies prioritize durability and consistent shift quality. They are often considered a premium option, potentially commanding a higher price point than some competitors.

Like other RMVBs, Pro Trans units eliminate automatic shifting, requiring full manual control. They are designed to handle increased power and stress, making them suitable for modified vehicles.

Further research beyond the provided text would be necessary to detail specific features, common issues, or model availability of Pro Trans valve bodies.

Huges Performance Valve Bodies

Huges Performance is another prominent name in the high-performance transmission component market, offering reverse manual valve bodies designed for demanding applications. While specific details from the provided text are limited, Hughes is known for its focus on improving shift quality and overall transmission performance.

Their valve bodies, like those from TCI and Pro Trans, convert an automatic transmission to fully manual operation, giving the driver complete control over gear selection. This is particularly beneficial for drag racing and other performance driving scenarios.

Users should anticipate a firmer shift feel with a Hughes RMVB, as they are typically tuned for aggressive performance. Proper installation and fluid type are crucial for optimal operation and longevity.

Further investigation would be needed to determine specific model offerings and detailed specifications for Hughes Performance reverse manual valve bodies.

Specific Models for TH400 Transmissions

TH400 transmissions are a popular choice for high-performance applications, and several reverse manual valve body (RMVB) options are specifically designed for this robust automatic. TCI is a frequently mentioned brand, with models tailored to the TH400’s architecture, offering a direct replacement for the stock valve body.

These RMVBs eliminate the factory automatic shifting mechanisms, requiring a manual linkage for gear selection. They often address common TH400 issues, like soft shifts or delayed engagement, by providing more positive control.

Reports suggest potential problems with some TCI RMVBs in older TH400s, highlighting the importance of careful installation and proper fluid maintenance. Hughes Performance also offers TH400-specific options.

Choosing the right model depends on the intended use and desired shift characteristics, with options available for street, strip, and all-out racing applications.

Maintenance and Longevity

Regular fluid changes and filter replacements are crucial for a reverse manual valve body’s lifespan, preventing wear and tear.

Proper shifting techniques and a robust cooling system further enhance reliability, avoiding potential pump wear issues.

Regular Fluid Changes

Maintaining the correct transmission fluid is paramount for the longevity of a reverse manual valve body. Frequent fluid changes, far more often than standard automatic transmission intervals, are absolutely essential. The increased stress and heat generated by the modified valve body demand cleaner, more efficient fluid to prevent internal component wear.

Contaminated fluid accelerates the deterioration of check balls, springs, and spool valves, potentially leading to sticking or failure of the reverse valve. Experts recommend changing the fluid and filter every 3,000 miles for street/strip applications, and even more frequently for dedicated racing setups.

Using the correct fluid type, specified by the valve body manufacturer (like TCI or Pro Trans), is also critical. Incorrect fluid can cause compatibility issues and reduce the valve body’s performance and lifespan. Don’t neglect this vital maintenance step!

Filter Replacement

Alongside regular fluid changes, consistent filter replacement is non-negotiable when utilizing a reverse manual valve body. The filter’s primary function is to trap debris and contaminants that circulate within the transmission, protecting sensitive internal components from damage. With the increased demands placed on the system by a manual valve body, the filter becomes clogged much faster.

A restricted filter reduces fluid flow, potentially leading to overheating and accelerated wear of the spool valves, check balls, and reverse valve. It’s highly recommended to replace the filter every time you change the fluid, regardless of mileage.

Using a high-quality filter designed for performance transmissions is also crucial. Don’t compromise on filter quality; it’s a small investment that can prevent costly repairs down the line.

Proper Shifting Techniques

Transitioning to a reverse manual valve body demands a significant shift in driving habits. Unlike automatic transmissions, smooth and deliberate shifts are paramount to prevent undue stress on the internal components. Avoid abrupt or “slamming” shifts, as this can contribute to spool valve sticking and premature wear of check balls.

Mastering controlled upshifts and downshifts is essential for maximizing performance and longevity. Pay close attention to engine RPM and vehicle speed when selecting gears. Remember, you are now fully responsible for gear selection, eliminating the transmission’s automatic functions.

Consistent, smooth operation minimizes the risk of overlap between gears and ensures optimal fluid dynamics within the valve body, safeguarding against potential issues.

Cooling System Considerations

A reverse manual valve body often generates increased heat due to the higher stress placed on the transmission during manual operation. Therefore, an upgraded cooling system is highly recommended, and often essential, for maintaining optimal fluid temperatures and preventing damage.

Consider installing an auxiliary transmission cooler, ideally positioned in front of the radiator for maximum airflow. Hayden coolers are frequently mentioned as a reliable option. Proper fluid circulation is critical; ensure the cooler lines are appropriately sized and free from restrictions.

Monitoring transmission fluid temperature is also advisable, especially during demanding driving conditions. Elevated temperatures can accelerate fluid breakdown and contribute to pump wear, ultimately leading to valve body problems.

spiritual principles of na pdf

Spiritual principles acknowledge us as Divine Spirit, experiencing humanity, where everything exists as conscious energy—reality and fiction are equal․

Understanding these principles involves recognizing Universal Consciousness, and navigating life’s challenges with spiritual awareness for a blessed existence․

These principles are foundational for growth, explored within communities like Spiritual Forums, encompassing topics from astral projection to Zen practices․

Defining Spirituality and its Relevance

Spirituality, at its core, is the recognition that we are fundamentally spiritual beings – Divine Spirit – temporarily inhabiting a human experience․ This understanding transcends religious dogma, focusing instead on a direct connection to the Universal Consciousness that permeates all existence․

Its relevance in today’s world is profound, offering a framework for navigating life’s complexities with greater meaning and purpose․ It acknowledges that all energy, whether perceived as ‘real’ or ‘fictional’, is inherently conscious, shaping our reality․ This perspective encourages self-awareness and a deeper understanding of our interconnectedness․

Exploring spirituality isn’t about escaping the human condition, but about enriching it․ It’s about discerning the origins of our thoughts, especially when facing challenges, and striving to live a good and blessed life․ Communities like Spiritual Forums provide spaces for this exploration, fostering discussions on diverse topics from astral projection to Zen, supporting individual spiritual journeys․

The Concept of a Soul and its Division

The concept of a soul, central to many spiritual beliefs, suggests a fundamental, eternal essence within each of us․ A fascinating perspective posits that what we perceive as individual souls are, in fact, fragments of a single, overarching Universal Consciousness․ This implies a division – not a destruction – of the original soul into multiple expressions, experiencing life from diverse perspectives․

The idea of “twin flames” embodies this division, describing two portions of one soul temporarily separated for a unique journey of growth and reunion․ This isn’t merely a romantic notion, but a recognition of a profound energetic connection and shared spiritual purpose․

Understanding this division encourages compassion and empathy, recognizing the inherent unity beneath apparent separation․ It highlights the importance of spiritual discernment, particularly when navigating internal and external influences, as discussed within forums dedicated to spiritual exploration and growth․

Core Spiritual Principles

Core principles center on Universal Consciousness, recognizing all as energy, and understanding the Divine Spirit’s human experience, demanding constant discernment․

Universal Consciousness and Energy

Universal Consciousness represents the fundamental ground of all reality and experience, a concept deeply interwoven with the understanding of energy itself․ Everything, regardless of perceived categorization – be it ‘real’ or ‘fictional’ – is fundamentally energy, and crucially, all energy possesses consciousness․

This interconnectedness implies that consciousness isn’t limited to individual beings but permeates all existence, forming a unified field․ Recognizing this universal energy allows for a shift in perspective, acknowledging the inherent divinity within ourselves and everything around us․ It’s a foundational principle for navigating spiritual growth and understanding the nature of reality․

The exploration of this concept encourages us to move beyond dualistic thinking, recognizing the inherent unity underlying apparent separation․ This understanding is vital for discerning genuine spiritual experiences from illusions or external influences, a key aspect of spiritual warfare and maintaining a balanced path․

The Divine Spirit and Human Experience

The core of our being is Divine Spirit, temporarily inhabiting a human experience․ This perspective reframes our understanding of self, moving beyond identification with the ego and recognizing our inherent spiritual nature․ We are not merely physical bodies, but conscious energy experiencing life through the lens of humanity․

This realization fosters a deeper connection to the Universal Consciousness, acknowledging the divine spark within each individual․ It allows for a more compassionate and understanding approach to ourselves and others, recognizing the shared spiritual essence that unites us all․

Embracing this truth is essential for navigating life’s challenges with grace and resilience, fostering a sense of purpose and meaning beyond the material realm․ It’s a fundamental principle for living a good and blessed life, guided by inner wisdom and spiritual awareness․

Spiritual Warfare and Discernment

Navigating the spiritual realm often involves recognizing and discerning energies that may hinder our growth․ It’s understood that forces exist attempting to obstruct our pursuit of a good and blessed life, employing intricate measures to create doubt and negativity․

A crucial skill is learning to identify the origin of our thoughts, especially spontaneous reactions to external stimuli․ Discernment becomes paramount – is a thought born from our higher self, or influenced by external, potentially negative, energies?

This “spiritual warfare” isn’t a battle against external enemies, but an internal process of recognizing and releasing limiting beliefs and patterns․ Cultivating inner peace and strengthening our connection to Divine Spirit are vital defenses, allowing us to navigate challenges with clarity and resilience․

The Twelve Spiritual Principles (Virtues)

These principles, encompassing the Twelve Steps, Traditions, and Concepts, offer a thorough framework for spiritual growth and virtuous living within communities․

Connection to the Twelve Steps of Recovery

The Twelve Spiritual Principles deeply resonate with the Twelve Steps of recovery programs, offering a structured path toward inner healing and transformation․

Each Step embodies a specific spiritual principle, fostering qualities like honesty, hope, faith, courage, integrity, and humility—virtues essential for overcoming adversity․

These principles aren’t merely suggestions; they represent fundamental shifts in perspective, encouraging surrender, self-awareness, and a connection to a higher power․

Applying these principles allows individuals to address core issues, release destructive patterns, and cultivate a more fulfilling and purposeful life․

The synergy between the Steps and principles provides a robust framework for sustained recovery, promoting emotional, spiritual, and psychological well-being․

Many Alcoholics Anonymous members have printed lists referencing the Twelve Steps as spiritual virtues, demonstrating their interconnectedness and practical application․

The Twelve Traditions as Spiritual Guides

The Twelve Traditions, born from experience within recovery communities, serve as vital spiritual guides for maintaining unity and effectiveness․

These traditions aren’t rules, but principles emphasizing group conscience, autonomy, and selfless service—cornerstones of a thriving spiritual environment․

They promote humility, anonymity, and a focus on the primary purpose: to carry the message to those still suffering, fostering a supportive network․

Each tradition embodies a spiritual principle, encouraging responsible decision-making, financial stability, and avoidance of external issues․

By adhering to these traditions, groups cultivate a safe and inclusive space where members can explore their spirituality and support each other’s journeys․

They represent a practical application of spiritual principles, ensuring long-term health and growth within the community, mirroring the core virtues․

The Twelve Concepts for Group Functioning

The Twelve Concepts build upon the foundation of the Twelve Traditions, offering a deeper understanding of how groups can effectively operate․

They address issues of leadership, responsibility, and decision-making, ensuring a balanced and harmonious group dynamic rooted in spiritual principles․

These concepts clarify roles and responsibilities, emphasizing that ultimate authority rests with the group conscience, guided by shared values․

They promote clear communication, rotation of service positions, and a commitment to continuous learning and improvement within the group․

The Concepts highlight the importance of safeguarding the group’s traditions and protecting its resources for future generations․

Ultimately, they provide a framework for fostering a healthy, resilient, and spiritually grounded community dedicated to mutual support and growth․

Twin Flames and Soul Connections

Twin flames represent one soul split into two, a profound connection experienced as a mirroring of energies and a catalyst for spiritual evolution․

Twin Flames: One Soul Split into Two

The concept of twin flames posits a singular soul essence divided into two distinct physical bodies, representing a deeply profound and transformative connection unlike any other․ This isn’t merely a romantic ideal, though romantic feelings often accompany the union; it’s a spiritual awakening catalyst․

Many believe these flames initially existed as one being, voluntarily fragmenting to experience life from dual perspectives, ultimately aiming for reunification and wholeness․ This separation isn’t a punishment, but a deliberate act of spiritual growth․

Identifying a twin flame isn’t about finding someone “perfect,” but recognizing a mirror reflecting your deepest shadows and highest potential․ The connection is often intense, triggering rapid personal evolution and challenging pre-conceived notions about love and self․ It’s a journey of profound self-discovery, demanding courage, honesty, and unwavering commitment to spiritual principles․

Identifying a Twin Flame Connection

Recognizing a twin flame connection often manifests as an immediate and undeniable recognition, a feeling of “coming home” upon meeting․ However, this initial spark is frequently followed by intense challenges designed to expose and heal deeply ingrained wounds․

Common signs include mirroring – seeing your own strengths and weaknesses reflected in the other person – and a powerful, magnetic pull that transcends logical explanation․ Expect intense emotional and spiritual growth, alongside periods of separation and reunion, serving as opportunities for self-reflection․

Be wary of idealizing the connection; twin flame journeys aren’t always easy or conventionally “happy․” Discernment is crucial, ensuring the connection aligns with your highest good and spiritual path․ True twin flame recognition fosters individual evolution, not codependency, guided by universal consciousness․

Exploring Spiritual Forums and Communities

Spiritual Forums provide a space for diverse discussions on metaphysics, paranormal topics, and esoteric subjects—from astral projection to Zen exploration․

These communities foster growth, offering resources, shared experiences, and opportunities to connect with like-minded individuals on their spiritual journeys․

The Role of Online Forums in Spiritual Growth

Online forums, such as Spiritual Forums, serve as invaluable hubs for individuals seeking to deepen their understanding of spiritual principles and connect with others on similar paths․

These platforms offer a unique environment for exploring complex concepts, sharing personal experiences, and receiving support from a diverse community of seekers․

Members can engage in discussions covering a vast range of topics, from astral projection and Zen meditation to mediumship and clairvoyance, fostering a collective learning experience․

The accessibility of these forums allows individuals from all backgrounds to participate, regardless of geographical location or prior knowledge, democratizing spiritual exploration․

Furthermore, forums often host resources like articles, links, and chat rooms, providing a wealth of information and opportunities for interaction․

The ability to request readings from mediums and clairvoyants, and to report and analyze spiritual experiments, adds another layer of depth to the learning process․

Ultimately, online forums empower individuals to take ownership of their spiritual growth and cultivate a deeper connection to themselves and the universe․

Resources for Astral Projection and Zen

Spiritual Forums actively cultivate resources dedicated to practices like astral projection and Zen meditation, catering to diverse interests within the spiritual community․

For those exploring astral projection, the forum provides a space to share experiences, techniques, and insights, fostering a collaborative learning environment․

Discussions often cover topics such as inducing out-of-body experiences, navigating the astral plane, and interpreting symbolic encounters․

Similarly, the forum offers a wealth of information on Zen Buddhism, including discussions on mindfulness, meditation practices, and the pursuit of enlightenment․

Members share resources like guided meditations, articles on Zen philosophy, and personal reflections on their practice․

The platform encourages exploration of these disciplines as pathways to deeper self-awareness and connection to Universal Consciousness․

Ultimately, Spiritual Forums serves as a valuable gateway for individuals seeking to integrate astral projection and Zen into their spiritual journey․

Advanced Spiritual Concepts

Exploring mediumship and clairvoyance, Spiritual Forums allows members to request readings, report experiments, and analyze results for deeper understanding․

Mediumship and Clairvoyance

Mediumship and clairvoyance represent advanced explorations within the spiritual realm, offering potential connections beyond the physical senses․ Spiritual Forums actively facilitates these investigations, providing a platform where individuals can request readings from experienced mediums․

This allows for personalized insights and potential communication with other realms of existence․ Furthermore, the forum encourages members to meticulously document and analyze their experiences with clairvoyance – the ability to perceive information beyond normal sensory channels;

Reporting experiment results is crucial for collective learning and discerning genuine spiritual phenomena from misinterpretations or external influences․ The community fosters a space for critical evaluation, promoting responsible engagement with these powerful abilities and contributing to a deeper understanding of consciousness itself․

Such exploration aligns with the broader pursuit of spiritual principles, seeking to unravel the mysteries of existence and our place within the universe․

Reporting and Analyzing Spiritual Experiments

Spiritual experimentation, a cornerstone of deeper understanding, thrives within communities like Spiritual Forums, where members are encouraged to document their journeys․ This platform provides a dedicated space for meticulously reporting the results of personal explorations into areas like astral projection and other metaphysical practices․

The emphasis isn’t solely on the experience itself, but on rigorous analysis – examining variables, identifying patterns, and critically evaluating outcomes․ This analytical approach helps differentiate genuine spiritual insights from subjective interpretations or external influences․

Sharing these reports fosters collective learning, allowing others to build upon existing knowledge and refine their own experimental designs․ Such collaborative investigation aligns with core spiritual principles, promoting transparency, discernment, and a commitment to truth-seeking within the realm of consciousness․

It’s a vital step towards expanding our understanding of reality․

Applying Spiritual Principles to Daily Life

Living a good life means navigating challenges with awareness, recognizing everything as conscious energy, and embracing our Divine Spirit’s human experience․

Living a Good and Blessed Life

Embracing spiritual principles is fundamentally about recognizing our inherent nature as Divine Spirit, presently engaged in a human experience․ This understanding shifts perspective, allowing us to perceive the interconnectedness of all things, acknowledging that both perceived “reality” and “fiction” are simply manifestations of conscious energy․

A blessed life, therefore, isn’t about avoiding challenges, but about navigating them with heightened awareness and discernment․ The enemy, as discussed within spiritual communities, employs intricate strategies to hinder our progress towards a fulfilling existence․

Cultivating this awareness involves questioning spontaneous thoughts and seeking to understand their origin, discerning whether they align with our highest good․ Ultimately, living a good and blessed life is a continuous practice of aligning with Universal Consciousness and embodying the virtues inherent within us․

Navigating Challenges with Spiritual Awareness

Spiritual awareness provides a powerful framework for confronting life’s inevitable difficulties․ Recognizing that we are spiritual beings, experiencing a human journey, allows us to detach from the intensity of emotional reactions and observe challenges with greater clarity․ This perspective acknowledges that obstacles aren’t necessarily punishments, but opportunities for growth and deeper understanding․

The concept of spiritual warfare highlights the presence of forces attempting to disrupt our path towards a good and blessed life․ Discernment becomes crucial – questioning the source of intrusive thoughts and aligning ourselves with positive energy․

By grounding ourselves in Universal Consciousness and embodying spiritual virtues, we can navigate these challenges with resilience, grace, and an unwavering faith in our inherent divinity․

comfortnet thermostat manual

ComfortNet Thermostat Manual: A Comprehensive Guide

This manual details the ComfortNet CTK04 system, offering installation, setup, and troubleshooting guidance for optimal performance and user experience with your new thermostat.

The ComfortNet CTK04 is a sophisticated communicating thermostat system designed to provide precise temperature control and enhanced energy efficiency within your home environment. This advanced thermostat isn’t merely a temperature regulator; it’s a central hub for managing your HVAC system, offering features like remote access, customizable scheduling, and integration with optional accessories for comprehensive comfort management.

This guide serves as a detailed resource for understanding and utilizing the full potential of your ComfortNet CTK04. Whether you’re a seasoned HVAC professional or a first-time thermostat installer, this manual will walk you through every step, from initial installation and configuration to troubleshooting common issues and accessing support resources. Expect to learn about wiring, linking accessories, and optimizing settings for peak performance.

Understanding the ComfortNet Advantage

The ComfortNet CTK04 distinguishes itself through its advanced communicating capabilities, offering a level of precision and control beyond traditional thermostats. This system establishes a two-way dialogue with compatible HVAC equipment, enabling real-time data exchange and optimized performance. Unlike conventional thermostats that simply signal on/off commands, the CTK04 receives detailed information about system status, allowing for proactive adjustments and efficient operation.

This communication translates to significant benefits, including improved energy savings, enhanced comfort, and proactive diagnostics. The system’s ability to monitor and respond to changing conditions ensures consistent temperatures and minimizes energy waste. Furthermore, the CTK04’s compatibility with optional accessories expands its functionality, creating a truly customized comfort solution.

Installation Guide Overview

This section provides a comprehensive overview of the ComfortNet CTK04 thermostat installation process, designed for both experienced HVAC professionals and confident DIY enthusiasts. Successful installation requires careful attention to detail and adherence to all safety precautions. The guide is structured to walk you through each step, from preparing the installation site and wiring the thermostat to initial configuration and accessory linking.

Before beginning, ensure you have a thorough understanding of your existing HVAC system and the necessary tools. The following sections detail preparing for installation, proper wiring techniques, and crucial setup procedures. Remember to consult the complete manual for detailed diagrams and troubleshooting tips. Proper installation is paramount for optimal performance and longevity of your ComfortNet system.

Installing the Thermostat

The installation of your ComfortNet CTK04 thermostat involves two primary stages: preparing the installation location and carefully wiring the unit to your HVAC system. Begin by powering down your HVAC system at the breaker to ensure safety. Remove your old thermostat, carefully labeling each wire before disconnecting it. This labeling is crucial for accurate reconnection to the ComfortNet baseplate.

Refer to the wiring diagrams provided in this manual to correctly connect the wires to the corresponding terminals on the ComfortNet baseplate. Incorrect wiring can damage your system. Once wiring is complete, securely mount the baseplate to the wall, ensuring it is level. Finally, attach the thermostat display to the baseplate. Double-check all connections before restoring power.

Preparing for Installation

Before commencing the installation of your ComfortNet CTK04 thermostat, several preparatory steps are essential for a smooth and successful process. First, and most importantly, completely shut off power to your heating and cooling system at the circuit breaker. This prevents electrical shock and potential damage to the equipment. Carefully remove your existing thermostat from the wall, noting the wire configuration.

Crucially, label each wire with its corresponding terminal designation before disconnecting them. A photograph can also be a helpful reference. Verify compatibility with your system; ComfortNet is designed for standard HVAC setups. Gather necessary tools: a screwdriver, wire strippers, a level, and potentially a drill for mounting. Ensure the installation location is free from obstructions and within a suitable temperature range.

Wiring the Thermostat

Carefully connect the labeled wires to the corresponding terminals on the ComfortNet CTK04 thermostat baseplate. Refer to the wiring diagram included with your thermostat and the labels you created during the removal of your old thermostat. Common terminals include R (power), C (common), W (heat), Y (cool), and G (fan). Ensure each wire is securely inserted into its terminal, avoiding loose connections.

Double-check all connections against the wiring diagram before proceeding. Incorrect wiring can damage your HVAC system or the thermostat itself. If you encounter any uncertainty, consult a qualified HVAC technician. Once all wires are connected, gently push any excess wire back into the wall opening. Secure the thermostat baseplate to the wall using the provided screws, ensuring it is level for accurate temperature readings.

Thermostat Setup

After successful wiring and mounting, the ComfortNet CTK04 thermostat requires initial setup for optimal operation. Upon powering on, the thermostat will guide you through a series of configuration steps. This includes selecting your HVAC system type (e.g., forced air, heat pump), configuring fan control settings, and setting up any optional accessories like humidifiers or dehumidifiers.

Follow the on-screen prompts carefully, using the thermostat’s touchscreen or buttons to navigate the menus. Accurate system configuration is crucial for efficient heating and cooling. The thermostat will also prompt you to set your preferred temperature units (Fahrenheit or Celsius) and establish a basic schedule. Take your time during this process to ensure all settings align with your comfort preferences and energy-saving goals.

Initial Power-Up and Configuration

Upon the first power-up, the ComfortNet CTK04 initiates a self-diagnostic check and guides you through essential configuration steps. The display will illuminate, presenting a welcome screen and prompting you to select your language preference. Next, the thermostat will ask you to identify your heating and cooling system type – options typically include forced air, heat pump, or radiant heat.

Accurate system identification is vital for correct operation. Following this, you’ll be prompted to configure basic settings like date and time, and to establish your preferred temperature display format (Fahrenheit or Celsius). The thermostat may also ask about any connected accessories, such as a humidifier or dehumidifier, initiating their setup process. Ensure a stable power supply during this initial configuration to prevent interruptions.

Setting Date and Time

Accurate date and time settings are crucial for scheduling and maintaining consistent temperature control with your ComfortNet CTK04 thermostat. Access the date and time settings through the thermostat’s menu, typically navigated using the touchscreen or physical buttons. You’ll be presented with separate fields for month, day, and year, followed by options for setting the hour and minute.

Ensure you select the correct AM or PM designation for accurate timekeeping. Some models may automatically synchronize with a network time server if connected to Wi-Fi, eliminating the need for manual adjustments. Verify the settings carefully before saving, as incorrect date and time can disrupt programmed schedules and affect system performance. Proper configuration ensures all automated features function as intended.

Linking Optional Accessories

The ComfortNet CTK04 thermostat supports integration with various optional accessories to enhance functionality and personalize your home comfort experience. These accessories may include remote sensors for zone control, wireless humidifiers, or dehumidifiers, and even advanced air quality monitoring devices. Linking these accessories typically involves accessing the thermostat’s settings menu and initiating a pairing process.

Follow the specific instructions provided with each accessory, as the pairing method can vary. The thermostat will usually search for nearby compatible devices and prompt you to confirm the connection. Successful linking allows for centralized control and monitoring of all connected components through the ComfortNet interface, optimizing system efficiency and convenience. Ensure accessories are within range for reliable communication.

Mounting Optional Accessories

Proper mounting of optional ComfortNet accessories is crucial for optimal performance and aesthetic integration within your home environment. Remote sensors should be positioned strategically to accurately measure temperature and humidity in specific zones, avoiding direct sunlight or airflow from vents. Wireless humidifiers or dehumidifiers require adequate space for ventilation and access for maintenance.

Always refer to the individual accessory’s installation guide for detailed mounting instructions. Utilize the provided hardware and ensure secure attachment to the wall or desired surface. Consider cable management to maintain a clean and organized appearance. Incorrect mounting can affect accessory functionality and potentially void the warranty, so careful attention to detail is essential for a seamless and reliable system.

Wiring Humidifier to the IFC

Connecting a humidifier to the Interface Control (IFC) module requires careful attention to wiring specifications for proper operation. First, ensure the system power is completely off before commencing any wiring. Identify the designated humidifier terminals on the IFC board, typically labeled ‘HUM’ or similar. Connect the humidifier wiring according to the ComfortNet wiring diagram, paying close attention to polarity if applicable.

Securely fasten the wires to the terminals, verifying a tight connection. Incorrect wiring can damage the humidifier or IFC module. After wiring, double-check all connections before restoring power. Proper configuration within the thermostat settings is also necessary to enable humidifier control and define operational parameters, like desired humidity levels and activation schedules.

Backup Heat Differential and Upstage Timer Settings

Configuring the backup heat differential is crucial for efficient operation when the primary heat source cannot meet demand. This setting determines the temperature difference required to activate the backup heat, preventing unnecessary energy consumption. A smaller differential means backup heat engages more readily, while a larger one prioritizes the primary source.

The upstage timer setting controls how long the primary heat must run before the backup heat is allowed to activate. This prevents short-cycling and ensures the primary system has sufficient time to respond. Adjust these settings based on your climate and heating system characteristics for optimal comfort and cost savings. Refer to the advanced settings menu within the thermostat interface for detailed configuration options.

Humidification System Configuration

Proper humidification system configuration ensures optimal indoor air quality and comfort during dry seasons. The ComfortNet CTK04 allows precise control over your humidifier, integrating seamlessly with the IFC (Interface Control) module. Begin by selecting the appropriate humidifier type within the thermostat’s settings menu – steam, evaporative, or bypass.

Next, define the desired humidity level, typically between 30% and 50%, based on your preference and climate. The thermostat will automatically activate and deactivate the humidifier to maintain this level. Fine-tune settings like minimum run time and cycle rate to prevent over-humidification or system cycling. Regularly monitor humidity levels to ensure optimal performance and adjust settings as needed.

Dehumidification Features

The ComfortNet CTK04 thermostat offers robust dehumidification features to manage excess moisture and enhance indoor comfort. This system actively removes humidity, preventing mold growth and creating a healthier living environment. Access the dehumidification settings through the thermostat’s main menu, where you can select ‘Dehumidify’ mode.

Configure the desired humidity level for dehumidification, typically lower than your standard comfort setting. The thermostat will then activate the cooling system, even if the temperature is comfortable, to remove moisture from the air. Adjust the ‘Dehumidification Speed’ to control the intensity of moisture removal. Monitor indoor humidity levels to optimize performance and prevent over-drying.

Away Mode Configuration

The ComfortNet CTK04’s Away Mode is designed to conserve energy while you’re absent from home. Access this feature through the thermostat’s main menu, selecting ‘Away Mode’ to initiate the configuration process. You can set a specific return date and time, allowing the system to automatically revert to your regular schedule upon your arrival.

Customize temperature settings for both heating and cooling while in Away Mode. Lowering the heating temperature and raising the cooling temperature significantly reduces energy consumption. The thermostat maintains these settings until you disable Away Mode or the scheduled return time is reached. Consider utilizing geofencing capabilities, if available, for automatic activation and deactivation based on your location.

Understanding Communicating System Functionality

The ComfortNet CTK04 utilizes a communicating system, enabling advanced interaction between the thermostat, furnace, and air conditioner. Unlike traditional thermostats, this system transmits detailed information, optimizing performance and efficiency. This two-way communication allows the system to diagnose issues proactively and adjust settings for precise temperature control.

Benefits include improved comfort, reduced energy consumption, and enhanced system diagnostics. The communicating functionality allows for variable-speed operation of your HVAC equipment, providing consistent temperatures and quieter operation. Error codes are communicated directly to the thermostat, simplifying troubleshooting. Ensure proper wiring and compatibility with your HVAC system for optimal communicating functionality.

Troubleshooting Common Issues

Encountering issues with your ComfortNet CTK04? Here’s a guide to resolving frequent problems. If the thermostat isn’t powering on, verify the wiring connections and ensure the power supply is active. Check the breaker and confirm proper voltage. Connectivity problems often stem from Wi-Fi signal strength; relocate the thermostat or router for improved connection.

For inaccurate temperature readings, ensure the thermostat isn’t exposed to direct sunlight or drafts. If the system isn’t responding, double-check the wiring and confirm compatibility with your HVAC equipment. Refer to the error code list in the manual for specific diagnostics. If issues persist, contact customer support for assistance; detailed troubleshooting steps are available online.

Thermostat Not Powering On

If your ComfortNet CTK04 thermostat fails to power on, systematically check several key areas. First, verify the circuit breaker supplying power to the HVAC system hasn’t tripped. Reset it if necessary. Next, carefully inspect all wiring connections at both the thermostat and the furnace/air handler. Ensure wires are securely fastened and haven’t come loose.

Confirm the ‘C’ wire (common wire) is properly connected, as this is essential for consistent power. Use a multimeter to test voltage at the thermostat terminals to confirm power delivery. If voltage is absent, the issue lies upstream. Consult a qualified HVAC technician if you’re uncomfortable working with electrical wiring; safety is paramount.

Connectivity Problems

Experiencing connectivity issues with your ComfortNet CTK04 thermostat? Begin by verifying your home’s Wi-Fi network is functioning correctly. Ensure the router is powered on and broadcasting a strong signal. Confirm the thermostat is within range of the Wi-Fi network; obstructions can weaken the signal.

Double-check the Wi-Fi password entered during setup is accurate. Try restarting both the thermostat and your router – a simple reboot often resolves temporary glitches. If problems persist, consult the ComfortNet app for troubleshooting steps or reset the thermostat’s network settings and re-establish the connection. Contact customer support if these steps fail to restore connectivity.

Updating Thermostat Firmware

Maintaining up-to-date firmware is crucial for optimal ComfortNet CTK04 performance and access to the latest features. The thermostat typically checks for updates automatically when connected to Wi-Fi, but you can also initiate a manual check through the ComfortNet app.

Before starting an update, ensure a stable Wi-Fi connection and avoid interrupting the process. The update may take several minutes; do not power off the thermostat during this time. The app will display the progress and confirm successful completion. Regular firmware updates enhance security, improve functionality, and address potential bugs. Check the ComfortNet website for release notes detailing specific improvements in each update version.

Safety Precautions

Prioritize safety during installation and operation of your ComfortNet CTK04 thermostat. Always disconnect power to the HVAC system at the breaker box before commencing any wiring. Incorrect wiring can damage the thermostat and potentially create a fire hazard. If you are uncomfortable with electrical work, consult a qualified HVAC technician.

Do not expose the thermostat to excessive moisture or extreme temperatures. Keep the device away from flammable materials. Regularly inspect wiring for damage or wear. Follow all local electrical codes and regulations. Never attempt to disassemble or repair the thermostat yourself; contact customer support for assistance.

Warranty Information

Your ComfortNet CTK04 thermostat is covered by a limited warranty against defects in materials and workmanship for a period of one year from the date of purchase. This warranty covers the cost of repair or replacement of the thermostat, at ComfortNet’s discretion. Warranty coverage is void if the thermostat has been subjected to misuse, abuse, neglect, accident, or unauthorized modification.

To make a warranty claim, please contact ComfortNet customer support with proof of purchase. Shipping costs for returning the thermostat are the responsibility of the customer. This warranty is non-transferable and applies only to the original purchaser. ComfortNet is not liable for any consequential damages arising from the use of this product.

Resources and Support

For comprehensive assistance with your ComfortNet CTK04 thermostat, a wealth of resources are readily available. Explore our online portal for detailed manuals, frequently asked questions (FAQs), and troubleshooting guides designed to address common issues. These digital resources provide step-by-step instructions and helpful visuals to assist with installation, setup, and operation.

If you require further support, our dedicated customer support team is available to provide personalized assistance. Contact us via phone or email during business hours, and our knowledgeable representatives will be happy to answer your questions and resolve any concerns. We are committed to ensuring your complete satisfaction with your ComfortNet thermostat system.

Online Manuals and FAQs

Access a comprehensive library of ComfortNet CTK04 resources directly through our website. Detailed online manuals provide in-depth explanations of all thermostat features, installation procedures, and troubleshooting steps. These manuals are searchable and downloadable for convenient offline access, ensuring you always have the information you need at your fingertips.

Our extensive Frequently Asked Questions (FAQs) section addresses common user inquiries, offering quick solutions to everyday issues. Browse categorized FAQs or utilize the search function to find answers to specific questions regarding setup, operation, and connectivity. These resources are continuously updated to reflect the latest product information and user feedback, providing a dynamic support experience.

Contacting Customer Support

For personalized assistance beyond our online resources, our dedicated customer support team is readily available. Reach us via phone during business hours at our toll-free number, where knowledgeable representatives can guide you through troubleshooting or answer specific questions about your ComfortNet CTK04 thermostat. Alternatively, submit a detailed inquiry through our online support portal, providing a comprehensive description of your issue.

Our support team strives to respond to all inquiries promptly, typically within 24-48 hours. We are committed to providing exceptional customer service and ensuring your complete satisfaction with your ComfortNet system. Please have your thermostat model number and purchase date available when contacting support to expedite the assistance process.

virginia model jury instructions

Virginia Model Jury Instructions: A Comprehensive Plan

Virginia Model Jury Instructions provide a structured framework for guiding juries, encompassing both civil and criminal cases within the state’s court system.

These instructions, regularly updated, are essential resources for legal professionals navigating Virginia’s judicial processes, ensuring clarity and consistency in trials.

Virginia Jury Instructions are the legal guidelines provided to jurors during trials, meticulously outlining the law applicable to the specific facts presented. These instructions, crucial for fair and consistent verdicts, are designed to help jurors understand their duties and responsibilities.

The Virginia Model Jury Instructions represent a standardized collection of these guidelines, developed by the Virginia Model Jury Instructions Committee. They serve as a foundational resource for both civil and criminal cases, offering clear and concise language to explain complex legal concepts.

Utilizing these model instructions promotes uniformity across the state’s courts, ensuring that jurors receive consistent guidance regardless of the jurisdiction. Access to these instructions is readily available through various resources, including online databases and law libraries, specifically Reserve Range 204, facilitating efficient trial preparation for legal counsel.

II. Historical Development of Virginia Jury Instructions

The evolution of Virginia Jury Instructions reflects a continuous effort to refine legal communication and enhance juror comprehension. Initially, instructions were often ad hoc, crafted by individual judges, leading to inconsistencies across the state. Recognizing this issue, the Virginia legal community began a movement towards standardized guidance.

The establishment of the Virginia Model Jury Instructions Committee marked a pivotal moment, initiating the systematic development of comprehensive, pre-approved instructions. Early editions, like the Virginia Practice Series, gained widespread acceptance for their clarity and accuracy.

Subsequent editions, such as the 2022-2023 release, demonstrate ongoing updates to reflect changes in case law and statutory provisions. This iterative process, supported by publishers like Matthew Bender & Company and ProView Plus Print, ensures that Virginia’s jury instructions remain current and legally sound, promoting fairness in trials.

III. The Virginia Model Jury Instructions Committee

The Virginia Model Jury Instructions Committee is a crucial body appointed by the Chief Justice of the Virginia Supreme Court. This committee comprises experienced judges and practitioners dedicated to crafting and revising standardized jury instructions for the state’s courts.

Their primary responsibility is to ensure the instructions accurately reflect Virginia law, are written in clear and concise language, and are accessible to jurors. The committee meticulously reviews proposed instructions, considering relevant case law and statutory updates.

The committee’s work is instrumental in promoting consistency and fairness in jury trials throughout Virginia. They authorize the publication of the Model Jury Instructions, which serve as a valuable resource for judges and attorneys. Their dedication to precision and clarity is vital for upholding the integrity of the judicial process.

IV. Civil Jury Instructions in Virginia

Civil Jury Instructions in Virginia are designed to guide jurors in resolving disputes between parties, covering a broad spectrum of legal claims. These instructions, found within the Virginia Model Jury Instructions – Civil edition, are presented in a specific format to ensure clarity and understanding.

The format typically includes a statement of the applicable legal principles, followed by specific questions for the jury to answer based on the evidence presented. Key areas covered include negligence, breach of contract, property law, and various tort claims.

These instructions aim to provide a comprehensive and legally sound framework for jury deliberations, ensuring a fair and just outcome in Virginia civil trials. They are regularly updated to reflect changes in the law.

A. Overview of Civil Instruction Format

The Virginia Model Jury Instructions for Civil cases adhere to a standardized format designed for juror comprehension. Each instruction begins with a clear and concise statement of the legal principle at issue, often referencing relevant case law. Following this, specific factual scenarios are presented, prompting the jury to apply the law to the evidence.

Instructions are typically numbered and organized logically, mirroring the order of presentation of evidence during trial. They utilize plain language, avoiding legal jargon whenever possible, to enhance understanding.

Crucially, the format includes questions for the jury to answer, demanding a specific finding on each essential element of the claim or defense. This structured approach promotes focused deliberation and a well-reasoned verdict.

B. Key Areas Covered by Civil Instructions

Virginia’s Model Jury Instructions – Civil comprehensively address a wide spectrum of legal claims. Prominent areas include instructions for negligence, outlining duty of care, breach, causation, and damages. Detailed guidance is provided for contract disputes, covering elements like offer, acceptance, and breach of agreement.

Furthermore, instructions exist for property law issues, including trespass, nuisance, and easement disputes. Instructions also cover torts such as defamation, assault, and battery, clearly defining the required elements for establishing liability.

The instructions extend to equitable remedies, like specific performance and injunctions, and also address complex areas like medical malpractice and product liability, ensuring a robust framework for civil litigation.

V. Criminal Jury Instructions in Virginia

Virginia’s Model Jury Instructions for criminal cases are meticulously crafted to reflect the state’s penal code and constitutional safeguards. These instructions distinctly differ from their civil counterparts, emphasizing the presumption of innocence and the prosecution’s burden to prove guilt beyond a reasonable doubt.

Key areas covered include instructions for various offenses, ranging from property crimes like larceny and burglary to violent crimes such as robbery, assault, and homicide. Specific instructions address elements of each crime, necessary mental states, and potential defenses.

Furthermore, instructions detail concepts like self-defense, duress, and insanity, providing juries with the legal framework to evaluate these claims. They also cover evidentiary matters crucial to criminal trials.

A. Distinctions Between Civil and Criminal Instructions

Virginia’s Model Jury Instructions exhibit fundamental differences between civil and criminal contexts, reflecting the distinct goals of each legal arena. Civil instructions guide juries in resolving disputes between private parties, focusing on concepts like preponderance of the evidence and assigning liability.

Conversely, criminal instructions address offenses against the state, demanding proof beyond a reasonable doubt – a significantly higher standard. Criminal instructions emphasize individual rights, including the presumption of innocence and the right to remain silent.

The language and focus diverge significantly; civil instructions often concern damages and remedies, while criminal instructions center on guilt or innocence and potential penalties. These distinctions are crucial for ensuring fair and legally sound outcomes in both types of cases.

B. Common Criminal Instruction Topics

Virginia Model Jury Instructions for criminal cases cover a wide spectrum of legal principles. Frequently addressed topics include definitions of specific crimes, such as larceny, assault, and robbery, outlining the essential elements the prosecution must prove. Instructions also detail the concept of mens rea – the guilty mind – and its relevance to criminal intent.

Self-defense, including the “stand your ground” doctrine, receives significant attention, clarifying justifiable use of force. Instructions also cover accomplice liability, explaining when an individual can be held responsible for another’s crime.

Furthermore, instructions address evidentiary matters, like the admissibility of hearsay and the weight given to circumstantial evidence, ensuring juries understand how to evaluate presented information when determining guilt or innocence.

VI. Sources of Virginia Jury Instructions

Several key sources provide Virginia’s comprehensive set of jury instructions. The primary source is the Virginia Model Jury Instructions themselves, published by Matthew Bender & Company, offering both civil and criminal patterns. These are frequently updated, with the 2022-2023 edition being a recent iteration.

ProView Plus Print: VA Jury Instructions is another readily available resource, providing access to these crucial legal guidelines. The Virginia Practice Series – Jury Instructions, a continuation of previous editions, is also highly regarded by legal professionals.

Additionally, unannotated model instructions are available with publisher permission, and many law libraries, like those at universities, maintain copies within their reserve collections (Range 204).

VII. ProView Plus Print: VA Jury Instructions

ProView Plus Print: VA Jury Instructions serves as a vital, accessible resource for legal professionals needing Virginia’s standardized jury instructions. This product offers a comprehensive compilation of both civil and criminal instructions, designed for practical application in state courts.

It’s an external product, directly linked to the official Virginia Model Jury Instructions, ensuring users have access to current and approved patterns. The print format allows for convenient offline access, a benefit during courtroom proceedings or when internet connectivity is limited.

ProView Plus facilitates efficient trial preparation, providing a readily available and reliable source for crafting legally sound and accurate jury guidance.

VIII. Virginia Practice Series — Jury Instructions

The Virginia Practice Series ⎯ Jury Instructions represents a continuously updated and refined collection of guidance for legal professionals. Building upon previous editions, this series has earned widespread acceptance among both the bench and the bar within Virginia’s legal community.

It functions as a continuation of established precedent, offering a detailed and current resource for navigating the complexities of jury instruction drafting. This series provides comprehensive coverage of both civil and criminal matters, ensuring practitioners have access to relevant and applicable patterns.

Its consistent updates reflect evolving case law and legislative changes, making it a dependable tool for accurate and effective trial preparation.

IX. Accessing Virginia Model Jury Instructions

Accessing the Virginia Model Jury Instructions is facilitated through various avenues for legal professionals and researchers. Online resources and databases provide convenient digital access to the most current versions of these crucial legal documents.

Furthermore, physical copies are readily available within law libraries, specifically noted as being held on RESERVE and within Range 204, designated for Virginia materials. This ensures accessibility for those preferring traditional research methods.

These instructions, published with the permission of Matthew Bender & Company, are designed to aid in clear and consistent application of the law during trials, offering a vital resource for both civil and criminal proceedings.

A. Online Resources and Databases

Several online platforms offer access to the Virginia Model Jury Instructions, streamlining research for legal professionals. ProView Plus Print, a dedicated resource, provides comprehensive access to VA Jury Instructions, offering a digital compilation of these essential legal tools.

These databases are frequently updated to reflect the latest revisions and amendments, ensuring users have access to the most current guidance. Subscription-based legal research services, like Westlaw and LexisNexis, also incorporate the Virginia instructions into their extensive collections.

Digital access allows for efficient searching and cross-referencing, aiding in the preparation of accurate and legally sound jury instructions for both civil and criminal cases.

B. Library Availability (Reserve Range 204)

For those preferring physical resources, the Virginia Model Jury Instructions – Civil, 2022-2023 Edition, are readily available in many Virginia law libraries. Specifically, these materials are often located within the “Reserve Range 204” section, designated for Virginia-specific legal resources.

This dedicated reserve section ensures easy access for practitioners and students needing to consult the instructions directly. The call number KFV2983 .A65 M5 identifies the Civil edition, facilitating quick location within the library’s collection.

Libraries maintain updated editions, reflecting recent changes and annotations, providing a reliable source for accurate instruction drafting. Physical copies offer a tangible reference point alongside digital resources.

X. Understanding Instruction Language and Style

Virginia Model Jury Instructions prioritize clarity and conciseness, employing plain language accessible to all jurors. The style deliberately avoids legal jargon, opting for straightforward phrasing to minimize confusion and ensure comprehension of complex legal concepts.

Instructions are crafted to be neutral and unbiased, presenting the law objectively without influencing the jury’s decision. Sentences are typically short and direct, focusing on essential elements of the legal principles at issue.

The committee emphasizes accuracy, ensuring the language precisely reflects Virginia case law and statutory provisions. Understanding this deliberate style is crucial for attorneys adapting model instructions to specific case facts.

XI; The Role of Counsel in Jury Instruction Drafting

Counsel plays a pivotal role in shaping Virginia jury instructions, going beyond simply adopting model language. Attorneys are responsible for tailoring instructions to the unique facts and legal issues of each case, ensuring they accurately reflect the applicable law.

This involves proposing instructions that support their client’s theory of the case, while also objecting to those offered by opposing counsel that are inaccurate or misleading. A proposed instruction, accurately stating the law, must be given consideration by the court.

Effective counsel thoroughly researches relevant case law and statutes, crafting instructions that are both legally sound and persuasive, ultimately guiding the jury towards a just verdict.

XII. Submitting Proposed Jury Instructions

The process of submitting proposed jury instructions in Virginia requires careful adherence to court rules and deadlines. Counsel must typically submit their proposed instructions well in advance of the trial, allowing opposing counsel adequate time for review and potential objection.

These submissions should clearly identify each instruction, referencing its source – whether a Virginia Model Jury Instruction, a published case, or original drafting. Attorneys must also provide a concise statement of the legal basis for each proposed instruction.

Proper formatting and organization are crucial for ensuring the court efficiently considers each submission, contributing to a smoother and more effective trial process.

XIII. Objecting to Opposing Counsel’s Instructions

Objecting to opposing counsel’s proposed jury instructions is a critical aspect of trial advocacy in Virginia. Attorneys must promptly raise objections, specifying the grounds – such as inaccuracy of the legal statement, misstatement of evidence, or irrelevance to the issues presented.

Objections should be clearly articulated, referencing relevant case law or Virginia Model Jury Instructions that support the challenge. A well-reasoned objection demonstrates a thorough understanding of the law and protects the client’s interests.

Failing to object in a timely manner may waive the right to challenge the instruction later, potentially impacting the outcome of the case.

XIV. The Judge’s Role in Adapting Model Instructions

In Virginia, judges possess the authority – and responsibility – to adapt Virginia Model Jury Instructions to the specific facts and legal issues of each case. While the model instructions provide a solid foundation, they aren’t always perfectly suited to every scenario.

Judges may modify language for clarity, add or remove provisions based on the evidence presented, and ensure the instructions accurately reflect the applicable law. This adaptation requires careful consideration and a deep understanding of both the model instructions and the case at hand.

The judge’s role is to craft instructions that are fair, impartial, and accurately guide the jury’s deliberations, ensuring a just outcome.

XV. Recent Updates to Virginia Model Jury Instructions (2022-2023 Edition)

The Virginia Model Jury Instructions underwent revisions in the 2022-2023 edition, reflecting changes in case law and statutory amendments. These updates, published by the Virginia Model Jury Instructions Committee, aim to maintain the instructions’ accuracy and relevance.

The updated edition of Virginia Model Jury Instructions ⎯ Civil, authored by the Committee appointed by the Chief Justice, incorporates recent legal developments. Practitioners should carefully review these changes to ensure their instructions align with the current state of the law.

Updates address various areas of civil practice, enhancing clarity and providing guidance on emerging legal issues. Staying current with these revisions is crucial for effective advocacy.

XVI. Annotations and Commentary on Instructions

Virginia Model Jury Instructions are often accompanied by detailed annotations and commentary, providing valuable context for legal professionals. These resources, typically found within publications like ProView Plus Print: VA Jury Instructions, explain the rationale behind specific instructions and offer guidance on their application;

Annotations frequently cite relevant case law and statutes, supporting the legal basis of each instruction. Commentary clarifies potential ambiguities and addresses common challenges in applying the instructions to diverse factual scenarios.

Understanding these annotations is crucial for tailoring instructions to the specific needs of a case, ensuring they accurately reflect the applicable law and effectively communicate legal principles to the jury.

XVII. Importance of Accurate Instruction Statements

The precision of Virginia Model Jury Instructions is paramount, as these statements directly inform the jury’s understanding of the law and their subsequent deliberations. An inaccurate or misleading instruction can fundamentally alter the outcome of a trial, potentially leading to reversible error.

Proposed instructions, as noted in legal precedents, must constitute an “accurate statement of the law” to be considered by the court. Counsel have a responsibility to ensure instructions reflect current case law and statutory provisions.

Clear, concise language is vital, avoiding legal jargon that jurors may not comprehend. Accurate instructions safeguard the fairness and integrity of the judicial process in Virginia.

XVIII. Case Law Supporting Jury Instructions

Virginia’s legal framework heavily relies on established case law to validate and refine its jury instructions. Courts consistently emphasize the necessity of instructions aligning with existing precedents, ensuring legal soundness and consistency across trials.

The principle that a proposed instruction accurately stating the law should not be withheld is rooted in numerous judicial decisions. These rulings underscore the importance of instructions reflecting the current state of Virginia jurisprudence.

Furthermore, appellate courts frequently review jury instructions for errors, referencing relevant case law to determine if any misstatements prejudiced the outcome. This continuous scrutiny reinforces the vital link between instructions and legal authority.

XIX. Common Challenges in Applying Jury Instructions

Despite the clarity aimed for in Virginia Model Jury Instructions, practical application often presents challenges. Counsel frequently grapple with adapting standardized instructions to the unique facts of individual cases, requiring careful tailoring to avoid misrepresentation.

Objecting to opposing counsel’s proposed instructions can be complex, demanding a thorough understanding of relevant case law and the nuances of instruction language. Judges face the difficult task of balancing model instruction adherence with the need for case-specific relevance.

Ensuring jurors fully comprehend the legal concepts within instructions remains a persistent hurdle, necessitating clear and concise phrasing. Recent updates attempt to address these issues, but ongoing refinement is crucial.

XX. Future Trends in Virginia Jury Instruction Development

The evolution of Virginia Model Jury Instructions will likely focus on enhanced clarity and accessibility, driven by feedback from practitioners and judicial observations. Expect continued refinement of language to minimize juror confusion, particularly regarding complex legal principles.

Increased emphasis on pattern instructions for emerging areas of law, such as technology-related disputes, is anticipated. Digital delivery and interactive instruction formats may become more prevalent, leveraging technology to improve comprehension.

Further integration of recent case law and statutory changes will remain a priority, ensuring instructions accurately reflect the current legal landscape. Collaboration between the committee and legal scholars will likely continue, fostering innovation and best practices.

alden last guide

Alden Last Guide: A Comprehensive Overview (Updated 12/10/2025)

This guide, updated today, 12/10/2025, delves into Alden shoe lasts, offering sizing advice and fit experiences gleaned from forums and retailers.

Alden’s reputation for quality stems significantly from its diverse range of shoe lasts – the foot-shaped forms around which shoes are constructed. Understanding these lasts is crucial for achieving a comfortable and aesthetically pleasing fit. Different lasts cater to varying foot shapes and preferences, impacting everything from width and volume to overall comfort.

The “last” isn’t merely a mold; it dictates the shoe’s profile and how it interacts with your foot. Alden utilizes numerous lasts, each with unique characteristics. Sizing isn’t always straightforward, as a size in one last may differ significantly in another. Factors like vamp construction, as noted in discussions on Styleforum, add complexity, especially with models like the Leisure Handsewn Penny Loafer.

Understanding the Importance of Last Selection

Choosing the correct Alden last is paramount to a satisfying footwear experience. A poorly chosen last can lead to discomfort, ranging from heel slippage and instep pressure to an overall ill-fitting shoe. Ignoring last selection can negate the benefits of Alden’s quality materials and construction.

Foot anatomy varies greatly; width, volume, and arch height all play a role. Some lasts, like the Aberdeen, may lack the support found in others, such as Whites 55 or Viberg 2040, as noted in Reddit discussions. Proper fit isn’t solely about length – the last’s shape must complement your foot’s contours. Prioritizing comfort is key; Alden leather will mold over time, but initial fit should never be painful.

Common Alden Lasts and Their Characteristics

Alden utilizes a variety of lasts, each offering a distinct fit profile. The Barrie, Modified, and Trubalance are frequently discussed, with sizing often being true-to-size for many wearers, though variations exist. The Plaza last is also popular, often fitting wider.

Understanding these differences is crucial. Some users find the Modified last wider than the Barrie. Lasts like Copley, Grant, Leydon, and Tremont often correlate with an AE 5-Last fit. The Aberdeen last, commonly found in wingtip boots, may require consideration for those needing more arch support or a narrower heel counter, as compared to other lasts.

The Barrie Last

The Barrie last is a cornerstone of Alden’s offerings, known for its classic, moderately rounded toe and generally accommodating fit. Many find it a reliable choice, often sizing their Aldens based on this last. However, individual experiences vary; some users report needing a 10C in Barrie, while a 10.5C works for other lasts.

It’s considered a versatile last, suitable for various Alden models. While generally true-to-size, it’s essential to consider foot volume and width. Those with wider feet might find it slightly constricting, while those with narrower feet may appreciate the snugger fit. Careful consideration of width (B, C, D, E) is vital when selecting Barrie-lasted shoes.

The Modified Last

The Alden Modified last presents a slightly more modern silhouette compared to the Barrie, featuring a more elongated and streamlined shape. It’s often described as wider than the Barrie last, particularly in the forefoot, making it a popular choice for those with broader feet. However, anecdotal evidence suggests this isn’t universally true, with some finding it comparable in width.

Sizing in the Modified last can be tricky; some users recommend going down a half size if you typically wear a Barrie 10.5C. It’s crucial to consider the specific model, as vamp shape also influences fit. The Modified last is frequently found on Alden’s shell cordovan offerings, enhancing its appeal for discerning shoe enthusiasts.

The Trubalance Last

The Alden Trubalance last is recognized for its balance between a classic and contemporary aesthetic. It generally fits similarly to the Barrie and Modified lasts, often accommodating a wider range of foot shapes. Users frequently report a comfortable fit, though individual experiences vary. It’s considered a versatile option, suitable for various Alden models.

Sizing in the Trubalance last tends to be consistent with one’s standard Alden size, but as with all lasts, trying before buying is recommended. It’s often a good starting point for those new to Alden footwear, offering a blend of comfort and style. The Trubalance is a reliable choice for those seeking a well-rounded fit.

The Plaza Last

The Alden Plaza last is frequently mentioned alongside the Hampton last, as they share similar characteristics. It’s generally considered wider and more accommodating than the Barrie or Modified lasts, particularly in the forefoot. Many users find it a comfortable choice for those with wider feet or who prefer a roomier fit.

However, some individuals report needing to size down or utilize heel grips to prevent slippage, as the Plaza last can sometimes feel a bit loose. It’s often found on dress shoes and loafers. Comparing it to the Aberdeen, the Plaza generally offers a less structured and more relaxed feel, prioritizing all-day comfort.

Alden Lasts: Sizing Considerations

Determining the correct size with Alden shoes requires careful consideration, as lasts significantly impact fit. General guidelines suggest starting with your Brannock device measurement, but this is merely a starting point. Different lasts necessitate adjustments; for example, the Barrie, Modified, and Trubalance lasts often fit true-to-size for many, while the Hampton and Plaza may require a half-size down.

Width is equally crucial. Alden offers widths from B to E, with D being the most common. A wider foot may benefit from a C, D, or E, while a narrower foot might prefer a B. Remember, quality leather will stretch and mold, but starting with a proper fit minimizes discomfort and maximizes long-term wearability.

General Sizing Guidelines for Different Lasts

Navigating Alden sizing demands understanding how each last influences fit. Users report the 10.5C often works well for lasts like Copley, Grant, Leydon, and Tremont – comparable to an Allen Edmonds 5-Last. However, the Modified last tends to run wider than the Barrie. For the Hampton, Plaza, and Aberdeen lasts, sizing down a half-size, to 11B, is frequently recommended.

The Van last often aligns with a 10C. It’s crucial to remember these are anecdotal observations. Individual foot shapes vary. Prioritize comfort; a snug, but not painful, fit is ideal. Allow for leather stretching, but avoid relying on it to compensate for a drastically incorrect initial size.

Comparing Last Widths (B, C, D, E)

Alden offers varying widths – B, C, D, and E – to accommodate diverse foot volumes. Width ‘B’ is the narrowest, suitable for those with slender feet. ‘C’ provides a standard-narrow fit, while ‘D’ is considered the standard width, fitting most individuals comfortably. Width ‘E’ caters to those needing extra room, ideal for wider feet or those preferring a more relaxed feel.

Users note the Modified last can feel wider overall. Brannock device measurements are a starting point; a 9.5D/E reading doesn’t guarantee that’s the perfect Alden size. Consider your foot’s specific shape and volume when selecting a width. Don’t hesitate to try multiple widths to find the best fit.

Specific Last Fit Experiences & User Feedback

Real-world experiences reveal nuanced fit characteristics across Alden lasts. The Aberdeen last, while stylish, receives feedback suggesting it lacks the comfort and support found in lasts like Whites 55 or Viberg 2040. Users describe it as less contoured in the heel and midfoot. Conversely, the Modified and Plaza lasts are often praised for a more secure, supportive fit.

Hampton/Plaza lasts generally fit true to size, but width can be a factor. One user found the Modified last wider than the Barrie. Remember, anecdotal sizing information (like a 10.5C for Copley/Grant) is a starting point, not a definitive rule. Individual foot shapes vary significantly.

Aberdeen Last: Comfort and Support Analysis

The Aberdeen last, frequently used for Alden boots, presents a specific fit profile. User feedback indicates it may not be the most comfortable or supportive option for all foot types. Compared to lasts like Whites 55, Viberg 2040, Alden Modified, or Plaza, the Aberdeen generally offers a less contoured heel counter and midfoot.

This results in reduced arch support and a potentially looser feel. Individuals accustomed to more structured lasts may find the Aberdeen less secure. Brannock measurements often suggest a 9.5D/E, but actual fit can lean towards a wider E width and slightly shorter length (around 9.25). Consider this when ordering.

Hampton/Plaza Lasts: Fit and Width Observations

The Hampton and Plaza lasts are often mentioned together due to their similar characteristics. Sizing information suggests these lasts tend to run slightly larger, with some users recommending a size 11B for those typically wearing a 10.5C in other Alden lasts. They are generally considered to be wider than the Barrie or Modified lasts, offering more room for broader feet.

However, individual experiences vary. Some find the Plaza last particularly accommodating in width, while others note the Hampton can feel snug. Careful consideration of foot volume is crucial. These lasts are popular choices for dress shoes and loafers, prioritizing a comfortable, classic fit.

Troubleshooting Common Fit Issues

Addressing fit issues is crucial for enjoying your Alden investment. A common problem is a loose heel, often remedied with heel grips, though selecting the correct size and last initially is preferable. Instep pressure can occur, particularly with lower-volume feet; consider models with higher vamps or alternative lacing systems to alleviate this.

Remember that Alden’s quality leather requires a break-in period, but shoes should never be painfully tight from the start. Don’t expect instant perfection. Prioritize comfort as your primary guide. If issues persist, consulting with an Alden retailer for expert advice is highly recommended.

Addressing Loose Heels in Alden Shoes

Loose heels are a frequently reported fit issue with Alden shoes. While heel grips can offer a temporary solution by filling excess space, they aren’t a permanent fix. Often, the root cause is an incorrect shoe size or an unsuitable last for your foot shape. Trying a smaller size or a last that fits more snugly around the heel is often the best approach.

Consider the volume of your foot; a lower-volume foot may experience more slippage. Ensure proper lacing, if applicable, to secure the heel. If the problem persists despite these measures, professional adjustments from a cobbler might be necessary. Prioritize finding the correct fit initially to avoid ongoing issues.

Dealing with Instep Pressure

Instep pressure in Alden shoes can cause discomfort, often stemming from a low-volume foot or a last with insufficient instep height. Selecting shoes with a higher vamp – the top part of the shoe – can alleviate this issue by providing more room. Alternatively, exploring different lacing systems might offer a more customized fit, reducing pressure points.

Remember that new Alden shoes require a break-in period, and leather will mold to your foot over time. However, persistent and significant instep pressure indicates a poor fit. Don’t force the fit; prioritize comfort. Consider seeking advice from Alden retailers to identify lasts better suited to your foot’s unique shape.

Alden Lasts and Shoe Models: A Correlation

Alden strategically pairs specific lasts with different shoe models to optimize fit and function. For boots, you’ll frequently find the Aberdeen last, though others like the Trubalance and Modified are also utilized. The Aberdeen, while stylish, may not offer the same support as lasts from other bootmakers.

Loafers and dress shoes often feature the Barrie, Modified, Plaza, and Hampton lasts. The Barrie is known for its sleek profile, while the Modified provides a wider toe box. Plaza and Hampton lasts offer varying degrees of width and volume. Understanding these correlations is crucial when selecting Alden shoes, ensuring the model’s inherent design complements the chosen last’s characteristics.

Lasts Commonly Used for Boots

Alden frequently employs the Aberdeen last for many of its boot offerings, particularly wingtips and work-style boots. However, the Trubalance and Modified lasts also appear in certain boot constructions, offering alternatives for varying foot shapes. The Aberdeen last, while aesthetically pleasing, receives mixed reviews regarding comfort and support compared to lasts from brands like White’s or Viberg.

Users note the Aberdeen’s heel counter isn’t as contoured or supportive as others. The Modified last, conversely, provides a wider fit, potentially suiting those with broader feet. Careful consideration of the last is vital, as it significantly impacts the overall boot experience, influencing both comfort and long-term wearability.

Lasts Commonly Used for Loafers & Dress Shoes

For loafers and dress shoes, Alden leans heavily on the Barrie, Modified, and Plaza lasts. The Barrie last is renowned for its classic, elegant shape and is frequently used in Alden’s more formal offerings. The Modified last provides a roomier fit, appealing to those preferring extra width or having wider feet. It’s often noted as being wider than the Barrie.

The Plaza last, similar to the Hampton, offers a refined silhouette. However, the choice can be complex; the Leisure Handsewn Penny Loafer presents a three-dimensional fitting challenge due to the vamp’s influence. Understanding these nuances is crucial for selecting the ideal last for optimal comfort and style;

Resources for Finding Your Alden Fit

Determining your perfect Alden fit requires utilizing available resources. Begin with a Brannock device measurement as a starting point, though remember length and width can vary between lasts. It’s often closer to 9.25 in length and E width than D.

Crucially, seek expert advice from Alden retailers. Experienced staff can assess your foot shape and recommend appropriate lasts and sizes. Online forums, like Styleforum and Reddit’s r/goodyearwelt, offer valuable anecdotal sizing information from fellow Alden enthusiasts. Remember that Alden leather requires break-in time, but initial comfort is paramount.

Utilizing Brannock Devices for Initial Sizing

A Brannock device provides a foundational measurement, but it’s not a definitive Alden size. Typically, a 9.5D/E is a guideline, but individual feet and last shapes necessitate adjustments. Length measurements are crucial, but width is equally important, as Alden offers varying widths (B, C, D, E).

Remember, Brannock readings are a starting point; consider your foot volume and any specific fit preferences. Some users find their true size is slightly smaller than the Brannock indicates. Always cross-reference with last-specific sizing charts and user feedback to refine your initial estimate before purchasing.

Seeking Expert Advice from Alden Retailers

Knowledgeable Alden retailers are invaluable resources. They possess extensive experience with various lasts and can offer personalized recommendations based on your foot shape and preferences. Don’t hesitate to describe any fit issues you’ve encountered with other shoes.

Experienced staff can assess your feet, discuss your needs, and suggest appropriate lasts and sizes. They can also explain the nuances of each last, such as the Barrie’s classic shape or the Trubalance’s wider toe box. Leveraging their expertise significantly increases your chances of finding the perfect Alden fit, avoiding costly returns and ensuring lasting comfort.