
This guide details installing a K&N air filter on your Chevy ZR2 (2019-2021). It covers preparation, removal of the stock system, and proper K&N installation procedures.
Numerous online resources, including YouTube videos from 2021, 2022, 2023, 2024 and 2025, demonstrate the process, highlighting tool prep and sensor considerations.
Overview of Performance Benefits
Installing a K&N filter on your Chevy ZR2 offers several potential performance enhancements. Increased airflow to the engine can result in modest horsepower and torque gains, improving throttle response and overall drivability.
Many ZR2 owners report a noticeable difference, particularly when combined with other modifications. The washable and reusable nature of K&N filters eliminates the need for frequent replacements, offering long-term cost savings.
Furthermore, the improved filtration can contribute to better engine protection, safeguarding against harmful contaminants. Online discussions confirm these benefits, with users noting improved engine sound and efficiency.
Tools and Materials Needed
For a successful K&N filter installation on your Chevy ZR2, gather these essential tools and materials. You’ll require a screwdriver set (Phillips and flathead), socket wrench with various sizes, and potentially pliers.
A hose clamp is crucial, often included in the K&N kit. Ensure you have the K&N air filter kit specifically designed for your ZR2 model year (2019-2021).
Consider a ProClip phone mount for referencing installation videos. An XPEL PRIME protective film can also be useful. Access to Amazon for parts is beneficial, and a clean workspace is recommended.

Preparing for Installation
Before starting, review installation guides and videos (2021-2025); Ensure you have all necessary tools and the correct K&N kit for your Chevy ZR2.
Safety Precautions
Prioritize safety during the K&N filter installation on your Chevy ZR2. Disconnect the negative battery terminal to prevent electrical shorts while working near the MAF sensor.
Ensure the engine is completely cool before beginning to avoid burns. Wear safety glasses to protect your eyes from debris during removal of the factory air intake components.
Work in a well-ventilated area. Be mindful of sharp edges on the intake tubes and housing. If unsure about any step, consult a professional mechanic or detailed online resources from 2024 and 2025.
Gathering Necessary Tools
Assemble the required tools before starting your K&N filter installation on the Chevy ZR2. You’ll need a socket set, including extensions and various sizes, and screwdrivers (Phillips and flathead).
A hose clamp pliers will be beneficial for removing and installing clamps. Consider a Torx bit set for specific ZR2 fasteners. A clean work surface and a container for organizing parts are also recommended.
Refer to installation guides from 2021-2025 for specific tool recommendations, and have a shop towel handy for cleaning components during the process.
Reviewing the K&N Filter Kit Contents
Before installation, carefully inventory the K&N filter kit for your Chevy ZR2. Ensure you have the K&N air filter itself, the filter adapter (if applicable), and a new hose clamp.
Check for any included mounting brackets or hardware specific to the ZR2 model. Verify the presence of instructions, though online resources from 2021-2025 offer supplemental guidance.
Confirm all listed components are present to avoid interruptions during installation. Familiarize yourself with each part’s purpose to streamline the process.
Removing the Stock Air Intake System
Begin by disconnecting the MAF sensor and loosening intake tubes. Remove the factory air filter housing, preparing for the K&N installation, as shown in guides from 2024.
Disconnecting the Mass Air Flow (MAF) Sensor
Carefully disconnect the electrical connector from the Mass Air Flow (MAF) sensor. This is a crucial first step in removing the stock air intake system on your Chevy ZR2. Ensure you gently release the connector clip to avoid damaging it.
Several online resources, including installation guides from 2021 and 2025, emphasize the importance of handling the MAF sensor with care. Avoid pulling on the wires themselves; always grasp the connector body. Disconnecting the MAF prevents potential electrical issues during the intake swap. Remember to note the connector’s orientation for reinstallation later.
Loosening and Removing Air Intake Tubes
After disconnecting the MAF sensor, loosen the clamps securing the air intake tubes. These clamps connect the tubes to the throttle body and the factory air filter housing on your Chevy ZR2. Use a screwdriver or socket to carefully loosen them – avoid excessive force.
Installation videos from 2024 and 2025 demonstrate gently twisting and pulling the tubes to detach them. Be mindful of any vacuum lines or other sensors attached to the intake tract. Once loose, carefully remove the tubes, setting them aside for potential reuse or reference during the K&N installation.
Removing the Factory Air Filter Housing
With the air intake tubes disconnected, proceed to remove the factory air filter housing. Typically, this housing is secured by several bolts or clips. Locate these fasteners and use the appropriate tool – often a socket wrench or screwdriver – to remove them.
Online resources from 2021 and 2022 emphasize carefully lifting the housing once unfastened, as it may contain loose debris. Inspect the area for any remaining connections or hoses before completely removing the factory air box, preparing the space for the K&N filter adapter.

Installing the K&N Filter Adapter
Securely install the filter adapter into the K&N air filter. Use the provided hose clamp to ensure a tight and reliable connection, preventing air leaks.
Attaching the Adapter to the K&N Filter
Carefully slide the K&N filter adapter onto the inlet of the new K&N air filter. Ensure it’s fully seated and aligned correctly before proceeding with securing it. This step is crucial for establishing a proper seal and maximizing airflow efficiency.
Refer to installation guides and videos from 2021-2025 for visual assistance. Pay close attention to the adapter’s orientation; incorrect placement can lead to fitment issues. Double-check compatibility with your specific Chevy Colorado ZR2 model (2019-2021) or Silverado ZR2.
A snug fit is essential before tightening the hose clamp.
Securing the Adapter with the Hose Clamp
Position the provided hose clamp over the connection point where the K&N filter adapter meets the K&N air filter. Tighten the clamp gradually and evenly, avoiding over-tightening, which could damage the filter or adapter. A secure connection is vital to prevent air leaks and maintain optimal engine performance.
Online resources from 2024 emphasize the importance of a firm, yet gentle, tightening process. Ensure the clamp is fully engaged and doesn’t slip during operation. This step is frequently highlighted in Chevy ZR2 installation guides.
Verify clamp placement before final tightening.

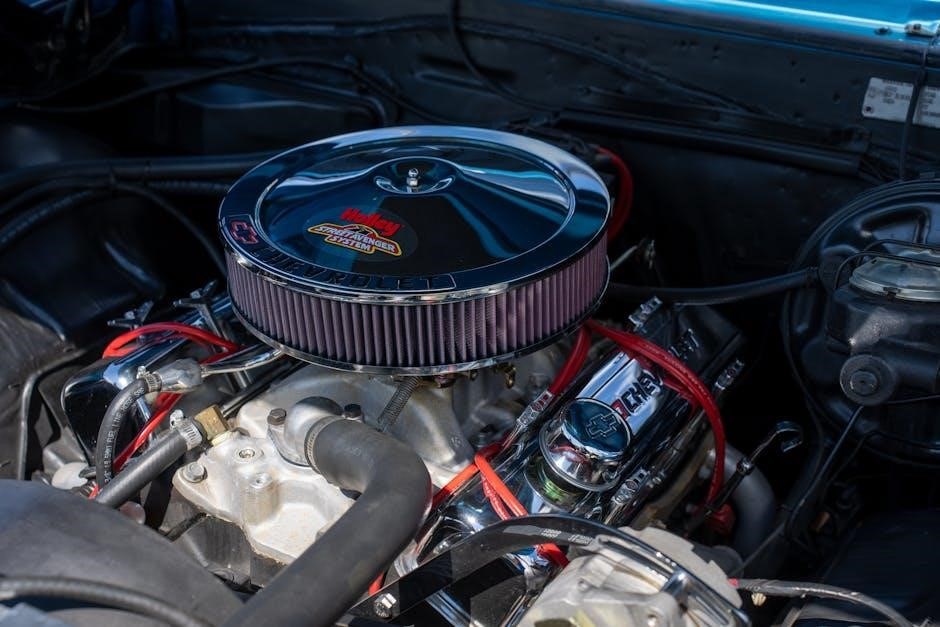
Installing the K&N Air Filter
Carefully position the K&N air filter into the intake, ensuring a snug fit. Proper alignment and a secure seal are crucial for optimal airflow and filtration.
Positioning the Filter in the Air Intake
Begin by carefully aligning the K&N filter with the air intake opening on your Chevy ZR2. Ensure the filter’s flange or sealing surface makes full contact with the intake adapter.
Avoid forcing the filter; gentle pressure is sufficient. Online resources from 2021 and 2024 emphasize proper fitment to prevent airflow restrictions or leaks. Double-check that the filter isn’t obstructing any nearby sensors or components.
Confirm the filter is seated correctly before proceeding to secure it with the hose clamp, as detailed in installation guides available online. A properly positioned filter maximizes performance.
Ensuring a Proper Seal
A tight seal between the K&N filter and the intake adapter is crucial for optimal performance on your Chevy ZR2. After positioning the filter, securely tighten the provided hose clamp.
Avoid over-tightening, which could damage the filter or adapter. Online resources from 2024 suggest checking for gaps or irregularities around the seal. A visual inspection, combined with gentle pressure, can confirm a secure fit.
Any leaks will compromise airflow and potentially affect engine performance. Regularly inspect the seal during maintenance, as highlighted in K&N’s official documentation.
Connecting the Air Intake Tubes
Reattach the air intake tubes to both the throttle body and the newly installed K&N filter adapter, ensuring secure connections for optimal airflow.
Reattaching the Tubes to the Throttle Body
Carefully align the air intake tube with the throttle body connection point. Gently push the tube onto the throttle body, ensuring it seats fully and securely. A proper fit is crucial to prevent air leaks and maintain engine performance.
Tighten the hose clamp securing the tube to the throttle body. Do not overtighten, as this could damage the tube or the throttle body housing. A snug fit is sufficient. Double-check the connection to confirm it’s firmly attached, referencing installation guides from 2024 and 2025 for visual aids.
Verify the tube isn’t kinked or obstructed, allowing for unrestricted airflow.
Connecting Tubes to the K&N Filter Adapter
Align the air intake tubes with the K&N filter adapter’s connection points. Gently push the tubes onto the adapter, ensuring a secure and airtight seal. Proper alignment prevents airflow restrictions and maintains optimal engine efficiency.
Secure each tube to the adapter using the provided hose clamps. Tighten the clamps firmly, but avoid overtightening to prevent damage. Refer to installation videos from 2021 and 2022 for correct clamping techniques.
Inspect the connections for any gaps or looseness, ensuring a complete seal.
Reconnecting the MAF Sensor
Carefully reattach the Mass Air Flow (MAF) sensor’s electrical connector. Ensure it clicks securely, avoiding damage. Online resources emphasize protecting the sensor during installation.
Carefully Reconnecting the Electrical Connector
When reconnecting the MAF sensor, exercise extreme caution. Gently align the electrical connector, ensuring the pins aren’t bent or damaged. A firm, audible click confirms a secure connection; avoid forcing it.
Several online guides from 2024 and 2025 stress the importance of a proper seal to prevent error codes. Double-check the connector’s locking mechanism. A loose connection can trigger a Check Engine Light, impacting performance.
Inspect the connector for any debris or corrosion before reattachment. A clean connection ensures accurate sensor readings, vital for optimal engine operation after the K&N filter installation.
Verifying the Sensor is Secure
After reconnecting the MAF sensor, thoroughly verify its security. Gently tug on the connector – it should resist movement without excessive force. A loose connection is a common cause of post-installation issues, triggering Check Engine Lights.
Resources from 2025 emphasize visually inspecting the locking tabs on the connector to ensure they’ve fully engaged. Confirm no wires are pinched or damaged during the process.
Proper sensor security is crucial for accurate airflow readings, maintaining optimal engine performance with the new K&N filter. A secure connection prevents potential airflow restrictions and sensor errors.

Securing the Air Intake System
Tighten all clamps and fasteners on the K&N intake system. Double-check connections to prevent air leaks, ensuring a secure and optimized airflow for your ZR2.
Tightening Clamps and Fasteners
Begin by systematically tightening all hose clamps connecting the K&N filter adapter to the intake tubes and throttle body. Ensure they are snug, but avoid over-tightening, which could damage the components. Next, secure any mounting brackets used to support the air intake system, verifying they are firmly attached to the vehicle’s chassis.
Pay close attention to the MAF sensor housing, confirming its fasteners are properly tightened to maintain a reliable electrical connection. A thorough check of all connections is crucial for preventing air leaks and ensuring optimal engine performance. Refer to the K&N kit’s instructions for specific torque specifications, if provided.
Checking for Loose Connections
After tightening all clamps and fasteners, meticulously inspect the entire air intake system for any potential loose connections. Gently tug on each tube and hose to confirm a secure fit. Focus particularly on the connections at the throttle body, MAF sensor housing, and K&N filter adapter.
Visually examine all clamps, ensuring they are correctly positioned and fully engaged. Any looseness could lead to air leaks, impacting engine performance and potentially triggering a check engine light. A careful review now prevents future issues and ensures a reliable installation.
Post-Installation Checks
Verify proper function by starting the engine and listening for unusual noises. Check for air leaks and confirm the MAF sensor operates correctly after installation.
Starting the Engine and Listening for Issues
After installing the K&N filter, start your Chevy ZR2’s engine and allow it to idle. Carefully listen for any atypical sounds, such as hissing, whistling, or rattling, which could indicate an air leak or loose connection within the intake system.
Pay close attention to the engine’s overall sound; a smooth, consistent idle is ideal. Any rough idling or hesitation suggests a potential problem. Online resources from 2024 and 2025 emphasize the importance of this initial auditory check for successful installation.
Checking for Air Leaks
Following the engine start, thoroughly inspect the entire K&N air intake system for potential air leaks. Visually examine all connections – the filter adapter, intake tubes, and throttle body – ensuring clamps are securely tightened. A common method involves spraying a small amount of carburetor cleaner around connections while the engine idles.
Any change in engine RPM indicates a leak. Resources from 2021 and 2022 highlight this technique. Address any leaks immediately to maintain optimal engine performance and prevent potential damage.
Verifying MAF Sensor Functionality
After reconnecting the Mass Air Flow (MAF) sensor, confirm its proper operation. A diagnostic scan tool can read MAF sensor data, verifying it falls within the manufacturer’s specified range. Observe the engine’s behavior; a properly functioning MAF sensor ensures smooth idling and responsive acceleration.
Online discussions from 2024 and 2025 emphasize the importance of a secure connection. If issues arise, double-check the connector and consider cleaning the sensor carefully, avoiding damage.
K&N Filter Maintenance
Regular cleaning and re-oiling are crucial for K&N filter performance. Follow K&N’s recommended schedule, utilizing their cleaning kit to maintain optimal airflow and filtration.
Cleaning the K&N Filter
Proper cleaning extends your K&N filter’s lifespan and maintains performance. Begin by removing the filter from your Chevy ZR2. Apply K&N filter cleaner liberally, allowing it to soak and dissolve dirt and grime for approximately 20-30 minutes.
Gently rinse the filter with low-pressure water, moving from the clean side to the dirty side to avoid forcing contaminants further into the filter media. Avoid using soap or detergents, as these can damage the filter. Allow the filter to air dry completely – do not use compressed air or heat – before re-oiling.
A thoroughly cleaned filter ensures optimal airflow and protection for your ZR2’s engine.
Re-oiling the K&N Filter
After cleaning and completely drying your K&N filter, re-oiling is crucial for optimal performance. Apply K&N filter oil evenly across the filter media, allowing it to wick into the material. Avoid over-oiling, as excess oil can contaminate the MAF sensor in your Chevy ZR2.
A light coating of red oil is sufficient; the filter should appear slightly pink, not saturated. Let the oil soak in for approximately 20 minutes before reinstalling. This ensures proper particle capture and maintains the filter’s efficiency, protecting your ZR2’s engine.
Recommended Cleaning Schedule
For your K&N air filter on your Chevy ZR2, cleaning frequency depends on driving conditions. Generally, inspect the filter every 5,000-10,000 miles. Dusty or off-road environments necessitate more frequent checks, potentially every 1,000-3,000 miles.
A visibly dirty filter indicates it’s time for cleaning. Following a consistent schedule ensures optimal airflow and engine protection. Regular maintenance maximizes the filter’s lifespan and maintains the performance benefits you expect from your K&N system in your ZR2.
Troubleshooting Common Issues
Address check engine lights, airflow restrictions, or sensor errors post-installation. Ensure proper connections and a secure seal for optimal K&N filter performance on your ZR2.
Addressing Check Engine Lights
A check engine light after K&N installation often indicates a sensor issue. Verify the MAF sensor is securely connected and free of debris, as discussed in installation guides from 2024 and 2025.
Double-check all connections, ensuring no air leaks exist, which can trigger codes; If the light persists, consider resetting the ECU to allow it to relearn parameters. Some users report successful resolution by ensuring the filter is properly oiled (if applicable) and not over-oiled, preventing sensor contamination.
Consult Chevy ZR2 forums for model-specific code interpretations and solutions.
Resolving Airflow Restrictions
Airflow restrictions post-K&N installation can diminish performance gains. Ensure the K&N filter isn’t over-oiled, as excess oil can impede airflow, a common issue noted in online discussions from 2023 and 2024.
Verify the intake tubes are securely connected to both the throttle body and the K&N filter adapter, eliminating any potential leaks. Inspect the filter itself for obstructions or damage. Confirm the adapter is correctly seated within the filter housing, allowing unrestricted air passage.
Refer to installation videos for proper component alignment.
Dealing with Sensor Errors
MAF sensor errors after K&N installation are often related to improper reconnection or contamination. Double-check the electrical connector is firmly seated on the MAF sensor, as highlighted in guides from 2021 and 2025.
Ensure no oil from the K&N filter has contacted the sensor’s filaments – even a small amount can cause inaccurate readings and trigger a check engine light. If oil contact occurs, a specialized MAF sensor cleaner is required.
Resetting the ECU may resolve minor sensor glitches.
Specifics for Chevy Colorado ZR2 (2019-2021)

Installation notes confirm compatibility with Colorado, ZR2, Trail Boss, and Duramax engines. Ensure the kit includes parts for your specific ZR2 model year (2019-2021).
Model-Specific Installation Notes
ZR2 owners should pay close attention to MAF sensor placement during reinstallation, as incorrect positioning can trigger check engine lights. Several online guides from 2024 and 2025 emphasize this point.
Verify the hose clamp is securely fastened to the K&N filter adapter, preventing air leaks. Compatibility extends to various Colorado trims – Z71, Trail Boss – alongside the ZR2.
When installing on Duramax engines, double-check all connections. Resources suggest using a ProClip phone mount for easy access to installation videos during the process.
Compatibility with Duramax Engines
K&N filters are generally compatible with Duramax engines in the Chevy Colorado ZR2, but careful attention to detail is crucial during installation. Online forums consistently recommend verifying all connections post-installation to avoid performance issues.
Specifically, ensure the MAF sensor is securely connected and functioning correctly, as Duramax engines are sensitive to airflow discrepancies. Resources from 2023 and 2024 highlight this concern.
Double-check the hose clamp tightness on the filter adapter, preventing potential air leaks that could affect engine operation.

Resources and Further Information
Explore the official K&N website for detailed product information and Chevy ZR2 forums for community insights. Numerous YouTube videos (2021-2025) offer visual guidance.
K&N Official Website
The K&N Filters website (knfilters.com) is the primary source for comprehensive product details, including specific fitments for your Chevy ZR2. You’ll find detailed specifications, high-resolution images, and downloadable installation instructions tailored to your vehicle’s year and engine configuration.
Beyond product information, K&N provides valuable resources on filter maintenance, cleaning kits, and re-oiling procedures to maximize the lifespan and performance of your air filter. Explore their FAQ section for answers to common questions and access technical support if needed. The site also features customer reviews and a dealer locator to find authorized K&N retailers near you.
Chevy ZR2 Forums and Communities
Online Chevy ZR2 forums and communities are invaluable resources for real-world installation experiences and troubleshooting advice. Members frequently share detailed guides, photos, and videos of their K&N filter installations, offering insights beyond the official instructions.
These platforms allow you to connect with fellow ZR2 owners, ask specific questions about compatibility, and learn about potential issues or modifications. Search existing threads for discussions related to K&N filters, or start a new thread to seek personalized assistance. Active communities provide a supportive environment for DIY enthusiasts.