
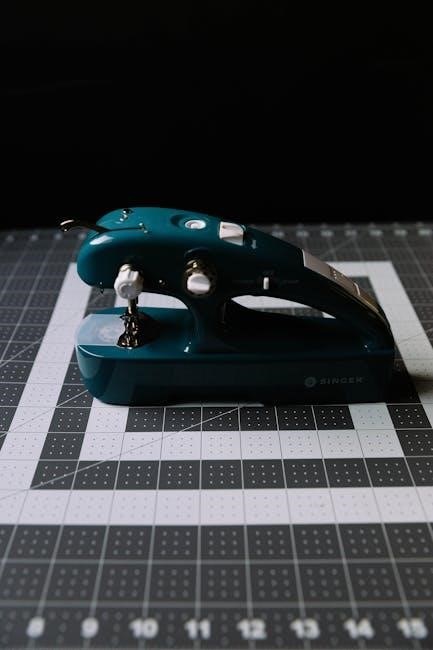
Singer Stylist 7258 Sewing Machine Manual: A Comprehensive Guide
This manual provides detailed instructions for the Singer Stylist 7258, covering setup, operation, troubleshooting, and maintenance for optimal sewing performance.
Welcome to the world of creative sewing with the Singer Stylist 7258! This machine is designed for both beginners and experienced sewists, offering a blend of reliable performance and user-friendly features. As a long-standing and trusted brand – originating in 1851 with the first practical sewing machine – Singer continues to innovate.
The Stylist 7258 boasts a range of stitches, adjustable settings, and convenient functionalities to tackle diverse projects. This manual serves as your comprehensive guide, ensuring you unlock the full potential of your machine. From initial setup to advanced techniques, we’ll cover everything you need to know for successful and enjoyable sewing experiences.
Unboxing and Initial Setup
Carefully unpack your Singer Stylist 7258, ensuring all components are present. These typically include the sewing machine, power cord, foot pedal, accessory kit (containing various presser feet, bobbins, needles, and more), and this instruction manual. Inspect for any shipping damage immediately.
Place the machine on a stable, flat surface with adequate space. Connect the power cord and foot pedal. Before sewing, attach the bobbin case and thread the machine following the detailed threading diagram in this manual. A properly threaded machine is crucial for smooth operation. Familiarize yourself with the basic parts before proceeding.
Machine Features Overview
The Singer Stylist 7258 boasts a robust set of features designed for both beginners and experienced sewers. It offers 100 built-in stitches, including essential, decorative, and stretch stitches, providing versatility for various projects. An automatic needle threader simplifies setup, while the adjustable stitch length and width allow for customization.
The machine includes a top-drop bobbin system for easy bobbin insertion and monitoring. A free arm facilitates sewing cuffs, sleeves, and other cylindrical shapes. The 7258 also features a drop-in bobbin, and a reverse stitch lever for secure seams.
Key Components and Their Functions
The Singer Stylist 7258’s key components work in harmony to deliver precise sewing. The power switch controls operation, while the speed control regulates stitching pace. The stitch selection dial allows choosing from 100 built-in stitches. The bobbin winder prepares bobbins for consistent thread supply.
The presser foot applies pressure to fabric, ensuring even feeding. The feed dogs move fabric under the needle. The needle bar holds the needle, driving it through the fabric. The tension dial adjusts thread tension for balanced stitches. Understanding these functions is crucial for optimal machine performance.
Stitch Selection and Adjustment
The Singer Stylist 7258 offers 100 built-in stitches, selected via the stitch dial. Each stitch is numbered and displayed on the machine for easy identification. Adjust stitch length and width using dedicated dials, influencing the stitch’s appearance and strength. Experimentation is key to achieving desired results.
For optimal results, test stitches on scrap fabric before sewing your project. Adjust tension as needed to prevent puckering or looping. Refer to the stitch guide in the manual for recommended settings for various fabrics and techniques. Mastering stitch selection unlocks creative possibilities.
Threading the Singer Stylist 7258
Proper threading is crucial for smooth sewing. Begin by raising the presser foot and thread spool pin. Guide the thread through the spool pin, tension discs, take-up lever, and finally, the needle. Ensure the thread is securely seated in each component. A numbered threading path diagram is printed directly on the machine for visual guidance.
Incorrect threading causes skipped stitches or tension issues. Double-check each step against the manual’s illustrations. Always use the correct type of thread for your fabric. Consistent threading practice will become second nature, ensuring reliable performance.
Bobbin Winding and Insertion
Winding the bobbin correctly is essential for consistent stitch quality. Place the thread spool on the spool pin and guide the thread through the bobbin winding tension disc. Wind several passes of thread onto the empty bobbin, ensuring even distribution. Once full, trim the thread.
To insert, consult the manual’s diagram for the correct bobbin orientation. The bobbin case clicks into place. Improper insertion can lead to tangled thread or skipped stitches. Regularly check the bobbin thread level during sewing to avoid running out mid-project.
Basic Sewing Techniques
Mastering fundamental techniques unlocks the Singer Stylist 7258’s potential. Begin with practicing straight stitching on scrap fabric, maintaining a consistent seam allowance. Adjust stitch length for different fabric weights. For zigzag stitching, experiment with width and length settings for varied applications like finishing raw edges.
Always use the appropriate needle for your fabric type. Guide the fabric gently; never force it. Consistent pressure on the foot pedal ensures even stitches. Refer to the manual’s stitch guides for recommended settings.
Straight Stitching
The foundation of sewing, straight stitching on the Singer Stylist 7258 requires precision. Select the straight stitch option and a suitable stitch length – typically 2.5mm for general sewing. Ensure the presser foot is lowered before starting. Guide the fabric smoothly, keeping the edge aligned with the seam guide on the needle plate.
Maintain a consistent speed and gentle pressure on the foot pedal. Practice on scrap fabric to develop a feel for the machine. Adjust tension if needed for a balanced stitch. A properly executed straight stitch is crucial for durable seams.
Zigzag Stitching
The Singer Stylist 7258’s zigzag stitch offers versatility for various applications. Select the zigzag stitch and adjust the width and length according to your project needs. Wider stitches are ideal for finishing raw edges, preventing fraying, while narrower stitches are suitable for reinforcing seams.

Practice on scrap fabric to understand the stitch’s behavior. Use a zigzag foot for optimal results. Adjust tension if the stitch appears uneven or puckered. Zigzag stitching is also excellent for decorative effects and sewing stretch fabrics.
Advanced Stitching Options
The Singer Stylist 7258 expands creative possibilities with diverse advanced stitches. Explore decorative stitches for embellishing projects, adding unique textures and patterns to garments or home décor. Master buttonhole sewing with the automatic buttonhole foot, ensuring consistently sized and professionally finished buttonholes.
Experiment with stretch stitches for knit fabrics, preventing puckering and maintaining elasticity. Utilize the blind hem stitch for invisible hems on skirts and trousers. Refer to the stitch guide in your manual for specific applications and recommended settings for each advanced stitch;
Decorative Stitches
The Singer Stylist 7258 boasts a wide array of decorative stitches, allowing for personalized embellishments on various projects. These stitches range from simple patterns to intricate designs, enhancing garments, home décor, and quilting projects. Experiment with different stitch widths and lengths to achieve unique effects.
Consult the stitch chart within the manual to identify each decorative stitch and its recommended uses. Practice on scrap fabric before applying to your final project. Utilize these stitches for monograms, decorative seams, or adding a touch of artistry to any sewing creation;
Buttonhole Sewing
The Singer Stylist 7258 simplifies buttonhole creation with its automatic buttonhole function. This feature ensures consistently sized and professionally finished buttonholes for your garments. The manual provides a step-by-step guide, detailing how to select the appropriate buttonhole foot and adjust the buttonhole size according to your button dimensions.
Practice on scrap fabric to familiarize yourself with the process. Ensure proper fabric stabilization to prevent puckering. The machine offers various buttonhole styles; explore these options for diverse design possibilities. Refer to the manual’s diagrams for precise buttonhole foot placement.
Troubleshooting Common Issues
This section of the manual addresses frequent problems encountered while using the Singer Stylist 7258. Common issues like thread bunching, skipped stitches, and needle breakage are thoroughly explained, alongside practical solutions. The manual emphasizes the importance of proper threading, correct needle selection, and appropriate fabric type for optimal performance.
Detailed diagrams illustrate potential causes and remedies. Always refer to this section before seeking professional repair. Regularly cleaning and oiling the machine, as described elsewhere, can prevent many issues. Remember to always unplug the machine before attempting any troubleshooting steps.
Thread Breakage Problems
Frequent thread breakage can stem from several causes. First, ensure correct threading following the manual’s diagrams precisely. Incorrect threading creates excessive friction. Second, verify the needle is appropriate for the fabric weight; a too-small needle strains the thread. Third, check for burrs or damage on the needle or bobbin case.
Also, confirm you’re using quality thread. Old or low-quality thread weakens easily. Finally, ensure the tension is properly adjusted – too tight or too loose can cause breaks. Re-thread the machine and test with a new needle if problems persist.
Needle Breakage Solutions
Needle breakage is often preventable with careful attention. Always use the correct needle type and size for your fabric. Attempting to sew through thick materials with a fine needle will cause it to snap. Ensure the needle is fully inserted into the machine and tightened securely. Avoid pulling or pushing the fabric while sewing, let the feed dogs do the work.
Inspect the needle regularly for bends or damage. A damaged needle is prone to breaking. Also, confirm the presser foot is correctly installed and applying even pressure. Finally, check for pins or other obstructions in the fabric path.
Maintaining Your Singer Stylist 7258
Regular maintenance ensures your Singer Stylist 7258 operates smoothly for years. Frequent cleaning is crucial; remove lint and dust from the bobbin area and feed dogs after each use. A soft brush is ideal for this. Periodically oil the machine, focusing on moving parts as detailed in the manual.
Inspect the belt for wear and tear, replacing it if it’s cracked or frayed. Proper storage, covered to protect from dust, also extends the machine’s life. Following these steps will prevent issues and maintain optimal performance.
Cleaning and Oiling
Consistent cleaning prevents lint buildup, a major cause of malfunctions. Use a soft brush to remove debris from the bobbin area, feed dogs, and around the needle plate after each sewing session. For stubborn lint, a vacuum cleaner with a brush attachment works well.
Oiling is equally vital. Apply a few drops of sewing machine oil to designated oiling points – consult your manual’s diagram. Avoid over-oiling, as excess oil attracts dust. Regular cleaning and oiling ensure smooth operation and prolong your Singer Stylist 7258’s lifespan.
Belt Replacement
A broken or worn belt prevents the machine from functioning. Begin by disconnecting the power. Access the belt cover, usually located on the machine’s side or back. Carefully remove the old belt, noting its routing around the motor pulley and handwheel.

Install the new belt, ensuring it’s properly seated in the grooves. Reattach the belt cover securely. Before reconnecting power, manually turn the handwheel to confirm the belt engages smoothly. A correctly installed belt is crucial for transferring power and maintaining consistent sewing speed.
Understanding the Manual’s Diagrams
The Singer Stylist 7258 manual utilizes detailed diagrams to illustrate complex procedures. These visuals are essential for understanding threading paths, bobbin insertion, and component locations. Pay close attention to numbered steps accompanying each diagram, as they provide a sequential guide.
Exploded views showcase internal parts, aiding in maintenance and repair. Arrows indicate direction of movement or component placement. Familiarize yourself with these visual cues to effectively troubleshoot and perform adjustments. Diagrams simplify intricate tasks, ensuring accurate machine operation and longevity.
Foot Pedal Operation and Control
The Singer Stylist 7258’s foot pedal governs sewing speed and direction. Gentle pressure initiates slow stitching, while increased pressure accelerates the process. The pedal isn’t simply ‘on’ or ‘off’; it offers variable speed control for precision.
Ensure the pedal cord is securely connected to the machine. A smooth, consistent pressing motion yields even stitches; Releasing the pedal immediately stops the needle. Practice controlling speed for different fabrics and techniques. Proper foot pedal technique is crucial for achieving professional-quality results.
Accessory Usage Guide
The Singer Stylist 7258 includes various accessories to expand sewing capabilities. These include multiple presser feet – a general-purpose foot, a zipper foot, and a buttonhole foot – each designed for specific tasks. Refer to the manual’s diagrams for correct attachment.
Needle packs accommodate different fabric types. Bobbins must be compatible with the machine. Utilize the seam ripper for correcting errors. Proper accessory selection and usage enhance project outcomes. Store accessories safely when not in use to prevent loss or damage.
Presser Feet Explained
The Singer Stylist 7258’s presser feet are crucial for diverse sewing applications. The standard foot is ideal for straight and zigzag stitching on most fabrics. The zipper foot facilitates close-to-edge stitching along zippers. A buttonhole foot automates buttonhole creation, ensuring consistent size and shape.
An additional foot may be included for blind hems or decorative stitching. Correct foot selection impacts stitch quality. Always lower the presser foot before starting to sew, ensuring fabric is firmly held. Refer to the manual’s illustrations for proper foot attachment and usage guidelines.
Safety Precautions
Prioritize safety when operating the Singer Stylist 7258. Always disconnect the power cord before threading, changing the needle, or performing maintenance. Keep fingers away from the needle while sewing. Never pull fabric while the machine is running; gently guide it. Use only genuine Singer accessories.
Avoid sewing over pins, as they can damage the needle and machine. Ensure the machine is stable on a flat surface. Supervise children when near the sewing machine. If the machine malfunctions, discontinue use and consult a qualified technician. Regular maintenance enhances safe operation.
Where to Find Additional Resources
For further assistance with your Singer Stylist 7258, explore Singer’s official website (singer.com) for FAQs, downloadable manuals, and troubleshooting guides. YouTube offers numerous video tutorials demonstrating various techniques and repairs. Online sewing communities and forums provide a platform to connect with other users and share experiences.
Consider joining Singer’s online support groups for direct assistance. Local sewing machine retailers often offer classes and repair services. Don’t hesitate to contact Singer’s customer support directly for personalized help. Remember to have your machine’s model number readily available when seeking support.
Singer Stylist 7258: Model Variations & Compatibility
The Singer Stylist 7258 exists in several minor variations, primarily differing in included accessory kits. These variations do not impact core functionality or compatibility with standard Singer accessories. Most presser feet designed for modern Singer machines will work seamlessly with the 7258.
Ensure compatibility when purchasing third-party parts; check product descriptions for “Singer low shank” compatibility. While generally compatible, older Singer attachments may require adapters. Always prioritize genuine Singer parts for optimal performance and longevity. Refer to Singer’s website for a detailed accessory guide.