
Welcome! This comprehensive resource unlocks the art of garment creation, offering step-by-step guides for all skill levels. From foundational techniques to intricate details,
it empowers you to craft beautiful, timeless pieces. Mastering sewing patterns and understanding fabric selection are key to success.
Embark on a journey of creativity, learning essential skills like seam finishes, button attachment, and working with diverse fabrics. Patience and practice are vital!
Getting Started: Essential Tools & Materials
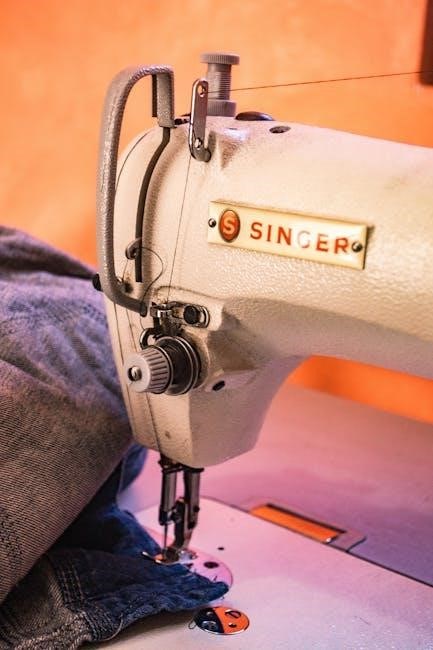
Embarking on your fashion sewing journey requires assembling a foundational toolkit. A quality sewing machine is paramount, offering various stitch options and reliable performance. Don’t underestimate the importance of sharp fabric scissors – dedicated solely to fabric to maintain their edge!
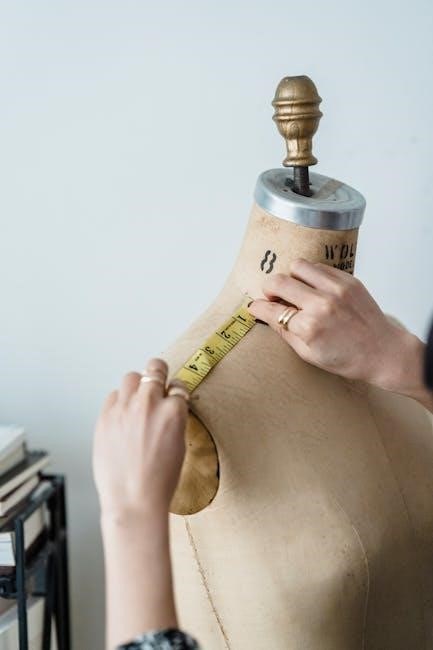
Essential hand-sewing tools include needles in assorted sizes, a comfortable thimble for protection, and seam rippers (because mistakes happen!). Measuring tools are crucial: a flexible measuring tape, a ruler, and a seam gauge ensure accuracy.
Marking tools like tailor’s chalk or fabric pens are vital for transferring pattern markings. Pins, preferably with glass heads (won’t melt under an iron!), securely hold fabric layers together. Iron and ironing board are non-negotiable for pressing seams and achieving a professional finish.
Consider investing in a rotary cutter and cutting mat for precise fabric cutting. Finally, basic materials like thread (matching your fabric), bobbins, and a pin cushion complete your starter kit. Remember, quality tools enhance the sewing experience and yield better results!
Understanding Sewing Patterns
Decoding sewing patterns is fundamental to successful garment construction. Patterns aren’t just lines on paper; they’re blueprints for your creations! Begin by identifying the pattern envelope, which details sizing, fabric recommendations, and finished garment measurements. Don’t assume your ready-to-wear size translates directly – always measure yourself and compare to the pattern’s size chart.
Inside, you’ll find pattern pieces, often nested to save paper. Carefully cut along the designated lines, ensuring accuracy. Understand pattern markings: grainlines, notches (for matching seams), darts, and buttonhole placements. These are crucial for proper alignment and fit.
Pay attention to seam allowances – the space between the stitching line and the fabric edge. Patterns typically include a standard allowance (often 5/8 inch). Read the pattern instructions thoroughly before cutting any fabric. They provide step-by-step guidance, including layout diagrams and finishing techniques.
Practice makes perfect! Start with simpler patterns to build confidence. Don’t rush; understanding the pattern is half the battle. Remember to press pattern pieces before cutting for accurate results.
Fabric Selection for Fashion Sewing
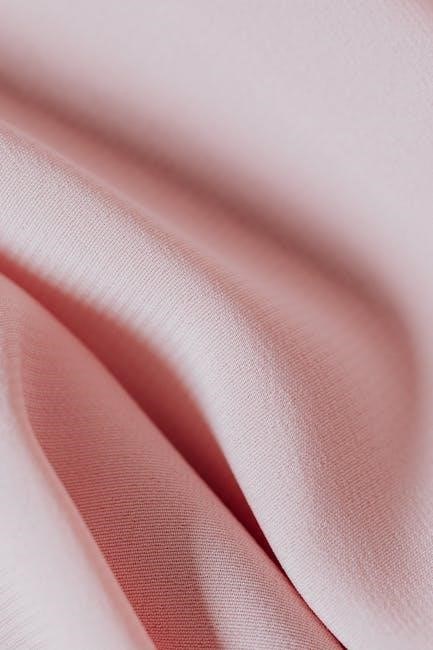
Choosing the right fabric is paramount to achieving a desired look and fit. Consider the garment’s intended use, drape, and your sewing skill level. Woven fabrics, like cotton, linen, and denim, are stable and ideal for structured garments. Knit fabrics, such as jersey and rib knit, offer stretch and comfort, but require different handling techniques.
Fabric weight impacts drape. Lightweight fabrics (chiffon, voile) are flowing, while heavier fabrics (canvas, tweed) provide structure. Fiber content influences fabric properties. Natural fibers (cotton, silk, wool) are breathable, while synthetics (polyester, nylon) offer durability and wrinkle resistance.
Always check the fabric width, as this affects pattern layout. Consider the fabric’s texture and pattern – will it complement the garment’s design? Pre-washing is crucial (discussed later) to prevent shrinkage and color bleeding.
Don’t be afraid to experiment, but start with easier-to-handle fabrics like quilting cotton. Research fabric properties before purchasing. A well-chosen fabric elevates your sewing project!
Pre-Washing Fabric: Why It Matters
Pre-washing fabric is a non-negotiable step in fashion sewing, often overlooked by beginners. It prevents significant issues later in the garment’s life. Shrinkage is the primary concern; washing removes excess dyes and finishes that cause fabric to shrink upon subsequent laundering. Imagine completing a garment only to have it become too small after its first wash!
Color bleeding is another risk. Dark or brightly colored fabrics can transfer dye onto lighter areas of your garment, ruining the finished look. Pre-washing isolates this issue. Furthermore, it softens the fabric, making it more comfortable to work with and wear.
Wash the fabric as you intend to wash the finished garment – similar water temperature and detergent. Dry the fabric in the same manner (machine or line dry). This ensures accurate shrinkage testing. Don’t skip this step; it saves time, frustration, and potentially a ruined project!
Basic Sewing Machine Operation

Understanding your sewing machine is fundamental to fashion sewing. Begin by familiarizing yourself with key components: the power switch, foot pedal, bobbin winder, stitch selector, and stitch length/width dials. Proper threading is crucial – follow your machine’s manual meticulously for both the upper and bobbin threads.
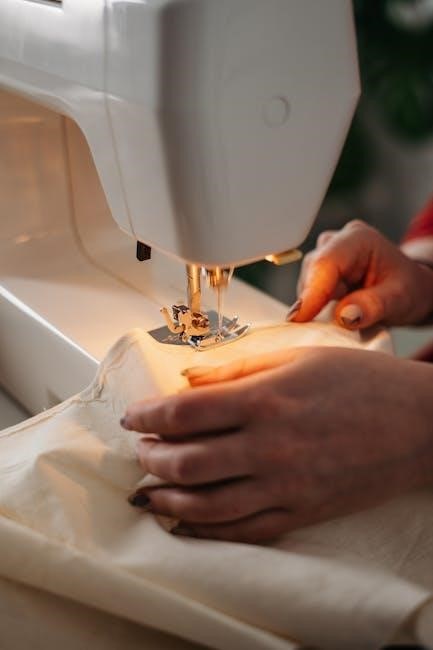
Winding the bobbin correctly ensures even stitching. Practice starting and stopping with the needle down, pivoting fabric, and maintaining a consistent seam allowance. The foot pedal controls speed; gentle pressure yields better control, especially for beginners.
Mastering basic stitches – straight, zigzag – is essential. Experiment with stitch length and width to understand their effects on fabric. Regularly clean and oil your machine to maintain optimal performance. Don’t rush; practice on scrap fabric before tackling your actual project. A well-maintained machine is a happy machine!
Seam Finishes: Preventing Fraying
Seam finishes are vital for garment durability and a professional appearance, preventing fabric fraying and unraveling. Several techniques exist, each suited to different fabrics and project needs. A simple zigzag stitch along the raw edge is a quick and effective solution for many woven fabrics.
For a cleaner finish, consider a serged edge, creating a professional, overlocked seam. Pinked edges, cut with pinking shears, offer a basic fray prevention method, though less durable than other options. French seams encase the raw edge within the seam allowance, providing a very clean and strong finish – ideal for lightweight fabrics.
Bound seams utilize bias tape to enclose the raw edge, adding a decorative touch. Choosing the right finish depends on the fabric weight, intended garment use, and desired aesthetic. Always finish seams immediately after sewing to prevent unraveling.
Hemming Techniques: Achieving a Professional Look
Hemming is the final touch that elevates a garment from homemade to professionally finished. Several techniques cater to different fabrics and styles. A turned-up hem, folded twice and stitched, is a classic and versatile choice, suitable for most woven fabrics. Ensure precise measurements and consistent folding for a neat result.
For lightweight or delicate fabrics, a rolled hem creates a narrow, refined edge. This can be achieved with a rolled hem foot on your sewing machine or hand-rolled for a couture finish. Blind hems, stitched invisibly from the right side, offer a seamless look, ideal for skirts and trousers.
Topstitched hems are visible and add a decorative element, often used on denim or casual garments. Remember to press the hem before stitching for a crisp, clean line. Consistent stitch length and tension are crucial for a professional appearance. A well-executed hem demonstrates attention to detail and enhances the garment’s overall quality.
Sewing Buttons & Creating Buttonholes
Buttons are more than just fasteners; they’re design elements! Securely attaching them requires technique. Always use a thread shank – a few wraps of thread under the button – to allow space for the buttonhole and prevent strain on the fabric. Reinforce the shank by rocking the button gently before knotting the thread.
Buttonholes, however, can be intimidating. Modern sewing machines offer automatic buttonhole features, simplifying the process. Practice on scrap fabric first to adjust settings for your chosen button size and fabric weight. For hand-stitched buttonholes, a buttonhole chisel and careful stitching are essential.
Bound buttonholes, created with fabric strips, offer a polished, durable finish. Claire Shaeffer emphasizes that often the fashion fabric is only along for the ride, so using coordinating or contrasting fabric for bound buttonholes can elevate the design. Proper placement and consistent buttonhole size are key to functionality and aesthetics.
Working with Knit Fabrics
Knit fabrics, known for their stretch and comfort, require a different approach than woven materials. Selecting the right needle is crucial – a ballpoint or stretch needle prevents skipped stitches and fabric runs. Reduce presser foot pressure to avoid stretching the fabric during sewing.
Stabilizers are your friend! Fusible knit interfacing can prevent distortion at necklines and buttonholes. When sewing seams, use a zigzag stitch or a stretch stitch to allow for movement. Avoid pulling or stretching the fabric as you sew; let the machine feed it through.
Serging or using a stretch stitch finish on raw edges prevents unraveling while maintaining elasticity. Remember pre-washing is even more important with knits, as they tend to shrink significantly. Mastering knit fabrics opens a world of comfortable and stylish garment possibilities, from t-shirts to dresses!
Zippers: Installation & Types
Zippers are essential closures, and mastering their installation elevates your sewing projects. Several types exist, each suited for different applications. Standard zippers are versatile for everyday garments, while invisible zippers create a seamless look in dresses and skirts.
Metal zippers offer durability, ideal for jackets and bags, while plastic zippers are lightweight and cost-effective. Installation requires precision. Use a zipper foot for close stitching, and carefully follow the zipper teeth. Practice on scrap fabric first!
Bound buttonholes often accompany zippers, creating a polished finish. Consider the zipper length carefully; it should be slightly shorter than the opening. Remember to backstitch at the beginning and end of each seam to secure the zipper. Don’t rush – a well-installed zipper is a hallmark of quality craftsmanship!
Tailored Pockets: A Step-by-Step Guide
Tailored pockets add functionality and style to garments. Creating them involves precision and attention to detail. Begin by interfacing the pocket opening for stability. Carefully cut out the pocket pieces, ensuring accurate measurements. Pressing is crucial at each stage – a well-pressed pocket looks professional.
Pin the pocket to the garment, aligning it with the marked placement lines. Stitch around the pocket opening, reinforcing the corners for durability. Turn the pocket right-side out and press again. Topstitching around the pocket adds a refined touch and prevents stretching.
Experiment with different pocket styles – patch pockets, welt pockets, and in-seam pockets – to enhance your designs. Adding details like a vine with green thread, or ruffle flaps, can personalize your creations. Remember, patience and practice are key to mastering this technique!
Bindings: Finishing Edges Neatly
Bindings offer a clean and durable finish to raw edges, preventing fraying and adding a decorative element. They’re ideal for necklines, armholes, and garment edges. Begin by creating bias tape – cutting fabric on the true bias provides the necessary stretch and drape. Pressing the bias tape in half lengthwise is essential for accurate application.

Pin the bias tape to the right side of the garment edge, aligning raw edges. Stitch close to the edge, then fold the binding over to the wrong side and press. Secure the folded edge with a second line of stitching, concealing the raw edge completely.
Experiment with different binding widths and fabrics to achieve various looks. Consider using contrasting fabrics for a bold statement or self-fabric for a subtle finish. Remember to take your time and press carefully for a professional result. This technique elevates the overall quality of your sewn garments!
Spaghetti Straps: Construction & Attachment
Spaghetti straps, delicate and stylish, require precision in both construction and attachment. Begin by cutting strips of fabric – typically self-fabric or lightweight bias tape – approximately ¼ to ½ inch wide. Pressing these strips in half lengthwise creates a neat, manageable form.
Enclose the raw edges within the folded fabric and stitch along the open edge, creating a narrow strap. For added durability, consider using a serger to finish the edges before folding. Attaching spaghetti straps requires careful placement and secure stitching.
Pin the straps to the garment, ensuring even spacing and length. Stitch in place, reinforcing the attachment point with a small rectangle or square of stay tape on the wrong side. This prevents the straps from pulling or stretching out of shape. A thread shank can provide extra support. Remember to test the strap length and adjust as needed for a comfortable and flattering fit!
Linings & Structure in Garments
Linings are crucial for elevating garment quality, providing comfort, and enhancing structure. They conceal raw seams, prevent stretching, and add a luxurious feel. Selecting the right lining fabric is key – consider its weight, drape, and compatibility with the fashion fabric. Silk, rayon, and polyester linings are popular choices.
Often, the fashion fabric is “only along for the ride,” as Claire Shaeffer suggests, meaning the lining provides the essential shape and support. When constructing a lined garment, sew the lining separately, mirroring the fashion fabric’s pattern pieces.
Attach the lining at key points – neckline, armholes, and hem – ensuring a smooth, clean finish. Techniques like hand-stitching or machine-basting can create an invisible connection. Interfacing, applied to specific areas, further enhances structure and prevents distortion. Properly installed linings contribute significantly to a garment’s longevity and professional appearance.
The Importance of Pressing Seams
Pressing is arguably as vital as the sewing itself! It’s not merely about removing wrinkles; it’s about shaping the garment, setting seams, and achieving a professional finish. Each seam should be pressed as you sew, not saved for the end. Pressing differs from ironing – it involves lifting and lowering the iron, rather than sliding it, to avoid distorting the fabric.
Proper pressing establishes crisp edges, flattens bulky areas, and ensures a smooth, even drape. Different fabrics require different heat settings; always test on a scrap first. Use a pressing cloth to protect delicate materials. Open seams are generally pressed flat, while topstitched seams are pressed to one side.
Remember, a beautifully constructed garment can be ruined by poor pressing. Don’t rush this step! It’s one of the top tips for beginners – and experienced sewists – to create high-quality, polished results. Pressing truly transforms a homemade item into something special.
Adding Details: Pockets & Decorative Elements
Elevate your garments beyond the basics with thoughtfully added details! Pockets aren’t just functional; they contribute to the overall design. Tailored pockets, whether patch, inseam, or welted, require precision and careful construction. Consider the fabric weight and garment style when choosing a pocket type.
Decorative elements, like ruffles – sometimes called “ruffle flaps” – or vines stitched with contrasting thread, inject personality and flair. Experiment with embroidery, appliqué, or trims to create unique accents. These embellishments can be applied to hems, pockets, or along seams.
Remember to plan these details during the cutting stage to ensure proper placement and alignment. Adding details can extend project time – sometimes by days and multiple trips to the fabric store – but the resulting bespoke piece is well worth the effort. Don’t be afraid to explore your creativity and personalize your creations!
Understanding Thread Shanks & Button Attachment
Securely attaching buttons is crucial for garment longevity and appearance. A “thread shank” – a small post of thread created beneath the button – allows the button to sit properly and prevents strain on the fabric when the garment is worn or washed. Learning when and how to create a thread shank is essential.
Bound buttonholes, often requiring practice, provide a professional finish. These are best created before attaching the buttons, ensuring a perfect fit. For buttons without corresponding buttonholes, a shank is particularly important. The shank’s height depends on the fabric thickness; heavier fabrics require taller shanks.
Proper button attachment involves using a strong thread and reinforcing the stitches. Consider the button’s size and weight when selecting thread. Claire Shaeffer emphasizes that often, the fashion fabric is merely along for the ride, highlighting the importance of quality supporting elements like thread and buttons. A well-attached button is a testament to careful craftsmanship!
Tips for Beginner Fashion Sewers
Embarking on your sewing journey? Patience is paramount! Don’t rush the process; sewing requires precision and a willingness to learn from mistakes. Start with simple projects to build confidence and master basic techniques before tackling complex designs.
Pre-washing fabric is non-negotiable – it prevents shrinkage and color bleeding after your garment is complete. Always read the sewing pattern thoroughly before cutting any fabric. Pressing seams as you sew is equally vital; it creates a professional finish and ensures accurate construction.
Don’t be afraid to experiment, but also don’t shy away from seeking help. Numerous online resources and communities offer guidance and support. Remember to be patient with yourself, and don’t do too much too soon. Mastering sewing is a gradual process, and every stitch brings you closer to creating beautiful, handmade clothes!
Avoiding Common Sewing Mistakes
New to fashion sewing? Several pitfalls await, but awareness is key! A frequent error is inaccurate cutting – always double-check pattern markings and ensure fabric is laid flat. Neglecting to backstitch at the beginning and end of seams leads to unraveling, compromising garment durability.
Incorrect thread tension causes puckering or loose stitches; test on scrap fabric first. Forgetting to clip curves and notches before sewing results in distorted shapes. Ignoring grainlines can lead to garments that hang poorly or stretch unevenly.
Rushing the process often leads to skipped stitches or misaligned seams. Always press seams open or to the side as you sew – this creates a professional finish. Finally, don’t be afraid to unpick mistakes; it’s a learning opportunity! Careful attention to detail and a methodical approach will significantly reduce errors and elevate your sewing results.
Resources for Further Learning
Expand your sewing knowledge! Numerous resources cater to all levels. Online platforms like YouTube offer a wealth of free tutorials, covering everything from basic machine operation to advanced techniques. Websites dedicated to sewing, such as How to Do Fashion, provide comprehensive guides and pattern assistance.
Consider investing in books – Claire Shaeffer’s publications are highly regarded for their in-depth explanations of couture techniques. Amazon Book Review offers curated selections of sewing books for various skill levels. Local fabric stores often host workshops and classes, providing hands-on learning experiences.
Explore online communities and forums to connect with fellow sewists, share tips, and seek advice. The Crafty Gemini offers pattern insights, while introductory body sewing resources are also available. Remember to utilize the wealth of information available to continually refine your skills and unlock your creative potential!