nutrition and wound healing pdf

Millions of patients require surgical procedures or experience injuries annually, yet often receive minimal guidance regarding dietary support for optimal recovery processes.

Effective wound healing is intrinsically linked to proper nutrition, emphasizing the vital roles of protein, vitamins A and C, zinc, omega-3 fatty acids, iron, and hydration.

The global wound healing nutrition market is poised for substantial expansion in the coming decade, fueled by increasing demand for advanced nutritional interventions.

Understanding the connection between nutrition and healing is paramount, as adequate intake of key nutrients directly supports the body’s natural restorative capabilities.

The Critical Link Between Diet and Recovery

The body’s ability to repair tissues and overcome injury is profoundly influenced by nutritional status; a deficiency in essential nutrients can significantly impede the healing process, prolonging recovery times and increasing the risk of complications.

Protein, vitamins C and A, zinc, and omega-3 fatty acids are particularly crucial, each playing distinct roles in collagen synthesis, immune function, and reducing inflammation – all vital components of effective wound repair.

Adequate calorie intake is also paramount, providing the energy needed to fuel the metabolically demanding processes of tissue regeneration and immune response. Without sufficient energy, the body may struggle to prioritize healing.

Furthermore, proper hydration ensures optimal cellular function and nutrient delivery to the wound site, facilitating the complex cascade of events necessary for complete recovery. Ignoring these nutritional needs can lead to slow healing and increased susceptibility to infection.

Ultimately, a well-balanced diet tailored to individual needs is a cornerstone of successful recovery from wounds and surgeries.

The Growing Wound Healing Nutrition Market

The global wound healing nutrition market is experiencing robust growth, projected to expand significantly over the next decade, driven by an increasing awareness of the critical role nutrition plays in recovery from injuries and surgical procedures.

Demand for advanced nutritional products specifically formulated to support wound healing is rising, fueled by an aging population, a growing prevalence of chronic diseases like diabetes, and increasing numbers of surgical interventions.

Key market drivers include the development of innovative formulations containing targeted nutrients, such as specialized protein blends, vitamin complexes, and omega-3 fatty acids, designed to optimize tissue repair.

Furthermore, healthcare professionals are increasingly recognizing the cost-effectiveness of preventative nutritional strategies in reducing wound complications and shortening hospital stays, boosting market adoption.

This expanding market reflects a paradigm shift towards proactive, nutrition-focused approaches to wound care, emphasizing the importance of optimizing patient outcomes through targeted dietary interventions.

Macronutrients for Wound Healing

Protein, carbohydrates, and fats are essential macronutrients that provide the building blocks and energy needed to support the complex processes of tissue repair and recovery.

Adequate intake of these macronutrients is crucial for optimizing wound healing outcomes and ensuring the body has the resources to rebuild damaged tissues effectively.

The Role of Protein in Tissue Repair

Protein stands as a cornerstone of wound healing, playing an absolutely critical role in every phase of the recovery process. It serves as the fundamental building block for new tissues, including collagen, which provides structural integrity to the healing wound.

Insufficient protein intake can significantly impair the body’s ability to repair damaged tissues, leading to delayed healing and increased risk of complications. Protein aids in the formation of new skin cells, immune cells, and antibodies, all vital for fighting infection and promoting tissue regeneration.

The process of wound healing is catabolic, meaning the body breaks down tissues, and protein helps counteract this by providing the necessary amino acids for rebuilding. It’s essential to consume enough protein to meet the increased demands during wound recovery, ensuring optimal tissue repair and a faster return to health.

Importance of Carbohydrates for Energy

Carbohydrates are the body’s primary source of energy, and their role in wound healing is often underestimated. The healing process is metabolically demanding, requiring significantly more energy than normal physiological functions. Without adequate carbohydrate intake, the body may break down protein for energy, hindering tissue repair.

Sufficient carbohydrate consumption spares protein, allowing it to be utilized specifically for tissue building and immune function. Complex carbohydrates, found in whole grains, fruits, and vegetables, provide a sustained release of energy, supporting the prolonged energy needs of wound healing.

Maintaining stable blood glucose levels through consistent carbohydrate intake is also crucial, as fluctuations can impair immune cell activity and delay the healing process. Prioritizing nutrient-rich carbohydrate sources ensures optimal energy provision for effective wound recovery;

Fats: Supporting Cell Function and Reducing Inflammation

Dietary fats are essential for numerous cellular processes involved in wound healing, extending beyond simply providing energy. They are integral components of cell membranes, influencing cell signaling and nutrient transport, both vital for tissue repair and regeneration.

Specifically, omega-3 fatty acids, found in sources like fatty fish and flaxseeds, possess potent anti-inflammatory properties. Chronic inflammation can impede wound healing, and omega-3s help modulate the inflammatory response, creating a more favorable environment for tissue reconstruction.

Adequate fat intake also supports the absorption of fat-soluble vitamins (A, D, E, and K), all of which play crucial roles in immune function and collagen synthesis. However, prioritizing healthy fats over saturated and trans fats is key to optimizing their beneficial effects on wound healing.

Micronutrients Essential for Wound Healing

Vitamins C and A, alongside zinc and iron, are critical micronutrients that significantly bolster the body’s natural wound-repair mechanisms and immune responses.

These nutrients actively participate in collagen formation, antioxidant protection, epithelialization, oxygen transport, and overall tissue growth during recovery.

Vitamin C: Collagen Synthesis and Antioxidant Protection

Vitamin C plays a pivotal role in wound healing, primarily due to its essential function in collagen synthesis – a crucial protein providing structure and strength to newly formed tissues.

Collagen is the most abundant protein in the body, and its production is severely hampered without sufficient Vitamin C levels, leading to delayed wound closure and weakened tissue integrity.

Beyond collagen synthesis, Vitamin C acts as a potent antioxidant, protecting cells from damage caused by free radicals generated during the inflammatory phase of wound healing.

This antioxidant property helps minimize oxidative stress, promoting a healthier healing environment and reducing the risk of complications.

Adequate Vitamin C intake supports immune cell function, further enhancing the body’s ability to fight infection and accelerate the healing process.

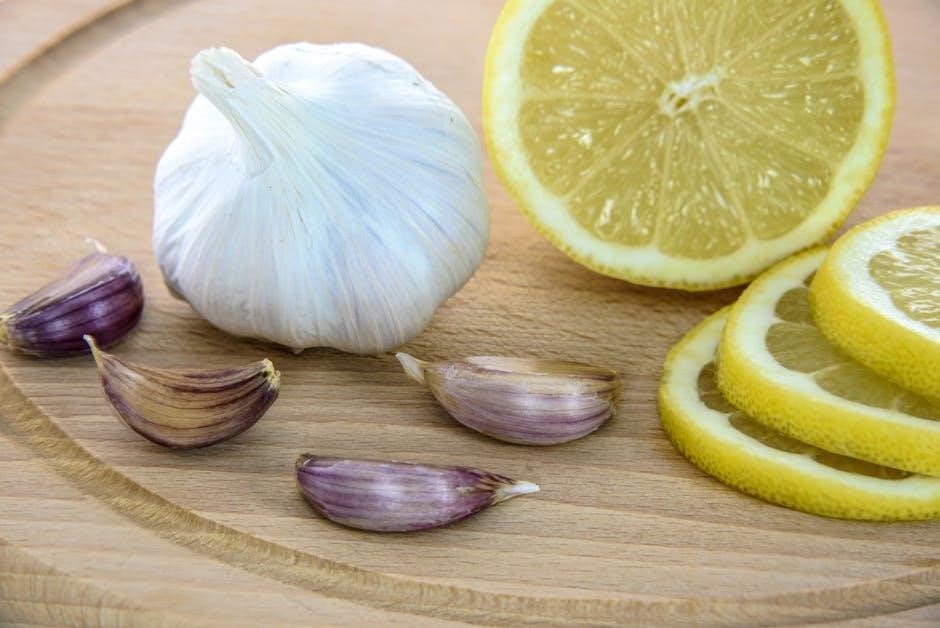
Consuming foods rich in Vitamin C, such as citrus fruits, berries, and peppers, is vital for optimal wound recovery.

Vitamin A: Promoting Epithelialization

Vitamin A is critically important for wound healing, specifically in the process of epithelialization – the formation of new skin cells that cover the wound surface.

This vitamin stimulates the growth and differentiation of epithelial cells, accelerating wound closure and reducing the risk of infection by creating a protective barrier.

Furthermore, Vitamin A enhances the inflammatory response, which, while often perceived negatively, is a necessary initial step in the healing cascade, clearing debris and signaling repair.

It also supports collagen synthesis, working synergistically with Vitamin C to build strong, resilient tissue.

However, it’s crucial to maintain appropriate Vitamin A levels, as excessive intake can actually hinder healing and lead to other health issues.

Sources of Vitamin A include liver, sweet potatoes, carrots, and dark leafy green vegetables, contributing to optimal wound recovery.

Zinc: Immune Function and Collagen Formation

Zinc plays a multifaceted role in wound healing, acting as a crucial component for both a robust immune response and the synthesis of collagen, the primary structural protein of skin.

Adequate zinc levels are essential for immune cell function, protecting the wound site from infection and promoting a controlled inflammatory response necessary for repair.

Moreover, zinc is directly involved in collagen synthesis, contributing to the strength and integrity of newly formed tissue, accelerating wound closure.

It also supports cell proliferation and migration, vital processes for rebuilding damaged skin.

Deficiency in zinc can significantly impair wound healing, leading to prolonged inflammation, increased risk of infection, and weakened tissue formation.

Good sources of zinc include meat, poultry, seafood, beans, and nuts, ensuring sufficient intake for optimal recovery.

Iron: Oxygen Transport and Tissue Growth

Iron is fundamentally important in wound healing due to its central role in oxygen transport via hemoglobin within red blood cells, delivering vital oxygen to healing tissues.

Oxygen is critical for collagen synthesis, angiogenesis (new blood vessel formation), and the energy production required for cellular repair and proliferation.

Insufficient iron levels can lead to anemia, reducing oxygen delivery and significantly impairing the wound healing process, resulting in delayed closure and increased susceptibility to infection.

Furthermore, iron is a cofactor for enzymes involved in collagen synthesis and DNA replication, both essential for tissue growth and repair.

Dietary sources of iron include red meat, poultry, fish, beans, and fortified cereals, ensuring adequate intake to support optimal wound healing outcomes.

Maintaining appropriate iron status is therefore crucial for efficient tissue regeneration and a successful recovery.

Hydration and Wound Healing

Adequate fluid intake is paramount for wound healing, supporting circulation, nutrient delivery, and waste removal from damaged tissues, aiding recovery.

Electrolytes, obtained from fluids, play a crucial role in maintaining fluid balance and supporting cellular function during the healing process.

The Importance of Adequate Fluid Intake

Maintaining optimal hydration is absolutely critical throughout all phases of wound healing, often underestimated in patient care plans. Fluids are not merely about quenching thirst; they are fundamental to the physiological processes that underpin tissue repair and regeneration.

Water constitutes a significant portion of body tissues, and adequate intake ensures sufficient blood volume for efficient nutrient delivery to the wound site; This enhanced circulation facilitates the transport of oxygen, proteins, vitamins, and minerals essential for collagen synthesis, angiogenesis (new blood vessel formation), and immune cell activity.

Dehydration, conversely, can impede these processes, leading to delayed healing, increased risk of infection, and compromised tissue integrity. Sufficient fluid intake also aids in the removal of metabolic waste products generated during the healing response, preventing their accumulation and potential interference with tissue repair. Fluid comes from water and any other beverages.

Electrolytes and Their Role in Healing

Beyond simple hydration, maintaining electrolyte balance is paramount for successful wound healing. Electrolytes – including sodium, potassium, calcium, and magnesium – are crucial minerals that conduct electrical impulses throughout the body, regulating vital functions directly impacting tissue repair.

These minerals play key roles in cellular function, nerve transmission, and muscle contraction, all of which are essential for the complex processes involved in wound closure. For instance, sodium and potassium are vital for maintaining fluid balance within cells, influencing nutrient absorption and waste removal.

Calcium is critical for blood clotting and inflammatory responses, while magnesium supports protein synthesis and energy production. Imbalances in electrolytes can disrupt these processes, hindering healing and potentially leading to complications. Ensuring adequate electrolyte intake, often through a balanced diet or, when necessary, supplementation, is therefore a vital component of nutritional support for wound care.

Specific Foods to Promote Wound Healing

Prioritize lean proteins for tissue building, alongside fruits and vegetables abundant in essential vitamins. Incorporate foods rich in omega-3 fatty acids to aid recovery.

Consuming these nutrient-dense options provides the building blocks and support needed for optimal wound repair and a faster healing process.

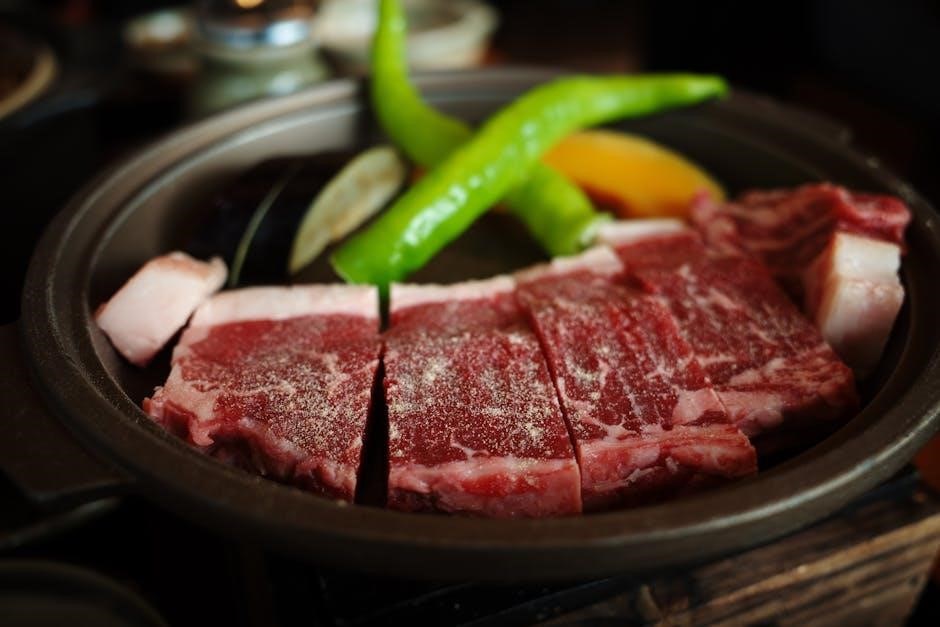
Lean Proteins for Tissue Building

Protein is undeniably crucial for wound healing, serving as the fundamental building block for tissue repair and regeneration. During the healing process, the body requires significantly increased protein intake to support the creation of new skin, muscle, and connective tissues.

Excellent sources of lean protein include chicken, turkey, fish, eggs, and beans. These options provide essential amino acids without excessive saturated fats. Adequate protein consumption ensures the body has the necessary resources to rebuild damaged tissues effectively.

Insufficient protein intake can severely hinder the healing process, leading to prolonged recovery times and increased risk of complications. Prioritizing lean protein sources is therefore a cornerstone of any nutritional plan designed to promote optimal wound healing.

Aim for consistent protein intake throughout the day to maintain a steady supply of amino acids for tissue repair.

Fruits and Vegetables Rich in Vitamins

Fruits and vegetables are powerhouses of vitamins essential for optimal wound healing, particularly Vitamin C and Vitamin A. These micronutrients play distinct, yet complementary, roles in supporting the body’s restorative processes.

Vitamin C is vital for collagen synthesis, a protein crucial for skin integrity and wound closure. Citrus fruits, berries, and peppers are excellent sources. Vitamin A promotes epithelialization, the process of new skin cell formation, aiding in wound coverage.

Dark leafy greens, sweet potatoes, and carrots are rich in Vitamin A. Consuming a colorful variety of fruits and vegetables ensures a broad spectrum of vitamins and antioxidants, further bolstering the healing response.

Prioritizing these nutrient-dense foods supports immune function and protects against oxidative stress, accelerating the healing timeline.

Foods Containing Omega-3 Fatty Acids

Omega-3 fatty acids are crucial components in supporting the wound healing process, primarily due to their potent anti-inflammatory properties. Chronic inflammation can significantly impede tissue repair and prolong recovery times.

These essential fats help modulate the inflammatory response, creating a more favorable environment for healing. Excellent sources include fatty fish like salmon, mackerel, and tuna, providing both EPA and DHA, the most beneficial types of omega-3s.

For individuals who do not consume fish, flaxseeds, chia seeds, and walnuts offer ALA, a precursor to EPA and DHA, though conversion rates can vary. Incorporating these foods into the diet supports cell function and reduces excessive inflammation.

Adequate omega-3 intake contributes to faster, more efficient wound closure and improved overall healing outcomes.

Wound Healing Stages and Nutritional Needs

Wound healing progresses through phases—hemostasis, proliferation, and remodeling—each with distinct nutritional demands to support tissue repair and overall recovery.

Nutritional support must adapt to these changing needs, ensuring adequate protein, vitamins, and minerals are available throughout the entire healing process.

Hemostasis and Inflammation Phase

The initial phase of wound healing, hemostasis and inflammation, is characterized by blood clotting and the recruitment of immune cells to the injury site. Nutritionally, this stage prioritizes controlling inflammation and providing the building blocks for subsequent repair.

While often perceived negatively, inflammation is a crucial component of healing, clearing debris and initiating tissue regeneration. Adequate protein intake is essential, providing amino acids for immune cell production and function.

Vitamin C, with its antioxidant properties, plays a vital role in protecting cells from oxidative stress during inflammation. Furthermore, sufficient hydration is paramount to maintain blood volume and facilitate nutrient delivery to the wound area. Focusing on anti-inflammatory foods can also be beneficial during this early stage.

Proliferation Phase: Increased Nutritional Demands

As the wound transitions into the proliferation phase, nutritional demands significantly increase to support the rapid growth of new tissue. This stage involves angiogenesis – the formation of new blood vessels – and collagen synthesis, requiring a substantial influx of nutrients.

Protein remains critically important, providing the amino acids necessary for building new tissues. Increased calorie intake is also essential to fuel the energy-intensive processes of cell proliferation and matrix formation.

Micronutrients like Vitamin A and Zinc become particularly vital, promoting epithelialization and collagen formation respectively. Adequate hydration continues to be crucial for nutrient transport and waste removal. Meeting these heightened nutritional needs is paramount for optimal wound closure and minimizing complications.

Remodeling Phase: Sustained Nutritional Support

The remodeling phase, the final stage of wound healing, is a prolonged process where collagen is reorganized and the wound gains strength. While nutritional demands aren’t as acutely elevated as in the proliferation phase, sustained nutritional support remains crucial for optimal outcomes;

Continued adequate protein intake is essential for collagen maturation and tensile strength development. Micronutrients, particularly Vitamin C, continue to play a role in collagen synthesis and antioxidant protection, safeguarding the newly formed tissue.

Maintaining sufficient hydration and electrolyte balance supports cellular function and overall tissue health. Consistent, balanced nutrition throughout this phase ensures the wound achieves maximum strength and functional recovery, minimizing the risk of re-injury or complications.

Clinical Guidelines and Recommendations

EPUAP/NPIAP/PPPIA guidelines advocate for 30-35 kcal/kg daily for individuals experiencing pressure ulcers or injuries, emphasizing comprehensive nutritional assessment and intervention.

These recommendations highlight the importance of tailored nutritional plans to address individual needs and optimize the healing process, supporting positive patient outcomes.

EPUAP/NPIAP/PPPIA Guidelines on Nutritional Intake

The 2019 International Guidelines from the European Pressure Ulcer Association (EPUAP), the National Pressure Injury Advisory Panel (NPIAP), and the Pan Pacific Pressure Injury Alliance (PPPIA) strongly emphasize the critical role of nutrition in preventing and treating pressure injuries and other wounds.

These guidelines recommend a daily energy intake of 30 to 35 kcal/kg of body weight for individuals at risk or experiencing wounds, acknowledging that needs may vary based on wound severity, overall health status, and activity levels.

Protein intake is also a key focus, with recommendations ranging from 1.2 to 1.5 grams per kilogram of body weight daily to support tissue repair and immune function.

Furthermore, the guidelines stress the importance of micronutrient adequacy, specifically vitamins C and A, zinc, and iron, to optimize collagen synthesis, immune response, and oxygen transport – all essential components of wound healing.

Consistent monitoring of nutritional status and individualized dietary plans are crucial for achieving optimal outcomes, as deficiencies can significantly impede the healing process.

Calorie and Protein Requirements for Wound Healing

Wound healing significantly elevates the body’s metabolic demands, necessitating increased caloric intake to fuel the repair processes. Generally, individuals with wounds require approximately 30-35 kcal per kilogram of body weight daily, a substantial increase compared to typical recommendations.

Protein, however, takes center stage in wound repair, serving as the fundamental building block for new tissue. Requirements escalate to 1.2-1.5 grams of protein per kilogram of body weight each day, ensuring sufficient amino acids are available for collagen synthesis and tissue regeneration.

These needs are particularly heightened during the proliferation phase of wound healing, where tissue growth is most rapid.

Individualized assessments are crucial, considering factors like wound size, depth, infection status, and the patient’s overall health.

Adequate calorie and protein intake are not merely supportive; they are foundational for successful wound closure and minimizing complications.

Addressing Slow Wound Healing Through Nutrition

Slow wound healing often signals underlying nutritional deficiencies, demanding a thorough assessment to identify and rectify imbalances for optimal recovery outcomes.

Personalized nutrition plans, tailored to individual needs and wound characteristics, are essential for maximizing the body’s inherent healing capabilities.

Identifying Nutritional Deficiencies

Accurately pinpointing nutritional deficits is crucial when addressing delayed wound closure, as deficiencies directly impede the complex healing cascade. Comprehensive assessment begins with a detailed dietary history, evaluating typical intake of protein, vitamins (especially C and A), zinc, and iron.

Laboratory tests play a vital role, measuring serum levels of albumin, prealbumin, transferrin, vitamin C, vitamin A, and zinc to objectively quantify deficiencies. Recognizing that inflammation can artificially lower these levels requires careful interpretation.

Clinical signs, such as poor collagen synthesis, impaired immune function, and prolonged inflammation, can also indicate specific nutrient shortages. A holistic approach, combining dietary analysis, lab data, and clinical observation, ensures a precise diagnosis and targeted nutritional intervention.

Furthermore, consider underlying conditions impacting nutrient absorption, like gastrointestinal disorders, which may necessitate specialized dietary modifications or supplementation strategies.

Personalized Nutrition Plans for Optimal Healing

Developing individualized nutrition plans is paramount, recognizing that healing needs vary based on wound size, type, patient health status, and metabolic rate. A ‘one-size-fits-all’ approach is often ineffective; tailoring interventions maximizes healing potential.

Plans should prioritize adequate protein intake (1.2-1.5g/kg body weight) to support tissue repair, alongside sufficient calories (30-35 kcal/kg) to fuel the energy-demanding healing process. Micronutrient supplementation, guided by deficiency assessment, is often necessary.

Consider incorporating foods rich in vitamin C for collagen synthesis, vitamin A for epithelialization, zinc for immune function, and omega-3 fatty acids to reduce inflammation. Hydration is also key, ensuring adequate fluid intake.

Regular monitoring and adjustments are essential, tracking wound progress and adapting the plan based on individual response and evolving nutritional needs.

speech craft joshua gunn 2nd edition pdf free download

Speech Craft Joshua Gunn 2nd Edition PDF Free Download: A Comprehensive Guide

Speech Craft, authored by Joshua Gunn, is a widely recognized resource for public speaking instruction, and many students actively seek a free PDF version for convenient access.

Discussions online, as of December 10, 2025, reveal consistent requests for a downloadable link, highlighting a strong demand for this material in a digital format.

Users express frustration with access limitations, while simultaneously exploring options like RingCentral for practicing communication skills, and troubleshooting audio issues within the platform.

Understanding the Demand for the PDF

Speech Craft by Joshua Gunn has become a cornerstone text in communication courses, fueling a significant demand for a readily available PDF version. This desire stems from several factors, primarily student accessibility and cost-effectiveness. Many learners prefer digital formats for portability and ease of study, especially given the increasing reliance on online learning platforms.

Online discussions, current as of December 10, 2025, demonstrate a consistent pattern of students requesting links to the 2nd edition PDF. This suggests a widespread need, potentially driven by textbook costs or limited library resources. The search isn’t solely academic; individuals also seek the material to enhance their professional communication skills, recognizing the importance of public speaking in various career paths.

Furthermore, the integration of tools like RingCentral for communication practice indicates a proactive approach to skill development, and a free PDF would complement such efforts.

The Popularity of “Speech Craft”

Speech Craft, penned by Joshua Gunn, enjoys considerable popularity within academic circles and professional development programs, establishing itself as a leading resource for public speaking instruction. Its strength lies in its practical approach, focusing on audience connection and effective communication strategies – principles highly valued by both students and practitioners.

The book’s emphasis on understanding speech context and situation resonates with a broad audience, moving beyond mere technique to address the nuances of real-world communication. This comprehensive approach contributes to its sustained relevance, even as communication technologies evolve, as evidenced by discussions surrounding tools like RingCentral for rehearsal.

The consistent online searches for a 2nd edition PDF (as of December 10, 2025) are a direct reflection of this popularity, indicating a strong desire for accessible learning materials.

Why a Free PDF is Sought After

The intense demand for a free PDF of Joshua Gunn’s Speech Craft stems from several key factors, primarily relating to accessibility and cost. Textbooks, particularly newer editions, can represent a significant financial burden for students, making a freely available digital copy highly desirable.

Furthermore, the convenience of a PDF format – portability, searchability, and ease of annotation – appeals to modern learners accustomed to digital resources. Online discussions (dated December 10, 2025) reveal numerous requests for the PDF, often from students seeking to supplement their learning or those facing financial constraints.

The desire for immediate access, bypassing purchase and shipping times, also fuels this demand, alongside the potential for utilizing the material with communication tools like RingCentral.

Legality and Ethical Considerations

Speech Craft PDF downloads raise critical legal and ethical concerns regarding copyright infringement; unauthorized distribution violates author and publisher rights, posing potential risks.

Copyright Laws and PDF Distribution

Copyright law firmly protects the intellectual property rights of Joshua Gunn and the publishers of Speech Craft, 2nd Edition. Creating, distributing, or downloading a PDF copy without proper authorization constitutes a violation of these laws, potentially leading to legal repercussions for those involved.

The unauthorized sharing of copyrighted material, even seemingly “for free,” undermines the author’s livelihood and the publishing industry’s ability to produce valuable educational resources. Digital Rights Management (DRM) is often employed to prevent unauthorized copying, but circumventing these measures is also illegal.

Simply possessing an illegally obtained PDF can be considered copyright infringement. Furthermore, websites offering these downloads often operate outside the law and may expose users to malware or other security threats. Respecting copyright is crucial for supporting authors and fostering a sustainable ecosystem for educational materials.

Risks Associated with Downloading from Unofficial Sources

Seeking a free PDF of Speech Craft from unofficial websites or peer-to-peer networks carries significant risks. These sources frequently harbor malware, viruses, and other malicious software that can compromise your device and personal data. Downloading files from untrusted origins exposes you to potential identity theft, financial fraud, and data breaches.

Furthermore, these downloads often contain corrupted or incomplete files, rendering the PDF unusable. The promise of a free resource can quickly turn into a frustrating and potentially damaging experience. Websites offering illegal downloads often lack adequate security measures, increasing the likelihood of encountering harmful content.

Even seemingly harmless files can contain hidden trackers or spyware. Prioritizing legal and ethical alternatives safeguards your digital security and supports the creators of the material.

Ethical Alternatives to Illegal Downloads

Instead of pursuing a free PDF of Speech Craft through unauthorized channels, several ethical and legal alternatives exist. Purchasing the book from official retailers directly supports Joshua Gunn and ensures you receive a legitimate, high-quality copy. Libraries offer borrowing options, providing access to the text without the need for purchase.

Exploring online courses based on the book’s principles is another valuable avenue. These courses often provide structured learning experiences and supplementary materials. Utilizing RingCentral, a communication tool, can complement your study of speech craft by offering a platform for practice and feedback.

Respecting copyright laws is crucial; illegal downloads undermine the author’s work and the publishing industry. Choosing ethical options demonstrates integrity and supports the creation of valuable educational resources.

Where to Look (and What to Avoid)

Speech Craft PDF searches utilize terms like “Joshua Gunn PDF,” but beware of unofficial websites and social media groups offering downloads; risks abound.

Prioritize official sources!

Common Search Terms Used for the PDF

Individuals seeking a free digital copy of Joshua Gunn’s Speech Craft, 2nd Edition, employ a variety of search terms online. Common phrases include “Speech Craft Joshua Gunn PDF,” “Speech Craft 2nd Edition PDF free download,” and simply “Joshua Gunn Speech Craft PDF.” Variations also appear, such as “download Speech Craft Gunn,” or searches specifying the edition number alongside “free PDF.”

User queries, documented as recently as December 10, 2025, demonstrate a direct desire for a PDF link. Many users explicitly request the PDF on online platforms, evidenced by repeated pleas in forum discussions and social media replies. These searches often stem from a need for accessible study materials, particularly for students enrolled in communication courses utilizing the textbook. The prevalence of these terms underscores the significant demand for a readily available, digital version of the book.

Websites Offering PDF Downloads – A Cautionary Approach

Numerous websites claim to offer free PDF downloads of Speech Craft by Joshua Gunn, but exercising extreme caution is crucial. Many of these sites are riddled with potential risks, including malware, viruses, and phishing attempts. Often, these downloads require users to complete surveys, install questionable software, or provide personal information – all red flags.

Downloading from unofficial sources violates copyright laws and poses security threats to your devices. While the desire for a free PDF is understandable, the potential consequences far outweigh the convenience. Users should be wary of sites promising “instant” or “easy” downloads, as these are frequently deceptive. Prioritize legal and ethical alternatives to avoid compromising your digital security and respecting intellectual property rights.

Social Media Groups and Forums – Potential Risks

While social media groups and online forums may appear as avenues for obtaining a free PDF of Speech Craft, they present significant risks. Requests for the book are common, as evidenced by user posts from August 19, 2025, and earlier dates, but sharing copyrighted material is illegal. Links shared within these platforms are often unreliable and can lead to malicious websites.

These groups frequently lack moderation, increasing the likelihood of encountering viruses, malware, or phishing scams disguised as legitimate download links. Furthermore, engaging in the distribution of pirated content can have legal repercussions. It’s best to avoid seeking or sharing copyrighted materials on these platforms and instead explore legal and ethical alternatives for accessing the book.

Joshua Gunn’s “Speech Craft” ⸺ Core Concepts

Speech Craft emphasizes connecting with audiences, mastering effective public speaking principles, and understanding the context of each communication situation, crucial for success.

The Book’s Focus on Audience Connection

Speech Craft, by Joshua Gunn, fundamentally centers on establishing a genuine connection with the audience, moving beyond simply delivering information. The book advocates for viewing the audience not as passive recipients, but as active participants in the communicative process.

This approach encourages speakers to consider the audience’s perspectives, needs, and expectations, tailoring their message accordingly. Gunn stresses the importance of empathy and understanding, suggesting speakers “think of the audience as an ally” – recognizing shared experiences and anxieties related to public speaking.

This perspective aims to transform the speaking environment from adversarial to collaborative, fostering a more comfortable and engaging experience for both speaker and listener. Ultimately, Speech Craft posits that a strong audience connection is the cornerstone of impactful and persuasive communication.

Key Principles of Effective Public Speaking

Joshua Gunn’s Speech Craft outlines several core principles for impactful public speaking. A central tenet is that all forms of public speaking are fundamentally about “bringing people together,” emphasizing communication as a collaborative act rather than a one-way delivery.

The book moves away from the notion of solely “persuading” an audience, advocating for a more nuanced approach that prioritizes connection and shared understanding. Avoiding an “expert” persona is encouraged; instead, speakers should foster rapport and trust.

Furthermore, Gunn advises against relying heavily on notes, suggesting it hinders genuine engagement. Effective speaking, according to Speech Craft, requires thoughtful preparation, contextual awareness, and a focus on building relationships with listeners.

Understanding Speech Context and Situation

Speech Craft by Joshua Gunn stresses the critical importance of analyzing the specific context and situation surrounding any speaking engagement. This extends beyond simply knowing who your audience is, delving into why they are gathered and what expectations they hold.

Gunn emphasizes that effective communication isn’t universal; it’s deeply rooted in the unique dynamics of each event. Considering the purpose of the speech – is it to inform, persuade, or entertain? – shapes the delivery and content.

Acknowledging the audience’s pre-existing knowledge, beliefs, and potential biases is also crucial. Adapting your message to resonate with their perspective, rather than imposing your own, fosters a stronger connection and increases impact.

Alternatives to a Free PDF Download

Legitimate options include purchasing Speech Craft from official retailers, borrowing from libraries, or exploring online courses that utilize the book’s core principles for learning.

Purchasing the Book from Official Retailers

Opting to purchase a legitimate copy of Joshua Gunn’s Speech Craft, 2nd Edition, directly supports the author and ensures access to the most accurate and up-to-date content. Several official retailers offer the book in various formats, including physical copies and e-books.

Major online booksellers, such as Amazon and Barnes & Noble, consistently stock Speech Craft, providing convenient purchasing options and often offering competitive pricing. University bookstores are also reliable sources, particularly for students enrolled in communication courses utilizing the textbook.

Purchasing from official channels guarantees a quality product, free from the potential risks associated with unofficial downloads, like malware or incomplete files. Furthermore, a purchased copy allows for highlighting, note-taking, and long-term reference, enhancing the learning experience.

Consider exploring bundled options that may include supplementary materials or access to online resources.

Renting or Borrowing from Libraries

For a cost-effective alternative to purchasing Speech Craft, consider utilizing library resources. Many public and academic libraries maintain copies of popular textbooks, including Joshua Gunn’s influential work on public speaking. Borrowing offers temporary access to the material without the financial commitment of a full purchase.

Check your local library’s online catalog to determine availability and reserve a copy if needed. University libraries often have extensive collections, catering specifically to student coursework. Some libraries also offer digital lending options, potentially providing access to an e-book version of Speech Craft.

Renting textbooks from services is another viable option, particularly for short-term use during a specific course. This can be significantly cheaper than buying, though rental periods are limited. Remember to factor in potential late fees when choosing this route.

Exploring Online Courses Based on the Book’s Principles

While seeking a free PDF of Speech Craft, consider exploring online courses that incorporate Joshua Gunn’s core principles of effective public speaking. Platforms like Coursera, Udemy, and Skillshare frequently offer courses focused on communication skills, often drawing from established methodologies found in texts like Gunn’s.

These courses can provide structured learning experiences, often including video lectures, practical exercises, and peer feedback. Some may even be designed specifically to complement the content found in Speech Craft, offering a more interactive learning approach.

Utilizing RingCentral for practice, as discussed elsewhere, can be integrated into these courses for speech rehearsal and feedback. Online learning provides a legitimate and enriching alternative, building upon the foundational concepts presented in Gunn’s work.

RingCentral and Communication Skills (Related Information)

RingCentral serves as a valuable tool for practicing and refining communication skills, offering features for speech rehearsal and feedback, alongside troubleshooting audio settings.

Users explore RingCentral alongside seeking resources like the Speech Craft PDF, aiming to enhance their overall presentation abilities.

RingCentral as a Tool for Practicing Communication

RingCentral provides a practical platform to implement principles discussed in resources like Joshua Gunn’s Speech Craft, offering features directly applicable to honing public speaking abilities.

The platform’s video conferencing capabilities allow users to record themselves delivering speeches, enabling self-assessment and identification of areas for improvement – a key component of effective practice.

Furthermore, RingCentral facilitates live practice sessions with colleagues or mentors, providing opportunities for real-time feedback on delivery, content, and overall presentation style.

Users can leverage RingCentral’s screen sharing functionality to present visual aids, mirroring real-world speaking scenarios and building confidence in managing presentation technology.

The platform’s accessibility, combined with its communication tools, makes it an ideal supplement to studying Speech Craft, bridging the gap between theory and practical application.

Ultimately, RingCentral empowers individuals to actively develop and refine their communication skills, complementing their learning journey.

Using RingCentral for Speech Rehearsal and Feedback

RingCentral excels as a rehearsal space, allowing speakers to practice delivery while applying concepts from resources like Joshua Gunn’s Speech Craft. Recording features enable detailed self-review, focusing on pacing, vocal variety, and non-verbal cues.

The platform’s meeting functionality facilitates simulated presentation environments, helping speakers acclimate to the pressure of a live audience. Invite colleagues for constructive criticism, mirroring the feedback process emphasized in effective communication training.

Utilize RingCentral’s chat feature for pre-speech Q&A, anticipating potential audience questions and refining responses – a valuable technique for building confidence and preparedness.

Share recordings with mentors or peers for asynchronous feedback, allowing for detailed analysis and personalized guidance. This iterative process aligns with the principles of continuous improvement.

RingCentral’s accessibility and user-friendly interface make it a convenient and effective tool for speech rehearsal, supplementing study of Speech Craft.

Ultimately, it empowers speakers to refine their skills and deliver impactful presentations.

Troubleshooting Audio Issues in RingCentral (Microphone/Headset)

Experiencing audio problems in RingCentral can hinder speech rehearsal, impacting practice based on principles from Speech Craft. Begin by verifying microphone and headset connections, ensuring they are securely plugged into the correct ports.

Within RingCentral’s settings, confirm the correct microphone and speaker devices are selected. Test audio input and output to identify any immediate hardware malfunctions. Update audio drivers to the latest versions for optimal compatibility.

If issues persist, check RingCentral’s permissions within your operating system, granting access to microphone and camera functionalities. Disable any conflicting audio applications that might interfere with RingCentral’s operation.

Users have reported success with purchasing new microphones and headsets, but the problem sometimes remains. Ensure volume levels are appropriately adjusted both within RingCentral and on your device.

Consult RingCentral’s support documentation or contact their technical support team for further assistance. Clear communication is key, even when troubleshooting technical difficulties!

The Importance of Public Speaking Skills

Public speaking is crucial for professional development, building confidence, and overcoming anxiety – skills emphasized in resources like Speech Craft.

Effective communication, practiced with tools like RingCentral, unlocks opportunities and fosters impactful connections.

Public Speaking in Professional Development

Public speaking transcends mere presentation; it’s a cornerstone of professional advancement, impacting career trajectories and leadership potential. Mastering this skill, as advocated in resources like Joshua Gunn’s Speech Craft, enables individuals to articulate ideas persuasively, navigate crucial meetings confidently, and build rapport with colleagues and clients.

In today’s dynamic workplace, the ability to communicate effectively – both verbally and nonverbally – is highly valued. Professionals who can deliver compelling presentations, lead engaging discussions, and articulate their vision clearly are often seen as more capable and influential. Platforms like RingCentral can further enhance these skills by providing tools for rehearsal and feedback, allowing individuals to refine their delivery and overcome communication barriers.

Ultimately, investing in public speaking skills isn’t just about improving presentation abilities; it’s about investing in one’s overall professional growth and unlocking opportunities for success.

Overcoming Speech Anxiety

Speech anxiety, a common hurdle for many, can significantly impede effective communication. Resources like Joshua Gunn’s Speech Craft often emphasize reframing perspectives – viewing the audience as allies rather than judges – as a crucial step in mitigating fear. Recognizing that nervousness is normal, and even expected, can lessen its impact.

Practical techniques, such as thorough preparation, deep breathing exercises, and visualization, are also invaluable. Utilizing tools like RingCentral for speech rehearsal provides a safe space to practice and receive constructive feedback, building confidence and reducing apprehension.

Remembering that the audience generally wants you to succeed, and focusing on delivering valuable content, can shift the focus away from self-consciousness. Consistent practice and a positive mindset are key to conquering speech anxiety and becoming a more poised and impactful speaker.

Building Confidence as a Speaker

Confidence in public speaking isn’t an innate trait, but a skill cultivated through practice and self-awareness. Joshua Gunn’s Speech Craft likely underscores the importance of understanding your audience and tailoring your message to resonate with them, fostering a sense of connection and control.

Leveraging technology like RingCentral for rehearsal allows speakers to refine their delivery, experiment with pacing, and identify areas for improvement in a low-stakes environment. Receiving feedback, even self-assessment through recording, is crucial for growth.

Embrace imperfections; striving for perfection can be paralyzing. Focus on conveying your message authentically and connecting with your audience. Each speaking opportunity, regardless of size, is a chance to build experience and solidify your confidence as a communicator.

Analyzing User Queries (Based on Provided Text)

User queries consistently request a direct PDF link for Speech Craft, appearing on various online platforms, revealing frustration with limited access to Joshua Gunn’s work.

The Desire for a Direct PDF Link

The overwhelming majority of online inquiries center around obtaining a readily available, direct PDF link for Joshua Gunn’s Speech Craft, 2nd Edition. As evidenced by posts dated August 19, 2025, and extending back to January 2025, users repeatedly ask if anyone still possesses such a link, demonstrating a persistent need for convenient access.

This demand suggests students and individuals interested in public speaking are actively seeking a cost-effective and easily accessible method to study the material. The repeated requests – “Could I get that pdf too please?” and “Hate to be a bother but do you still have that PDF?” – highlight a common struggle to acquire the textbook through traditional channels.

The focus remains squarely on the PDF format, indicating a preference for digital learning and portability, rather than physical copies or library rentals.

Requests for the PDF on Online Platforms

The search for a free PDF of Joshua Gunn’s Speech Craft is prominently visible across various online platforms. Discussions, particularly those surfacing around December 10, 2025, reveal consistent requests within reply chains and forum-like environments. Users actively solicit the PDF from one another, indicating a shared desire to bypass purchase costs.

These requests aren’t isolated incidents; they represent a recurring pattern of inquiry. Individuals are proactively reaching out on platforms, hoping to connect with someone who can share the digital textbook. This behavior underscores the widespread appeal of the book and the financial barriers some face in accessing it.

The prevalence of these requests highlights a clear need and a community actively seeking solutions for affordable educational resources.

User Frustration with Limited Access

The pursuit of a free PDF of Joshua Gunn’s Speech Craft is often accompanied by evident user frustration stemming from limited access to the material. Online discussions, as recent as December 10, 2025, demonstrate repeated inquiries for the PDF, frequently phrased as polite requests but hinting at underlying difficulty obtaining the textbook through conventional means.

This frustration appears to be fueled by a desire for convenient, readily available learning resources. The repeated nature of the requests – “Do you still have that PDF?” – suggests previous attempts to locate a free copy have been unsuccessful.

Users express this implicitly through persistent follow-up questions, indicating a continued need and a sense of being blocked from easily accessing the educational content.

2024 silverado owners manual

The 2024 Chevrolet Silverado offers comprehensive owner resources, including detailed service and repair guides, plus vital information regarding fluids, tires, and maintenance schedules.

Helm Incorporated provides the official 2024 Silverado 2500 HD/3500 HD Owner Manual, detailing specific vehicle options and essential operational guidance for all drivers.

Overview of the 2024 Silverado Model Year

The 2024 Silverado model year builds upon a legacy of dependability, offering owners a robust platform for work and play. Accessing the correct owner’s manual is paramount for understanding your vehicle’s capabilities and maintaining optimal performance. Resources like FactoryManuals provide detailed service and repair workshop guides, mirroring those used by Chevrolet dealerships, available in convenient PDF format.

Understanding the specifics of your Silverado – whether a 2500 HD or 3500 HD – is simplified through Helm Incorporated’s official owner manuals. These guides cover everything from recommended oil types and gas tank capacity to clock and radio settings, vital fluid information, tire maintenance, and details pertaining to your vehicle’s unique options.

As 2024 presents a landscape of geopolitical volatility and technological change, having readily available information about your vehicle’s operation and maintenance becomes even more crucial for peace of mind and continued reliability.

Where to Find the Official Owner’s Manual

Locating your 2024 Silverado’s official owner’s manual is straightforward. Helm Incorporated serves as a primary source, offering dedicated manuals for the 2500 HD and 3500 HD models. These resources provide comprehensive details tailored to your specific vehicle configuration, ensuring accurate guidance for maintenance and operation.

Alternatively, FactoryManuals offers an “insider’s look” at your Silverado’s inner workings, providing the same service and repair workshop guides utilized by Chevrolet’s authorized service centers. These manuals are conveniently available in digital PDF format for easy access and portability.

Given the global shifts in technology and the economy in 2024, having immediate access to digital resources is increasingly valuable. Both Helm Incorporated and FactoryManuals provide reliable platforms to download and review your vehicle’s documentation, empowering you with the knowledge to confidently maintain your Silverado.

Understanding Your Vehicle

The 2024 Silverado’s documentation details vital fluids, tire specifics, and routine maintenance, alongside crucial information about your vehicle’s unique options and features.

Vehicle Identification Number (VIN) and Key Information

Your 2024 Silverado’s Vehicle Identification Number (VIN) is a unique 17-character code crucial for identifying your specific vehicle. It’s located on the driver’s side dashboard, visible through the windshield, and also on your vehicle registration and insurance documents.

The VIN provides essential details about your truck’s manufacturing specifications, engine type, and model year. Accessing information related to your VIN is vital for service, recalls, and warranty claims. The owner’s manual emphasizes the importance of keeping your VIN readily available.

Furthermore, key information like your vehicle’s paint code and trim level are often linked to the VIN. Understanding these details ensures accurate parts ordering and personalized service when required. Refer to your owner’s manual for specific instructions on locating and interpreting your Silverado’s VIN.

Dashboard Symbols and Warning Lights

The 2024 Silverado’s instrument panel features a variety of symbols and warning lights designed to keep you informed about your vehicle’s status. Your owner’s manual provides a comprehensive guide to understanding each indicator, categorized by severity – from informational alerts to critical warnings.

Ignoring warning lights can lead to potential damage or unsafe driving conditions. Familiarize yourself with symbols like the check engine light, oil pressure warning, and brake system warning. The manual details the recommended action for each alert, whether it’s a simple check or immediate service.

Understanding the difference between steady, flashing, and color-coded lights is crucial. For example, a flashing light generally indicates a more urgent issue than a steady one. Refer to your owner’s manual for a detailed explanation of all dashboard symbols and their meanings.

Operation and Features

The 2024 Silverado’s manual details starting, driving, and the infotainment system, alongside Chevrolet Safety Assist features for a secure and connected driving experience.

Starting, Stopping, and Driving

The 2024 Silverado owner’s manual provides detailed instructions for safely starting and stopping the vehicle, covering various engine types and conditions. It explains the proper use of the ignition system, including keyless entry and remote start features where equipped.

Driving procedures are thoroughly outlined, encompassing normal operation, towing considerations, and off-road techniques. The manual emphasizes the importance of understanding the vehicle’s braking system, including anti-lock brakes and stability control.

Specific guidance is given on utilizing the transmission, whether automatic or manual, for optimal performance and fuel efficiency. Drivers will find information on hill start assist, trailer sway control, and other advanced driving aids. The manual also stresses the importance of adhering to all traffic laws and safety regulations while operating the 2024 Silverado.

Infotainment System and Connectivity

The 2024 Silverado’s infotainment system is comprehensively covered in the owner’s manual, detailing its features and operation. Users will find instructions on navigating the touchscreen interface, adjusting audio settings, and utilizing smartphone integration features like Apple CarPlay and Android Auto.

Connectivity options, including Bluetooth pairing for hands-free calling and audio streaming, are explained step-by-step. The manual also details the use of the Chevrolet Connected Services, offering features like remote vehicle access and Wi-Fi hotspot capability.

Troubleshooting tips are provided for common infotainment issues, along with information on software updates and system customization. The manual emphasizes safe usage of the infotainment system while driving, promoting driver awareness and minimizing distractions.

Chevrolet Safety Assist Features

The 2024 Silverado’s standard Chevrolet Safety Assist suite is thoroughly explained within the owner’s manual, detailing each feature’s operation and limitations. This includes Automatic Emergency Braking, Forward Collision Alert, Lane Keep Assist with Lane Departure Warning, and Front Pedestrian Braking.

The manual provides clear instructions on how each system functions, including activation/deactivation procedures and scenarios where they are most effective. It emphasizes that these features are assistive and do not replace attentive driving.

Additional safety technologies, such as Following Distance Indicator and IntelliBeam auto high beams, are also covered. The owner’s manual stresses the importance of understanding these systems to maximize safety and prevent reliance on automated features in all driving conditions.

Seating and Safety Restraints

The 2024 Silverado owner’s manual dedicates a significant section to proper seating positions and safety restraint usage. It details instructions for adjusting all seats, including power-adjustable options, and emphasizes the importance of correct posture for optimal safety.

Comprehensive guidance is provided on the use of seat belts for all occupants, including proper fitting procedures for adults and children. The manual clearly outlines the legal requirements and safety recommendations regarding child restraint systems, detailing LATCH system usage and appropriate car seat types.

Information on the airbag system is also included, explaining the locations of airbags and important safety precautions. The manual warns against placing rear-facing child seats in front of active airbags and stresses the importance of reading all warnings and instructions carefully.

Maintenance and Care

The 2024 Silverado’s manual outlines recommended oil types and capacities, tire maintenance, routine schedules, and fluid checks for optimal vehicle performance and longevity.

Recommended Oil Types and Capacities

Ensuring your 2024 Silverado receives the correct oil is crucial for engine health and performance. The official owner’s manual, provided by Helm Incorporated, details the recommended oil types for various engine options available in the 2024 model year.

Generally, the 2.7L Turbo, 5.3L, and 6.2L engines require SAE 5W-30 full synthetic oil. However, always consult your specific vehicle’s manual as requirements can vary based on factory fill and regional climate considerations.

Oil capacity also differs depending on the engine. The 2.7L Turbo typically requires approximately 6.3 quarts, while the 5.3L needs around 8.4 quarts, and the 6.2L demands approximately 8.4 quarts as well.

Regular oil changes, following the recommended intervals in the manual, are vital for maintaining optimal engine lubrication and preventing premature wear.

Tire Information and Maintenance

Maintaining proper tire pressure and condition is essential for the 2024 Silverado’s safety, handling, and fuel efficiency. The 2024 Silverado owner’s manual, available through Helm Incorporated, provides detailed tire information specific to your vehicle’s trim level and wheel size.

Recommended tire pressure can be found on the tire placard located on the driver’s side doorjamb. It’s crucial to check tire pressure monthly and adjust as needed, especially with temperature changes.

The manual also outlines proper tire rotation procedures to ensure even wear. Regular inspections for cuts, bulges, and uneven tread depth are vital for identifying potential issues.

Understanding your tire size and load capacity is also covered, ensuring you select appropriate replacement tires when needed, contributing to a safe and reliable driving experience.

Routine Maintenance Schedule

The 2024 Chevrolet Silverado’s longevity and performance depend on adhering to a consistent maintenance schedule. Your owner’s manual, sourced from Helm Incorporated, details a comprehensive plan tailored to your driving conditions – normal, severe, or special operating.

Key intervals include oil and filter changes, tire rotations, and fluid level checks. The manual specifies mileage or time-based recommendations for these services, ensuring optimal engine and component health.

It also outlines inspections of critical systems like brakes, suspension, and exhaust. Following this schedule helps prevent unexpected repairs and maintains your Silverado’s resale value.

The manual provides a clear, easy-to-follow guide, empowering owners to proactively manage their vehicle’s upkeep and enjoy years of reliable service.

Fluid Checks and Replacements

Maintaining proper fluid levels is crucial for the 2024 Chevrolet Silverado’s operation. The owner’s manual, available through Helm Incorporated, details the types and capacities of all essential fluids, including engine oil, coolant, brake fluid, power steering fluid, and transmission fluid.

Regular checks should be performed to identify leaks or low levels. The manual specifies the recommended replacement intervals for each fluid, based on mileage and driving conditions.

Using the correct fluid type is paramount to avoid damage to vehicle components. The manual clearly lists the approved specifications for each fluid, ensuring compatibility and optimal performance.

Proper fluid maintenance contributes to a smoother ride, improved fuel efficiency, and extended component life. Refer to your manual for detailed instructions and safety precautions.

In Case of Emergency

The 2024 Silverado owner’s manual details emergency assistance, roadside support, and towing procedures, ensuring driver preparedness for unexpected situations and safe recovery.

Emergency Assistance and Roadside Assistance

Your 2024 Silverado’s owner manual provides crucial details regarding emergency assistance options. It outlines procedures for contacting roadside assistance, covering services like towing, jump-starts, tire changes, and fuel delivery when you find yourself stranded.

The manual will guide you through the process of accurately reporting your vehicle’s location, utilizing the vehicle identification number (VIN) for swift identification and efficient service dispatch. It also details what information to have readily available when contacting assistance.

Furthermore, the manual emphasizes the importance of safety while awaiting assistance, advising drivers to position themselves safely away from traffic and to remain vigilant. Understanding these procedures can significantly reduce stress and ensure a quicker resolution during unforeseen circumstances.

Towing and Recovery Information

The 2024 Silverado owner’s manual contains vital towing and recovery procedures. It details proper towing methods, specifying designated towing points on the vehicle’s frame to prevent damage during transport. Incorrect towing can lead to significant structural issues, so adherence to these guidelines is critical.

The manual also outlines recovery procedures for situations where the Silverado becomes stuck. It advises against using improper equipment or techniques that could further immobilize the vehicle or cause injury. Specific instructions are provided for utilizing recovery straps and winches safely and effectively.

Detailed diagrams illustrate the correct attachment points and emphasize the importance of using appropriate safety gear during both towing and recovery operations. Always consult the manual before attempting either procedure.

Technical Specifications

The 2024 Silverado’s manual details engine specifications and performance metrics, alongside comprehensive dimensions and capacity data for informed vehicle understanding.

Engine Specifications and Performance

The 2024 Silverado owner’s manual provides a detailed breakdown of available engine options, including displacement, horsepower, and torque figures for each configuration. This crucial information allows owners to understand the performance capabilities of their specific vehicle.

Furthermore, the manual outlines key engine specifications, such as compression ratios, fuel injection systems, and recommended fuel grades. It also details performance characteristics, including acceleration times and towing capacities, enabling owners to optimize their driving experience.

Owners can find precise data regarding engine oil capacity and type, alongside maintenance intervals tailored to their engine. This ensures optimal engine health and longevity, maximizing the vehicle’s performance and reliability throughout its lifespan. The manual serves as an invaluable resource for understanding and maintaining the Silverado’s powerful engine.

Dimensions and Capacities

The 2024 Silverado owner’s manual meticulously details the vehicle’s dimensions, encompassing overall length, width, height, and wheelbase for each cab and bed configuration. This information is vital for navigating tight spaces and assessing storage capabilities.

Crucially, the manual outlines various capacities, including maximum payload, towing capacity (both conventional and fifth-wheel/gooseneck), and gross vehicle weight rating (GVWR). These figures are essential for safe and legal operation, preventing overloading and ensuring vehicle stability.

Owners will also find detailed information on interior dimensions, such as headroom, legroom, and cargo volume. Furthermore, the manual specifies fuel tank capacity and fluid capacities for all major systems, aiding in routine maintenance and preventing unexpected issues. This comprehensive data empowers owners to utilize their Silverado effectively.

Warranty Information

The 2024 Silverado owner’s manual clearly explains the New Vehicle Limited Warranty details, alongside comprehensive service and repair information for peace of mind.

New Vehicle Limited Warranty Details

Chevrolet provides a comprehensive New Vehicle Limited Warranty for the 2024 Silverado, offering owners protection against defects in materials or workmanship. The bumper-to-bumper coverage typically lasts for 3 years/36,000 miles (whichever comes first), safeguarding against a wide range of potential issues.

Powertrain coverage extends to 5 years/60,000 miles, protecting the engine, transmission, and drive systems. Additionally, corrosion protection is often included for a specified period. The 2024 Silverado owner’s manual meticulously details the specifics of each warranty component, including what is covered and any associated deductibles.

It’s crucial to review the manual to understand the warranty’s limitations and requirements for maintaining coverage, such as adhering to the recommended maintenance schedule. Proper documentation and service records are essential for any warranty claims.

Service and Repair Information

The 2024 Silverado owner’s manual directs owners to valuable service and repair resources. FactoryManuals offers an exclusive, insider’s look into the vehicle’s mechanics, providing the same detailed guides used by Chevrolet dealer service centers – conveniently available in PDF format.

These resources cover a broad spectrum of maintenance and repair procedures, from routine oil changes and tire rotations to more complex engine and transmission work. Accessing these manuals empowers owners and independent mechanics to accurately diagnose and resolve issues.

The manual emphasizes the importance of using recommended oil types and capacities, detailed within the service guides. Helm Incorporated’s owner manuals also provide specific information on vital fluids, clock/radio settings, and vehicle-specific options, aiding in accurate service and repair.

stealth camera instructions

Stealth cameras are increasingly utilized for security and monitoring, offering discreet surveillance options. Modern advancements, like AI-powered image enhancement (Deepnight), improve low-light visibility.

Dual Pixel Focus Guide technology simplifies manual focusing, while systems like Stealth Station S8 provide comprehensive solutions. Understanding these tools is crucial for effective implementation.

What are Stealth Cameras?

Stealth cameras, fundamentally, are recording devices designed for inconspicuous surveillance. They diverge from traditional cameras by prioritizing concealment, often integrated into everyday objects. These devices capture video and sometimes audio, providing a discreet monitoring solution for various applications.

Modern stealth cameras leverage advanced technologies like AI-powered image enhancement – exemplified by Deepnight – to improve visibility in challenging lighting conditions. Furthermore, features such as Dual Pixel Focus Guide assist in achieving clear footage, even with manual focus adjustments. They range from simple, standalone units to complex systems like the Stealth Station S8, offering diverse capabilities.

Why Use a Stealth Camera?

Stealth cameras offer a unique advantage: unobtrusive monitoring. They are ideal for situations where visible cameras might alter behavior or are impractical. Security is a primary driver, providing evidence in cases of theft, vandalism, or other incidents.

Beyond security, they’re used for investigative purposes, employee monitoring (with legal considerations), and even documenting wildlife. The integration of technologies like improved night vision, such as that offered by Deepnight, expands their utility. Systems like DrivePro 620 offer comprehensive recording, while discreet designs ensure minimal disruption. Ultimately, they provide peace of mind through covert observation.

Types of Stealth Cameras

Stealth cameras come in diverse forms, from hidden devices within everyday objects to sophisticated wireless and wired systems. Indoor and outdoor models cater to varied surveillance needs.

Hidden Cameras in Everyday Objects

Hidden cameras are ingeniously disguised within common items, offering unparalleled discretion. These can be integrated into clocks, smoke detectors, USB chargers, and even everyday objects like pens. This concealment makes them ideal for unobtrusive monitoring in homes, offices, or vehicles.

The key advantage lies in their ability to blend seamlessly into the environment, avoiding detection. However, careful consideration must be given to placement to ensure optimal viewing angles and functionality. These devices often utilize SD card storage or cloud storage for recorded footage, offering flexible data management options. Remember to check local privacy laws before deployment.

Wireless vs. Wired Stealth Cameras

Wireless stealth cameras offer flexibility and ease of installation, connecting via Wi-Fi for remote viewing and control. They eliminate the need for complex cabling, making them suitable for various locations. However, they rely on a stable network connection and may be susceptible to interference.

Wired cameras, conversely, provide a more secure and reliable connection, minimizing the risk of signal loss. They require physical cabling, which can be more challenging to install but offers greater data security. Consider your environment and security needs when choosing between these options, factoring in connectivity problems and potential troubleshooting requirements.

Indoor vs. Outdoor Stealth Cameras

Indoor stealth cameras are typically designed for discreet monitoring within homes or offices, often concealed within everyday objects. They prioritize image quality in controlled lighting conditions and may lack robust weatherproofing. Features like a built-in webcam and microphone are common for comprehensive surveillance.

Outdoor cameras, however, require durable construction to withstand the elements – rain, snow, and extreme temperatures. They often incorporate thermal imaging for low-light conditions and wider dynamic range for varying light levels. Powering these cameras can be achieved through direct wiring or battery operation, demanding careful consideration of powering the camera needs.

Setting Up Your Stealth Camera

Proper setup involves selecting an optimal location, ensuring adequate powering, and establishing a secure network connection for remote access and efficient monitoring.

Choosing the Right Location

Strategic placement is paramount for effective stealth camera operation. Consider areas with high traffic or potential points of interest, ensuring a clear field of view. Camouflage and concealment are vital; blend the camera seamlessly into its surroundings to avoid detection.

Indoor locations benefit from discreet placement within everyday objects, while outdoor setups require weatherproofing and protection from the elements. Avoid direct sunlight or strong backlighting, which can compromise image quality. Prioritize locations offering a stable surface, potentially utilizing a tripod for enhanced stability and consistent footage. Remember to consider power source accessibility when finalizing the location.

Powering the Camera

Powering your stealth camera requires careful consideration. Wired cameras offer a consistent power supply but limit placement flexibility. Wireless models rely on batteries or AC adapters, demanding regular battery changes or convenient access to power outlets.

Some cameras utilize USB Type-C for power, offering versatility. Ensure the power source is reliable to avoid interruptions during recording. Consider the camera’s power consumption and battery life when selecting a power solution. DrivePro 620 dashcams, for example, require a consistent power source during operation. Prioritize uninterrupted power for continuous surveillance.

Connecting to a Network (Wireless Models)

Connecting your wireless stealth camera to a network is crucial for remote viewing and control. Most cameras utilize Bluetooth or Wi-Fi for connectivity. Download the camera’s companion app and follow the on-screen instructions for network setup.

Ensure your Wi-Fi network is secure with a strong password. Some cameras support USB Type-C for initial setup or firmware updates. Verify the camera’s compatibility with your router’s frequency band (2.4GHz or 5GHz). A stable network connection is vital for reliable performance and access to features like cloud storage.

Recording and Storage

Stealth cameras record in various modes, including continuous and motion-activated. Data is stored on SD cards or via cloud storage, commonly in MP4 or AVI formats.

Recording Modes (Continuous, Motion-Activated)

Stealth cameras offer flexible recording options to suit diverse surveillance needs. Continuous recording captures footage 24/7, ensuring no events are missed, but requires substantial storage capacity. This mode is ideal for areas demanding constant monitoring.

Alternatively, motion-activated recording conserves storage space by only recording when movement is detected. This is perfect for locations where activity is infrequent. Sensitivity settings allow customization to minimize false alarms triggered by things like shadows or insects.

Many cameras allow scheduling, enabling specific recording modes during certain times. Combining these modes provides a balanced approach to security and efficient storage management.

Storage Options (SD Card, Cloud Storage)

Stealth cameras typically utilize two primary storage methods: SD cards and cloud storage. SD cards offer a cost-effective, self-contained solution, allowing local recording without recurring fees. However, they have limited capacity and are susceptible to physical damage or theft.

Cloud storage provides remote access to footage, enhanced security through encryption, and scalability. Recordings are stored on secure servers, protecting against data loss. This option usually involves a subscription fee, varying based on storage space and features.

Some cameras support both methods, offering redundancy and flexibility. File formats like MP4 and AVI are commonly used for efficient storage and playback.

File Formats (MP4, AVI, etc.)

Stealth cameras record footage in various digital file formats, with MP4 and AVI being the most prevalent. MP4 is favored for its efficient compression, maintaining good video quality with smaller file sizes, ideal for cloud storage and streaming. AVI, while older, offers broader compatibility across different devices and software.

Some cameras also support XF-AVC, a professional-grade format offering superior quality but requiring more storage space. The chosen format impacts file size, playback compatibility, and editing options. Understanding these differences is crucial for managing and archiving recorded data effectively.

Consider your intended use when selecting a recording format.

Camera Features & Technology

Stealth cameras boast features like night vision and adjustable motion detection sensitivity. Thermal imaging enhances low-light performance, while Dual Pixel Focus Guide aids manual focus.

Night Vision Capabilities

Night vision is a critical feature in stealth cameras, enabling recording in low-light or completely dark environments. Traditional infrared (IR) night vision illuminates the scene with IR light, creating a monochrome image. However, newer technologies, such as AI-Powered Image Enhancement – exemplified by Deepnight – are revolutionizing this capability.

Deepnight doesn’t simply enhance existing light; it aims to reveal what’s actually present in the darkness, offering a more realistic and detailed image. This is a significant leap beyond conventional IR, which can often produce grainy or washed-out footage. The effectiveness of night vision also depends on the camera’s sensor quality and lens aperture, impacting clarity and range.

Furthermore, advanced cooling systems, like those found in the ASUS Stealth Hinge design, can contribute to better sensor performance in low-light conditions by reducing thermal noise.

Motion Detection Sensitivity

Motion detection sensitivity is a crucial setting in stealth cameras, determining how readily the camera triggers recording when movement is detected. Adjusting this setting correctly minimizes false alarms – recordings triggered by irrelevant motion like shadows or insects – while ensuring important events are captured.

Higher sensitivity means even slight movements will activate recording, potentially leading to numerous unnecessary files. Lower sensitivity requires more significant motion to trigger, risking missing crucial activity. Finding the optimal balance depends on the camera’s location and environment.

Advanced systems may offer customizable motion zones, allowing you to specify areas within the camera’s field of view to monitor, further refining detection accuracy and reducing unwanted recordings. Proper configuration is key for efficient storage and review.

Dual Pixel Focus Guide Technology

Dual Pixel Focus Guide Technology significantly simplifies achieving sharp, clear images with stealth cameras, particularly when manual focusing is required. This innovative feature utilizes specialized indicators within the camera’s interface to visually guide the user towards optimal focus.

Unlike traditional manual focusing, which relies on subjective assessment, Dual Pixel technology analyzes light entering the lens and provides real-time feedback. This is especially beneficial in low-light conditions or when monitoring distant subjects where precise focusing is challenging.

The technology enhances usability, ensuring critical details are captured with clarity, maximizing the effectiveness of the stealth camera for surveillance and documentation purposes. It’s a valuable asset for both novice and experienced users.

Advanced Stealth Camera Techniques

Remote viewing and control, combined with effective camouflage, maximize a stealth camera’s potential. Utilizing a tripod ensures stability for clear footage and reliable monitoring.

Camouflage and Concealment

Effective concealment is paramount for successful stealth camera operation. Blending the camera into its surroundings minimizes detection, ensuring continuous, unobtrusive monitoring. Consider the environment – a camera disguised as an everyday object, like a clock or smoke detector, offers excellent camouflage.

Pay attention to lighting and shadows; a poorly positioned camera will stand out. Utilize natural elements for cover, and avoid placing the camera in direct line of sight. Remember, the goal is to make the camera invisible to casual observation. Regularly check the concealment to ensure it hasn’t been compromised by environmental changes or accidental exposure.

Think creatively about how to integrate the camera seamlessly into the existing décor, maximizing its stealth capabilities.

Remote Viewing and Control

Remote viewing capabilities are a cornerstone of modern stealth camera systems, allowing access to live feeds and recorded footage from anywhere with an internet connection. Most wireless models offer dedicated mobile apps or web interfaces for convenient control.

Connectivity is key; ensure a stable network connection for uninterrupted access. Features often include pan, tilt, and zoom control, enabling adjustments to the camera’s perspective remotely. Secure your system with strong passwords and encryption to prevent unauthorized access.

Explore features like motion detection alerts, which notify you of activity in real-time. Regularly update the camera’s firmware to benefit from the latest security enhancements and performance improvements.

Using a Tripod for Stability

Employing a tripod significantly enhances the quality of footage captured by a stealth camera, particularly in situations demanding prolonged monitoring or low-light conditions. A stable base minimizes unwanted movement, resulting in clearer, more usable recordings.

Consider the environment when selecting a tripod; adjustable height and sturdy legs are crucial for uneven terrain. Discreet, compact tripods are ideal for blending into surroundings. Ensure the tripod is securely positioned to prevent accidental tipping.

Combine with camouflage techniques to further conceal the setup. Regularly check the tripod’s stability, especially in outdoor environments, to maintain optimal image quality and avoid disruptions.

Legal Considerations

Adhering to privacy laws is paramount when deploying stealth cameras; understand recording audio implications and informed consent requirements to avoid legal repercussions.

Privacy Laws and Regulations

Navigating privacy laws is critical when utilizing stealth cameras. Regulations vary significantly by location, demanding thorough research before deployment. Understanding federal, state, and local laws concerning surveillance is essential to avoid legal issues.

Generally, recording in areas with a reasonable expectation of privacy – like bathrooms or bedrooms – is prohibited. Public spaces often have more lenient rules, but even there, signage indicating surveillance may be required. Always prioritize transparency and ethical considerations. Failure to comply can result in substantial fines and legal penalties. Consulting with legal counsel specializing in surveillance law is highly recommended.

Recording Audio – Legal Implications

Audio recording introduces significant legal complexities beyond video surveillance. Many jurisdictions operate under “one-party consent” laws, meaning only one person involved in the conversation needs to consent to the recording. However, “two-party” or “all-party consent” laws require all parties to agree.

Secretly recording audio without consent can lead to criminal charges and civil lawsuits. Even in one-party consent states, using audio recordings as evidence may be restricted. Always research and adhere to the specific audio recording laws in your location. Disabling audio recording functionality is a prudent step if legal uncertainties exist, ensuring compliance and minimizing risk.

Informed Consent Requirements

Obtaining informed consent is paramount when deploying stealth cameras, particularly in areas with privacy expectations. This means individuals must be clearly aware of the surveillance and understand how the recorded data will be used. Simply posting a sign may not be sufficient; active, demonstrable consent is often required, especially in sensitive locations.

Transparency builds trust and mitigates legal challenges. Clearly communicate the purpose of the recording, data storage practices, and access controls. Failure to obtain proper consent can result in legal repercussions and damage your reputation. Prioritize ethical considerations alongside legal compliance when implementing any surveillance system.

Troubleshooting Common Issues

Common problems include recording failures, poor image quality, and connectivity issues. Ensure proper power, SD card functionality, and network settings for optimal performance.

Camera Not Recording

If your stealth camera isn’t recording, several factors could be at play. First, verify the power source is securely connected and functioning correctly; a loose connection or depleted battery is a frequent cause.

Next, check the storage medium – an SD card – ensuring it’s properly inserted, not full, and compatible with the camera’s specifications. Formatting the SD card can sometimes resolve issues.

Confirm the recording settings are enabled, and the camera isn’t in a paused or standby mode. Finally, examine the camera’s interface for any error messages or indicators suggesting a malfunction. A reset might be necessary.

Poor Image Quality

Suboptimal image quality from your stealth camera can stem from several issues. Lighting is paramount; insufficient illumination leads to grainy or dark footage. Utilizing cameras with night vision capabilities or adding external lighting can dramatically improve visibility in low-light conditions.

Ensure the lens is clean and free from obstructions. Adjusting the camera’s resolution settings to a higher value will enhance detail, but requires more storage space.

Consider the camera’s focus; utilizing Dual Pixel Focus Guide can assist with manual adjustments. AI-Powered Image Enhancement, like Deepnight, can also improve clarity.

Connectivity Problems

Experiencing connectivity issues with your wireless stealth camera? First, verify your Wi-Fi network is functioning correctly and the camera is within range of the router. Check the camera’s manual for specific network compatibility requirements – some may only support 2.4GHz networks.

Restart both the camera and your router as a simple troubleshooting step. Ensure the correct password has been entered during setup. If problems persist, consider a wired connection for greater stability.

USB Type-C interfaces can also be utilized for data transfer and potential power, bypassing wireless concerns.

Stealth Camera Systems ౼ Overview

Comprehensive systems, like Stealth Station S8, offer complete surveillance solutions. DrivePro 620 dashcams provide front and rear recording, utilizing high-sensitivity sensors for clarity.

Stealth Station S8 System

The Stealth Station S8 system represents a complete surveillance package, designed for comprehensive monitoring capabilities. While specific details regarding its functionality are limited in the provided text, it’s referenced as a system with a dedicated reference guide available for download in PDF or text format.

This suggests a potentially complex setup requiring detailed instructions for optimal performance. Users interested in utilizing the S8 system should consult the official manual to understand its features, configuration options, and troubleshooting procedures. The system likely integrates multiple components for enhanced security and discreet operation, making the guide essential for effective deployment.

DrivePro 620 ౼ Front and Rear Dashcams

DrivePro 620 offers a paired front and rear dashcam solution, enhancing vehicle security and providing comprehensive recording coverage. Both cameras feature high-sensitivity sensors capable of capturing clear footage, even in challenging lighting conditions. The system utilizes a USB Type-C interface for power and data transfer, alongside features like a microphone, compass, gyroscope, and Bluetooth connectivity.

Recording options include both photo and video with audio. Storage capacity reaches 64GB, and the dashcams support recording in XF-AVC and MP4 formats. Proper installation and configuration are crucial for optimal performance, ensuring continuous and reliable operation during vehicle use.

Emerging Technologies in Stealth Cameras

Thermal imaging enhances low-light performance, while AI-powered image enhancement (Deepnight) reveals details in darkness. ASUS Stealth Hinge improves cooling and durability.

AI-Powered Image Enhancement (Deepnight)

Deepnight (YC W24) represents a significant leap in stealth camera technology, moving beyond simply making images look believable. Most AI focuses on aesthetic improvements, but Deepnight’s core innovation lies in its ability to reveal what is actually present in low-light or even completely dark environments.

As explained by co-founder and CEO Lucas Young, the technology doesn’t just brighten an image; it reconstructs the scene based on subtle data points, offering a clearer, more accurate representation of reality. This is particularly valuable for surveillance applications where identifying details in challenging conditions is paramount. It’s a paradigm shift in how we perceive and utilize images captured in darkness.

Thermal Imaging for Low-Light Conditions

Thermal imaging offers a distinct advantage in stealth camera applications, particularly when traditional cameras struggle in low-light scenarios. Unlike standard cameras that rely on visible light, thermal cameras detect heat signatures emitted by objects and living beings. This allows for clear image capture even in complete darkness, through smoke, or in obscured visibility conditions.

This technology is invaluable for security purposes, enabling the detection of intruders or monitoring environments where visual surveillance is limited. While the provided text doesn’t detail specific thermal camera models, its implication suggests a growing trend towards integrating this capability into advanced stealth systems for enhanced performance.

Advanced Cooling Systems (ASUS Stealth Hinge)

Advanced cooling systems are becoming increasingly vital in stealth camera technology, particularly as devices become more powerful and compact. The ASUS Stealth Hinge, mentioned in the provided information, exemplifies this trend. It’s designed to enhance durability and improve thermal management within the camera system.

This hinge, coupled with tri-fan cooling technology and an ASUS-exclusive thermal solution, ensures silent operation even during prolonged use. Effective cooling prevents overheating, which can degrade image quality and shorten the lifespan of the camera components. This innovation is crucial for maintaining reliable performance in demanding surveillance applications.

ram raksha stotra pdf

Ram Raksha Stotra PDF: A Comprehensive Guide

Ram Raksha Stotra PDFs are readily available online‚ offering translations and the original Sanskrit text. Numerous sources provide free downloads in PDF format‚ including Google Drive links.

Authenticity and copyright considerations are crucial when obtaining and distributing these digital versions of the sacred text.

The Ram Raksha Stotra is a revered hymn dedicated to Lord Rama‚ widely recited for protection and spiritual upliftment. Its origins trace back to ancient Vedic traditions‚ becoming a powerful tool for devotees seeking solace and divine grace.

Many seek the Ram Raksha Stotra PDF for convenient access to the verses‚ enabling regular recitation and study. This stotra isn’t merely a collection of words; it’s a potent mantra believed to shield practitioners from negative influences and obstacles.

The availability of the Ram Raksha Stotra in PDF format has significantly broadened its reach‚ allowing individuals globally to incorporate this sacred practice into their daily lives. It’s a pathway to connect with Rama’s divine energy.

Historical Background and Authorship

The Ram Raksha Stotra is traditionally attributed to Sage Budhakaushika‚ a revered figure in Hindu mythology. While the exact dating remains debated‚ its composition is believed to fall within the Vedic or post-Vedic period; Accessing a Ram Raksha Stotra PDF allows study of the original verses.

The stotra’s authorship is deeply rooted in devotion to Lord Rama‚ reflecting a profound understanding of His divine attributes and protective powers. The text’s enduring popularity suggests a long history of oral transmission before being compiled into its present form.

Numerous PDF versions circulate‚ preserving this ancient hymn for future generations. The stotra’s historical significance lies in its ability to offer spiritual solace and protection‚ as evidenced by its continued recitation today.

The Rishi‚ Devata‚ and Chanda

Understanding the Rishi‚ Devata‚ and Chanda is crucial when studying the Ram Raksha Stotra‚ often found in PDF format. Sage Budhakaushika is recognized as the Rishi‚ the inspired seer of this powerful hymn. Lord Seetaramachandra is the Devata‚ the divine entity invoked throughout the stotra.

The meter‚ or Chanda‚ is Anushtup‚ a common and versatile Vedic meter lending itself to devotional poetry. These elements are typically stated at the beginning of the stotra within a Ram Raksha Stotra PDF.

Knowing these foundational aspects enhances comprehension and proper recitation‚ unlocking the stotra’s full spiritual benefits. Many PDF versions include this introductory information for practitioners.

Understanding the Stotra’s Content

Ram Raksha Stotra PDF versions contain verses detailing Rama’s divine form and protective powers. Careful study reveals the stotra’s core message of devotion and liberation.

The Initial Dhyana Shloka (Meditation Verse)

The Dhyana Shloka‚ found within the Ram Raksha Stotra PDF‚ serves as a foundational meditative verse. It vividly describes Lord Rama‚ seated on a lotus‚ with a radiant face and adorned with a jata (matted hair). This initial verse‚ often recited before the core stanzas‚ prepares the devotee’s mind for deeper contemplation.

The PDF versions typically present the Sanskrit verse alongside transliterations and translations. The imagery evokes Rama’s beauty‚ strength‚ and divine presence. Reciting this shloka cultivates a focused and reverent state of mind‚ essential for experiencing the stotra’s full benefits. It’s a powerful tool for establishing a connection with Rama before embarking on the recitation of the protective verses.

Description of Rama’s Form in the Dhyana

The Ram Raksha Stotra PDF’s Dhyana shloka meticulously details Rama’s divine form. He is depicted seated on a lotus‚ symbolizing purity and spiritual awakening. His face is described as a blossoming lotus‚ radiating serenity and beauty. Adorned with a jata (matted hair)‚ signifying his ascetic nature‚ Rama holds a shield and sword‚ representing protection and righteousness.

PDF versions often highlight these details‚ aiding visualization during meditation. The description emphasizes his complexion‚ attire‚ and overall majestic presence. This vivid imagery‚ found within the Ram Raksha Stotra‚ isn’t merely aesthetic; it’s a pathway to experiencing Rama’s divine qualities and fostering devotion.

The Core Stanzas: A Verse-by-Verse Overview

The Ram Raksha Stotra PDF contains verses dedicated to invoking Rama’s protection against various fears and obstacles. Each stanza‚ meticulously preserved in PDF formats‚ praises Rama’s virtues and power. Translations within the PDF often explain the deeper meaning of each verse‚ revealing layers of spiritual significance.

The stotras detail Rama’s ability to vanquish negativity and grant liberation. Many PDF versions include transliteration alongside the Sanskrit‚ aiding pronunciation. Reciting these verses‚ as detailed in the Ram Raksha Stotra‚ is believed to create a protective shield‚ fostering inner peace and strength.

Invocation of Rama’s Protection

The Ram Raksha Stotra PDF fundamentally serves as a powerful invocation of Rama’s divine protection. Each verse‚ readily accessible within the PDF document‚ is a plea for safeguarding from worldly fears‚ negative energies‚ and obstacles. Recitation‚ as outlined in the PDF‚ is believed to create an impenetrable shield around the devotee.

The stotra’s verses specifically request Rama’s grace to overcome challenges and attain spiritual growth. Many PDF versions emphasize the importance of sincere devotion during recitation. This focused intention amplifies the protective power of the stotra‚ offering solace and strength to those seeking Rama’s blessings.

Benefits of Reciting the Ram Raksha Stotra

The Ram Raksha Stotra PDF details numerous benefits‚ including spiritual peace‚ protection from negativity‚ obstacle removal‚ and positive quality enhancement through consistent recitation.

Spiritual Benefits and Inner Peace

The Ram Raksha Stotra‚ accessible through various PDF versions online‚ is believed to profoundly impact one’s spiritual well-being. Recitation fosters a deep connection with Lord Rama‚ cultivating inner peace and tranquility. The stotra’s verses‚ when internalized‚ are said to purify the mind‚ reducing anxiety and promoting emotional stability.

Consistent practice‚ as outlined in many Ram Raksha Stotra PDF guides‚ helps devotees overcome mental clutter and develop a stronger sense of self-awareness. This leads to increased clarity‚ improved focus‚ and a heightened capacity for compassion. The stotra’s power lies in its ability to quiet the internal dialogue‚ allowing for a more profound experience of inner stillness and spiritual growth.

Protection from Negative Energies

Many devotees turn to the Ram Raksha Stotra‚ often found in readily available PDF formats‚ specifically for its protective qualities. The stotra is considered a powerful shield against negative energies‚ evil influences‚ and detrimental forces. Reciting the verses creates a vibrational field that repels negativity‚ safeguarding the practitioner and their surroundings.

Ram Raksha Stotra PDF resources often emphasize the stotra’s ability to dispel fear‚ anxiety‚ and psychic attacks. It’s believed to neutralize the effects of curses and remove obstacles caused by malevolent entities. Regular chanting‚ as detailed in various guides‚ strengthens one’s aura‚ providing a robust defense against harmful energies and promoting a sense of security.

Removal of Obstacles and Fulfillment of Desires

The Ram Raksha Stotra‚ easily accessible as a PDF download‚ is revered for its capacity to clear pathways and facilitate the fulfillment of righteous desires. Devotees believe consistent recitation removes obstacles hindering progress in various life endeavors‚ be they personal‚ professional‚ or spiritual.

Many PDF versions highlight the stotra’s power to overcome challenges and attract positive outcomes. It’s thought to appease planetary influences and mitigate the effects of unfavorable astrological alignments. By invoking Rama’s grace‚ practitioners aim to align themselves with divine will‚ fostering success and achieving desired results. The stotra’s verses are considered potent catalysts for manifesting positive change.

Enhancement of Positive Qualities

Accessing the Ram Raksha Stotra in PDF format allows for consistent study and recitation‚ fostering the development of admirable character traits. The stotra’s verses are believed to cultivate virtues like courage‚ compassion‚ devotion‚ and detachment. Regular engagement with the text‚ available for free download‚ inspires practitioners to embody Rama’s exemplary qualities.

Many believe the stotra’s energy purifies the mind and heart‚ diminishing negative tendencies. It encourages selflessness‚ integrity‚ and a commitment to dharma. Through dedicated practice‚ individuals can strengthen their inner resolve and cultivate a more virtuous disposition‚ leading to a more fulfilling and purposeful life.

Obtaining the Ram Raksha Stotra PDF

Numerous online resources offer the Ram Raksha Stotra in PDF format‚ including Google Drive links. Both free and paid versions are available for download.

Reliable Sources for PDF Download

Finding a trustworthy source for the Ram Raksha Stotra PDF is essential. Several websites and platforms consistently provide authentic versions of this sacred text. Google Drive frequently hosts high-quality PDF copies‚ easily accessible with a simple search.

Additionally‚ dedicated spiritual websites specializing in Hindu scriptures often offer downloadable PDFs. Be cautious of unfamiliar sites and prioritize those with established reputations. Look for sources that clearly state the origin and any translation details.

Remember to verify the authenticity of the document before relying on its content. Checking for consistent formatting and accurate Sanskrit transliteration can help ensure you have a reliable copy of the Ram Raksha Stotra.

Google Drive Links and Online Availability

Ram Raksha Stotra PDF versions are widely shared on Google Drive‚ offering convenient access for devotees. A quick online search reveals numerous links to downloadable files‚ ranging from simple text formats to beautifully formatted PDFs. Online availability extends beyond Google Drive‚ with several websites dedicated to Hindu scriptures hosting the stotra.

However‚ exercise caution when utilizing these links. Verify the file size and source before downloading to ensure it’s a complete and accurate version; Many platforms also allow online viewing‚ eliminating the need for a download. Remember to respect copyright considerations when distributing or sharing these files.

Free vs. Paid PDF Versions

Numerous websites offer the Ram Raksha Stotra PDF for free download‚ providing access to the text for devotional practice. These versions typically include the Sanskrit verses‚ transliteration‚ and English translations. However‚ some platforms offer paid versions‚ often boasting enhanced features like high-resolution formatting‚ detailed commentaries‚ and audio recitations;

The value of paid versions lies in the added scholarly insights and improved readability. While free PDFs serve the purpose of reciting the stotra‚ paid options cater to those seeking a deeper understanding. Ultimately‚ the choice depends on individual needs and preferences‚ with both free and paid resources readily available.

Ensuring Authenticity of the PDF

When downloading a Ram Raksha Stotra PDF‚ verifying its authenticity is paramount. Numerous versions circulate online‚ and discrepancies can occur due to transcription errors or unauthorized modifications. Cross-reference the downloaded text with established sources‚ like reputable websites or published books‚ to confirm accuracy.

Look for PDFs originating from recognized spiritual organizations or scholars. Be cautious of versions with unusual formatting or grammatical inconsistencies. Respecting content ownership is vital; ensure the source doesn’t violate copyright laws. Prioritize PDFs that clearly state their origin and any editorial notes‚ guaranteeing a reliable and accurate rendition of the stotra.

Recitation Guidelines and Practices

Proper pronunciation and shraddha (faith) are essential when reciting the Ram Raksha Stotra. Daily or weekly practice‚ at a recommended time‚ maximizes benefits.

Proper Pronunciation of Mantras

Accurate pronunciation is paramount when reciting the Ram Raksha Stotra mantras. The power of the stotra lies not just in the words themselves‚ but in the vibrational energy created through correct articulation. Many online resources‚ including PDF versions‚ often lack phonetic guidance.

Seek guidance from a knowledgeable teacher or utilize audio recordings to learn the proper sounds of each syllable. Mispronunciation can alter the mantra’s effect. Pay close attention to the nasal sounds and the subtle nuances of Sanskrit phonetics. Consistent‚ mindful practice will refine your pronunciation‚ enhancing the spiritual benefits derived from this powerful stotra. Remember‚ clarity and devotion are key!

Recommended Time for Recitation

While the Ram Raksha Stotra can be recited at any time‚ certain periods are considered particularly auspicious. Early morning‚ during the Brahmamuhurta (approximately 96 minutes before sunrise)‚ is highly recommended for maximum benefit. This time is believed to be conducive to spiritual practice.

Evening‚ before sunset‚ is also favorable. Many practitioners incorporate the stotra into their daily puja (worship) routine. Accessing a PDF version allows for convenient recitation at your preferred time. Consistency is more important than strict adherence to a specific hour; however‚ a peaceful and undisturbed environment enhances the experience.

Frequency of Recitation (Daily‚ Weekly)

The frequency of reciting the Ram Raksha Stotra depends on individual capacity and intention. Daily recitation is considered ideal for consistent spiritual growth and protection‚ easily facilitated by having a PDF readily available; However‚ even weekly recitation offers significant benefits.

Some devotees commit to reciting it at least once a month‚ particularly during challenging times. The key is sincerity and devotion. A downloadable PDF allows for flexible integration into your schedule. Consistent practice‚ regardless of frequency‚ strengthens faith and invites positive energy. Remember‚ the power lies in the devotion‚ not merely the repetition.

The Importance of Shraddha (Faith)

Shraddha‚ or unwavering faith‚ is paramount when reciting the Ram Raksha Stotra. Simply reading the words from a PDF isn’t enough; genuine belief in Rama’s protective power amplifies the stotra’s efficacy. A downloaded PDF serves as a tool‚ but faith is the engine.

Devotees believe that sincere recitation‚ fueled by shraddha‚ can overcome obstacles and fulfill desires. It’s about connecting with the divine energy embodied in the stotra. Without faith‚ the benefits may be diminished. Cultivate a heartfelt connection with Rama while utilizing the convenient accessibility of a digital PDF version.

Variations and Translations

Ram Raksha Stotra exists in Hindi and English translations‚ often found within PDF versions. Different schools offer varied recitation styles‚ accessible online.

Hindi Translations of the Stotra

Numerous PDF versions of the Ram Raksha Stotra include Hindi translations alongside the original Sanskrit verses. These translations cater to devotees who are more comfortable with Hindi‚ facilitating deeper understanding and devotional practice. Shree Ram Raksha Stotra Hindi versions are easily discoverable online‚ often presented alongside transliteration to aid pronunciation.

These Hindi translations aim to convey the precise meaning and essence of each shloka‚ preserving the spiritual power of the stotra. Many digital copies‚ available for download‚ feature both Devanagari script and Roman transliteration for wider accessibility. The availability of Hindi translations significantly broadens the reach of this powerful protective hymn.

English Translations and Interpretations

Ram Raksha Stotra’s profound verses are widely accessible through numerous English translations available in PDF format. These translations aim to convey the stotra’s meaning and spiritual significance to English-speaking devotees. Many online resources offer both literal translations and interpretive explanations‚ enhancing comprehension.

The document‚ often found as a free download‚ provides a valuable tool for those seeking to connect with the stotra’s protective energy. Interpretations often delve into the symbolism and deeper philosophical implications of each shloka. These English versions facilitate recitation and contemplation‚ allowing practitioners to fully absorb the stotra’s blessings.

Different Schools of Recitation

While the core Ram Raksha Stotra text remains consistent across traditions‚ subtle variations in pronunciation and recitation styles exist. These differences often stem from various schools of thought within Hinduism‚ influencing the emphasis and melodic intonation. Some practitioners adhere to strict phonetic guidelines‚ while others prioritize devotional feeling.

PDF versions available online may not always specify a particular school‚ leaving room for individual interpretation. Understanding these nuances can enrich the recitation experience. Devotees often learn specific recitation methods from their gurus or through established lineages‚ ensuring proper adherence to tradition.

Additional Resources and Related Texts

Exploring texts like the Hanuman Chalisa and Sundar Kand complements the Ram Raksha Stotra‚ deepening devotion. PDF versions of these are widely accessible online.

Shree Hanuman Chalisa Connection

Hanuman Chalisa and Ram Raksha Stotra share a profound connection‚ both deeply rooted in devotion to Lord Rama. Reciting the Hanuman Chalisa often precedes or follows the Ram Raksha Stotra‚ creating a synergistic spiritual practice.

Many individuals find that the Chalisa prepares the mind and heart for the more extensive protection invoked by the Stotra. Both texts‚ frequently available as PDF downloads‚ emphasize surrender and faith.

The Hanuman Chalisa celebrates Hanuman’s unwavering devotion‚ while the Ram Raksha Stotra directly seeks Rama’s shield. Combined recitation amplifies positive energies and offers comprehensive spiritual fortification‚ readily accessible through online PDF resources.

Sundar Kand and its Relevance

The Sundar Kand‚ a pivotal chapter of the Ramcharitmanas‚ narrates Hanuman’s journey to Lanka and his devoted service to Lord Rama; Its relevance to the Ram Raksha Stotra lies in the shared theme of unwavering devotion and protection.

Both texts highlight Rama’s power and grace‚ offering solace and security to devotees. Studying the Sundar Kand deepens understanding of the context within which the Ram Raksha Stotra operates.

Many find that reading the Sundar Kand before reciting the Stotra enhances the experience‚ readily available as PDF downloads. Both are powerful tools for spiritual growth and readily accessible online.

Other Rama-Related Stotras

Alongside the Ram Raksha Stotra‚ numerous other stotras celebrate Lord Rama’s glory and offer devotees pathways to spiritual upliftment. The Hanuman Chalisa‚ a widely recited devotional hymn‚ complements the Stotra beautifully‚ focusing on Hanuman’s devotion.

Sri Rama Stuti and Rama Kavacha are also popular choices‚ providing similar protective benefits. Many of these stotras are available as PDF downloads‚ facilitating easy access for practitioners.

Exploring these texts alongside the Ram Raksha Stotra enriches one’s devotional practice and deepens connection with Rama’s divine energy‚ readily available online.

Addressing Copyright Concerns

Ram Raksha Stotra PDF distribution requires respecting content ownership. Legal considerations apply when sharing these sacred texts; ensure compliance with copyright regulations.

Respecting Content Ownership

When accessing and sharing the Ram Raksha Stotra PDF‚ acknowledging the original creators and publishers is paramount. Many versions available online are offered freely‚ but this doesn’t negate the intellectual property rights associated with translations‚ commentaries‚ or unique formatting.

It’s crucial to avoid unauthorized reproduction or modification of copyrighted material. If a PDF clearly indicates ownership‚ adhere to any stated usage restrictions. Supporting authors and publishers through legitimate channels ensures continued access to these valuable spiritual resources. Consider purchasing versions from reputable sources when possible‚ demonstrating respect for their work and dedication.

Remember‚ responsible digital citizenship extends to sacred texts like the Ram Raksha Stotra.

Legal Considerations for Distribution

Distributing the Ram Raksha Stotra PDF‚ even without monetary gain‚ carries legal implications. Copyright laws protect the original Sanskrit verses‚ translations‚ and any added commentary. Mass distribution without permission from the copyright holder could constitute infringement.

Sharing links to legitimately hosted PDF files is generally permissible‚ but hosting unauthorized copies on personal websites or file-sharing platforms is risky. Be mindful of “terms of service” agreements for platforms used.

apush period 7 study guide

APUSH Period 7 Study Guide (1890-1945)

Period 7 encompasses significant shifts, including Progressivism, Imperialism, the Great Depression, and two World Wars, profoundly reshaping American society and its global role․

Period 7 (1890-1945) marks a transformative era in American history, witnessing rapid industrialization, urbanization, and a burgeoning consumer culture․ The nation transitioned from a largely rural, agrarian society to a global economic and military power․ This period saw the rise of big business, alongside calls for Progressive reforms to address social and economic inequalities․

American foreign policy shifted towards imperialism, culminating in the Spanish-American War and increased involvement in international affairs․ The era was punctuated by the devastation of two World Wars and the economic hardship of the Great Depression, ultimately leading to Franklin D․ Roosevelt’s New Deal programs․

II․ Key Concept 7․1: Growth of American Economic Power

Key Concept 7․1 highlights the dramatic expansion of American economic power during this period․ New technologies, like electricity and the assembly line, fueled industrial growth and increased production efficiency․ This led to improved standards of living and greater personal mobility, alongside better communication systems․ The rise of big business and monopolies, however, created economic disparities and prompted calls for regulation․

Consumer goods became more accessible, fostering a burgeoning consumer culture․ These economic shifts fundamentally altered American society, creating both opportunities and challenges for various groups, including new immigrants and workers․

A․ Technological Innovation & Industrial Growth

Technological advancements were central to industrial growth, transforming the American landscape․ Innovations like electricity, steel production, and the telephone revolutionized industries and daily life․ The assembly line, pioneered by Henry Ford, dramatically increased manufacturing efficiency, lowering costs and boosting production․ These changes spurred economic expansion and created new job opportunities, though often under harsh conditions․

Improved communication systems, such as the telegraph and telephone, facilitated business operations and connected distant regions․ This period witnessed a surge in patents and inventions, driving further innovation and economic progress․

B․ Rise of Big Business & Monopolies

The late 19th and early 20th centuries saw the emergence of “Big Business” and monopolies, driven by industrial growth and laissez-faire policies․ Powerful industrialists like Rockefeller (oil), Carnegie (steel), and Vanderbilt (railroads) amassed immense wealth and controlled vast sectors of the economy․ These monopolies often stifled competition, manipulated prices, and exploited workers․

Horizontal and vertical integration became common strategies for achieving dominance․ Public outcry over unfair practices led to calls for government regulation, ultimately resulting in legislation like the Sherman Antitrust Act, though its initial enforcement was limited․

III․ Imperialism and American Foreign Policy

By the late 19th century, the United States began to pursue an increasingly expansionist foreign policy, driven by economic interests, political ambitions, and a belief in cultural superiority․ This “New Imperialism” saw America acquiring territories in the Pacific, Latin America, and asserting influence globally․ Debates arose regarding the morality and constitutionality of imperialism․

The Spanish-American War (1898) marked a turning point, resulting in the US gaining control of Cuba, Puerto Rico, Guam, and the Philippines․ This expansion fueled further involvement in international affairs and set the stage for America’s role as a world power․

A․ Motivations for Imperialism

Several factors propelled American imperialism․ Economic desires for new markets and resources were paramount, fueled by industrial growth and overproduction․ Political motivations included a desire for strategic military bases and increased international prestige, mirroring European powers․

Ideological justifications, like Social Darwinism and the “White Man’s Burden,” promoted the belief in American superiority and a duty to “civilize” other nations․ Furthermore, Alfred Thayer Mahan’s theories emphasized naval power, advocating for a strong navy and control of key sea lanes to project American influence globally․

B․ The Spanish-American War (1898)

The Spanish-American War stemmed from Cuban independence struggles and American economic interests in Cuba․ The sinking of the USS Maine in Havana harbor, attributed (though controversially) to Spain, ignited public outrage and fueled calls for war․

The conflict was brief but decisive, resulting in American victories in Cuba and the Philippines․ The Treaty of Paris (1898) ceded Cuba, Puerto Rico, and Guam to the US, and the Philippines were purchased for $20 million․ This marked America’s emergence as a global power, sparking debates over imperialism․

C․ American Expansion in the Pacific & Latin America

Following the Spanish-American War, the US pursued an expansionist foreign policy․ In the Pacific, annexation of Hawaii (1898) provided a strategic naval base and access to Asian markets․ American interests in the Philippines led to a prolonged and brutal Philippine-American War․

In Latin America, the US asserted dominance through economic and political intervention․ The Platt Amendment (1901) granted the US the right to intervene in Cuban affairs․ Roosevelt Corollary to the Monroe Doctrine justified US intervention to stabilize Latin American nations, furthering American influence․

IV․ The Progressive Era (1900-1920)

The Progressive Era addressed problems stemming from industrialization, urbanization, and immigration․ Progressives aimed to reform government, regulate big business, and improve social conditions․ Key goals included political democracy, economic fairness, and social justice․

Reforms encompassed initiatives like trust-busting, consumer protection laws (Pure Food and Drug Act), and conservation efforts․ Political reforms included direct election of senators (17th Amendment) and women’s suffrage (19th Amendment)․ Theodore Roosevelt’s “Square Deal” and Woodrow Wilson’s “New Freedom” embodied progressive ideals, though approaches differed․

A․ Goals of the Progressive Movement

Progressives sought to address societal ills arising from rapid industrialization and urbanization․ Core goals centered on enhancing democracy through political reforms like initiative, referendum, and recall, empowering citizens directly․ Economically, they aimed for fairness by regulating monopolies and protecting consumers via legislation like the Pure Food and Drug Act․

Socially, Progressives championed improved working conditions, child labor laws, and temperance․ They believed in using government intervention to correct injustices and promote the general welfare, fostering a more equitable and just society for all Americans․

B․ Key Progressive Reforms (Political, Economic, Social)

Political reforms included the 17th Amendment (direct election of senators), and voting rights expansions․ Economically, antitrust legislation like the Sherman Antitrust Act aimed to curb monopolies, alongside regulations protecting consumers from unsafe products․ Socially, reforms addressed labor issues with laws limiting working hours and banning child labor․

Furthermore, the establishment of food safety standards, like those outlined in the Pure Food and Drug Act, and conservation efforts to protect natural resources marked significant progressive achievements, improving daily life and promoting sustainability․

C․ Theodore Roosevelt and Progressive Policies

Theodore Roosevelt embodied the Progressive spirit, championing “trust-busting” to dismantle harmful monopolies while distinguishing between “good” and “bad” trusts․ His Square Deal advocated for fair dealings for workers, consumers, and businesses․ Roosevelt significantly expanded the power of the presidency and federal government intervention in the economy․

He also prioritized conservation, establishing national parks and forests, protecting natural resources for future generations․ Roosevelt’s assertive foreign policy, including negotiating the end of the Russo-Japanese War, demonstrated America’s growing global influence․

D․ Woodrow Wilson and New Freedom

Woodrow Wilson’s “New Freedom” aimed to dismantle economic inequalities and restore competition․ He lowered tariffs with the Clayton Antitrust Act, strengthened anti-monopoly laws, and established the Federal Trade Commission to prevent unfair business practices․ A key achievement was the creation of the Federal Reserve System, providing a more stable financial system․

Wilson also enacted progressive income tax with the 16th Amendment․ Despite his domestic successes, Wilson’s segregationist views and handling of civil rights represent a significant contradiction within the Progressive Era․

V․ World War I (1914-1918)

Initially neutral, the US entered WWI in 1917 due to Germany’s unrestricted submarine warfare, including the sinking of the Lusitania, and the Zimmerman Telegram proposing an alliance with Mexico․ The home front experienced mobilization, with industries shifting to war production and increased government control over the economy․

WWI profoundly impacted American society, fostering patriotism but also suppressing dissent through measures like the Espionage and Sedition Acts․ The war contributed to the Great Migration of African Americans seeking industrial jobs, and laid the groundwork for future international involvement․

A․ Causes of American Entry into WWI

American neutrality was challenged by several factors․ Germany’s unrestricted submarine warfare, targeting even neutral ships, culminated in the sinking of the Lusitania in 1915, inflaming public opinion․ Economic ties with the Allied powers fostered a pro-Allied sentiment, as American trade heavily favored Britain and France․

The final catalyst was the Zimmerman Telegram, a German proposal to Mexico for an alliance against the US, intercepted by British intelligence․ This perceived threat to national security, combined with continued German aggression, prompted President Wilson to ask Congress for a declaration of war in April 1917․

B․ The Home Front During WWI

World War I dramatically transformed the American home front․ The government mobilized resources through agencies like the War Industries Board, directing economic production․ Propaganda campaigns, spearheaded by the Committee on Public Information, fostered patriotic fervor and demonized the enemy․

Civil liberties were curtailed with the passage of the Espionage and Sedition Acts, suppressing dissent and limiting freedom of speech․ Women entered the workforce in unprecedented numbers, filling jobs vacated by men serving overseas․ Great Migration saw African Americans move north for employment, facing continued discrimination․

C․ Impact of WWI on American Society

World War I left a lasting imprint on American society, fostering a climate of disillusionment and social change․ The war’s end witnessed the Red Scare, fueled by fears of communism and anarchism, leading to widespread repression of radical groups․

The 19th Amendment granted women suffrage, a culmination of decades of activism․ African American veterans, despite their service, continued to face racial discrimination and violence․ The war stimulated economic growth initially, but postwar adjustments brought instability and labor unrest, setting the stage for the Roaring Twenties․

VI․ The Roaring Twenties (1920-1929)

The 1920s represented a period of dramatic social and cultural change, marked by economic prosperity and a burgeoning consumer culture․ Mass production techniques fueled affordability, while advertising encouraged spending on new goods like automobiles and radios․ This era witnessed the rise of jazz music and the “flappers,” challenging traditional norms․

The Harlem Renaissance flourished, celebrating African American artistic expression․ However, beneath the surface of prosperity lay tensions, including nativism, Prohibition, and the resurgence of the Ku Klux Klan, foreshadowing the coming economic crisis․

A․ Economic Prosperity & Consumer Culture

The 1920s experienced substantial economic growth driven by technological advancements and mass production․ Assembly lines, particularly in the automotive industry, increased efficiency and lowered costs, making goods accessible to a wider population․ Advertising played a crucial role, fostering a consumer culture focused on acquiring new products․

Installment buying allowed consumers to purchase items on credit, further stimulating demand․ Electricity became more widespread, powering new appliances and transforming daily life․ This prosperity, however, wasn’t universally shared, with agricultural sectors struggling․

B․ Social and Cultural Changes (Jazz Age, Flappers)

The “Roaring Twenties” witnessed dramatic social and cultural shifts․ The Jazz Age, originating in African American communities, became a national phenomenon, symbolizing modernity and rebellion against traditional norms․ “Flappers” challenged Victorian ideals with their liberated lifestyles – shorter hairstyles, dresses, and embracing social freedoms like smoking and drinking․

Prohibition, ironically, fueled speakeasies and organized crime․ New forms of entertainment, like radio and movies, gained popularity, creating a shared national culture․ These changes reflected a broader questioning of traditional values and a desire for individual expression․

C․ The Harlem Renaissance

The Harlem Renaissance, a flourishing of African American artistic and intellectual creativity during the 1920s and 30s, centered in Harlem, New York City․ It encompassed literature, music, art, and theater, expressing the Black experience and challenging racial stereotypes․ Key figures like Langston Hughes, Zora Neale Hurston, and Duke Ellington gained prominence․

This cultural movement fostered a new sense of racial pride and identity, while also addressing issues of racial discrimination and inequality․ The Harlem Renaissance significantly impacted American culture, leaving a lasting legacy of artistic innovation and social commentary․

VII; The Great Depression (1929-1939)

The Great Depression, beginning with the 1929 stock market crash, was the most severe economic downturn in modern history․ Underlying causes included overproduction, unequal wealth distribution, and unstable banking practices․ Widespread unemployment and poverty gripped the nation, impacting all segments of society․

President Hoover initially favored a limited government response, relying on voluntary cooperation․ However, his policies proved inadequate, leading to growing public discontent․ The Depression fundamentally altered Americans’ views on the role of government in addressing economic crises, paving the way for the New Deal․

A․ Causes of the Great Depression

Several interconnected factors triggered the Great Depression․ Overproduction in both agriculture and industry created surpluses, driving down prices and profits․ Unequal distribution of wealth meant most Americans lacked the purchasing power to sustain economic growth․ Risky banking practices, including excessive speculation and insufficient regulation, led to widespread bank failures․

A global economic slowdown, exacerbated by high tariffs restricting international trade, further worsened the situation․ The stock market crash of 1929 served as a catalyst, exposing underlying economic weaknesses and triggering a downward spiral of declining investment and consumer spending․

B․ Hoover’s Response to the Depression

President Herbert Hoover initially believed the Depression was a temporary downturn, advocating for voluntary cooperation among businesses and limited government intervention․ He opposed direct relief to individuals, fearing it would undermine self-reliance․ Hoover supported the creation of the Reconstruction Finance Corporation (RFC) to provide loans to banks and businesses, hoping to stimulate economic recovery through “trickle-down” economics;

However, these measures proved insufficient to address the crisis․ Public criticism grew as unemployment soared and hardship intensified, leading to protests like the Bonus Army march․ Hoover’s reluctance to embrace more aggressive government action ultimately contributed to his defeat in the 1932 election․

VIII․ The New Deal (1933-1939)

Franklin D․ Roosevelt’s New Deal represented a dramatic shift in the role of the federal government, aiming to address the Great Depression through relief, recovery, and reform․ The New Deal programs sought to provide immediate assistance to the unemployed and impoverished, stimulate economic growth, and prevent future economic crises․

Key initiatives included the Civilian Conservation Corps (CCC), Public Works Administration (PWA), and Works Progress Administration (WPA), creating jobs and infrastructure․ The Social Security Act established a safety net for the elderly and unemployed, fundamentally altering the relationship between citizens and the government․

A․ Franklin D․ Roosevelt and the New Deal

Franklin D․ Roosevelt (FDR) assumed the presidency during the depths of the Great Depression, offering Americans a “New Deal” – a series of programs and policies designed to alleviate suffering and restore prosperity․ His charismatic leadership and optimistic approach instilled hope during a time of widespread despair․

FDR’s willingness to experiment with unprecedented government intervention, coupled with his “fireside chats,” fostered a direct connection with the American people․ He skillfully navigated political opposition, expanding the role of the federal government and redefining the relationship between the state and its citizens․

B․ Key New Deal Programs (Relief, Recovery, Reform)

The New Deal comprised three main categories: Relief, Recovery, and Reform․ Relief programs, like the Civilian Conservation Corps (CCC) and Federal Emergency Relief Administration (FERA), provided direct aid to the unemployed and impoverished․ Recovery measures, such as the Public Works Administration (PWA) and Agricultural Adjustment Act (AAA), aimed to stimulate economic growth․

Reform initiatives, including the Securities and Exchange Commission (SEC) and Social Security Act, sought to prevent future economic crises and establish a safety net for vulnerable populations․ These programs fundamentally altered the role of government in American life, establishing precedents for future social welfare policies․

C․ Impact of the New Deal on American Society

The New Deal dramatically expanded the federal government’s role in the economy and citizens’ lives, fostering a mixed economy․ It provided crucial relief to millions, though full employment remained elusive․ The Social Security Act established a lasting safety net for the elderly, unemployed, and disabled, reshaping social welfare․

Furthermore, the New Deal fostered a shift in political alignment, solidifying the Democratic Party’s base among labor unions, farmers, and minority groups․ While controversial, it fundamentally altered Americans’ expectations of government’s responsibility for their well-being and economic security․

IX․ The Road to World War II

The 1930s witnessed the rise of aggressive fascist regimes in Europe and Asia, spearheaded by Hitler’s Germany and militaristic Japan, challenging the post-WWI international order․ Initially, the United States clung to isolationism, enacting Neutrality Acts to avoid foreign entanglements, reflecting a widespread desire to avoid another costly war․

However, as Axis powers expanded their aggression – including Japan’s invasion of Manchuria and Italy’s actions in Ethiopia – American public opinion gradually shifted․ The “cash and carry” and “lend-lease” policies signaled increasing US involvement, ultimately paving the way for direct participation in WWII․

A․ Rise of Fascism and Aggression in Europe & Asia

The interwar period saw the emergence of totalitarian ideologies, notably Fascism in Italy under Mussolini and Nazism in Germany led by Hitler, fueled by post-WWI resentment and economic hardship․ Simultaneously, Japan pursued an expansionist policy in Asia, invading Manchuria in 1931, demonstrating aggressive militarism․

These regimes rejected democratic principles, embraced nationalism, and prioritized military buildup․ Their expansionist ambitions directly threatened international stability, violating treaties and escalating tensions, ultimately setting the stage for global conflict and challenging the existing world order․

B․ American Isolationism & Neutrality

Following the devastation of World War I, a strong isolationist sentiment gripped the United States, fueled by a desire to avoid entanglement in European conflicts․ This manifested in policies like the Neutrality Acts of the 1930s, designed to prevent American involvement in future wars by prohibiting arms sales and loans to belligerent nations․

Despite growing concerns about fascist aggression, public opinion and Congressional action largely favored non-intervention, reflecting a belief that the US should focus on domestic issues and avoid repeating the perceived mistakes of entering WWI․ This stance gradually eroded as the global situation deteriorated․

X․ World War II (1939-1945)

The attack on Pearl Harbor in December 1941 shattered American neutrality, propelling the US into World War II․ Mobilization on an unprecedented scale transformed the nation’s economy and society, with women and minorities entering the workforce in significant numbers․ Major battles, including Midway and D-Day, marked turning points in both the Pacific and European theaters․

The war’s conclusion witnessed the use of atomic bombs on Hiroshima and Nagasaki, leading to Japan’s surrender and the end of the conflict, but also ushering in the nuclear age and the dawn of the Cold War․

A․ Causes of US Entry into WWII

Initially, the US maintained a policy of isolationism and neutrality, influenced by memories of WWI and the Great Depression․ However, growing aggression from Axis powers – Nazi Germany, Fascist Italy, and Imperial Japan – challenged this stance․ The Lend-Lease Act provided aid to Allied nations, subtly shifting US involvement․

Ultimately, the Japanese surprise attack on Pearl Harbor on December 7, 1941, proved the catalyst for US entry, uniting public opinion and prompting a declaration of war against Japan, and subsequently, Germany and Italy․

B․ The Home Front During WWII

World War II dramatically transformed the American home front․ Massive industrial mobilization ended the Great Depression, creating jobs and boosting the economy․ Women entered the workforce in unprecedented numbers, filling roles previously held by men, exemplified by “Rosie the Riveter․”

Rationing of essential goods, victory gardens, and war bond drives became commonplace․ Japanese Americans faced internment, a grave violation of civil liberties․ Propaganda promoted national unity and support for the war effort, shaping public opinion and fostering patriotism․

C․ Major Battles and Events of WWII

Key WWII battles included Pearl Harbor, initiating US involvement, and Midway, a turning point in the Pacific․ The D-Day invasion of Normandy marked the beginning of liberating Western Europe․ The Battle of the Bulge represented Germany’s last major offensive․

The US employed island-hopping strategies in the Pacific, culminating in the atomic bombings of Hiroshima and Nagasaki, leading to Japan’s surrender․ These events, alongside the Holocaust’s revelation, profoundly impacted global perceptions and ushered in a new era of international relations and American responsibility․

XI․ Post-War America & the Beginning of the Cold War

Post-WWII America experienced economic boom and suburban growth, fueled by the GI Bill and baby boom․ Simultaneously, the Cold War emerged, defined by ideological conflict with the Soviet Union․ Containment policy, articulated through the Truman Doctrine and Marshall Plan, aimed to prevent communist expansion․

The formation of NATO signaled a military alliance against Soviet aggression, while the Korean War became a proxy conflict․ Domestic anxieties fueled McCarthyism, a period of intense anti-communist suspicion, impacting civil liberties and shaping American political landscape for decades․

disclaimer of interest form pdf

Today’s date is 12/10/2025. This guide details secure password changes for Roblox accounts‚ emphasizing regular updates to protect personal information and prevent unauthorized access.

What is a Disclaimer of Interest Form?

A Disclaimer of Interest Form is a crucial document used to formally declare that an individual or entity has no personal stake or vested interest in a particular matter‚ decision‚ or transaction. It’s a statement of objectivity‚ ensuring transparency and preventing potential conflicts of interest. This form‚ often provided as a PDF‚ is vital in maintaining ethical standards and public trust.

Considering current online security practices‚ as highlighted by recent Roblox password update guides (dated September 4th‚ 2025‚ and May 28th‚ 2025)‚ safeguarding information is paramount. A completed Disclaimer of Interest form‚ especially in PDF format‚ demonstrates a commitment to unbiased participation and accountability. Regularly updating such declarations‚ much like updating passwords‚ is a best practice.

Purpose and Importance of a Disclaimer of Interest

The primary purpose of a Disclaimer of Interest is to establish impartiality and prevent accusations of bias. It assures stakeholders that decisions are made based on merit and objective criteria‚ not personal gain. Utilizing a PDF format for this document enhances its security and ensures a verifiable record of disclosure.

Much like securing a Roblox account with a strong‚ regularly updated password (as emphasized in guides from September 18th‚ 2023‚ and September 30th‚ 2022)‚ a Disclaimer of Interest protects the integrity of processes. It’s essential for maintaining trust in organizations and upholding ethical governance. A properly completed PDF form demonstrates a proactive approach to transparency and accountability‚ mitigating potential legal or reputational risks.

When is a Disclaimer of Interest Form Required?

A Disclaimer of Interest Form‚ often delivered as a secure PDF‚ is typically required whenever an individual is involved in a decision-making process where a potential conflict of interest exists. This includes situations involving financial benefits‚ close relationships with parties involved‚ or any circumstance that could compromise objectivity.

Similar to regularly updating your Roblox password for account security (as highlighted on May 28th‚ 2025)‚ proactive disclosure is key. Forms are crucial during contract negotiations‚ grant applications‚ committee assignments‚ and any scenario where impartiality is paramount. Consistent use of a standardized PDF ensures compliance and provides a clear audit trail‚ mirroring the importance of a secure digital identity like SwissID.

Key Elements of a Standard Disclaimer of Interest Form

A comprehensive Disclaimer of Interest PDF typically includes three core sections. First‚ an Identifying Information Section captures the declarant’s name‚ position‚ and contact details. Second‚ Details of the Potential Conflict of Interest requires a thorough description of the relationship or circumstance creating the conflict‚ similar to detailing reasons for a Roblox password change.

Finally‚ a Declaration and Signature Block affirms the information’s accuracy and acknowledges understanding of relevant policies. Just as secure authentication is vital for SwissID‚ a legally sound signature is crucial. The form‚ often a PDF for easy distribution and preservation‚ must be clear‚ concise‚ and compliant with applicable regulations‚ ensuring transparency and accountability.

Identifying Information Section

This initial section of a Disclaimer of Interest PDF meticulously gathers essential details about the individual making the declaration. Typically‚ it requests the declarant’s full legal name‚ current job title or position within the organization‚ and a reliable contact address. Crucially‚ it also includes a space for a unique identifier‚ like an employee ID number‚ mirroring the secure login process with SwissID.

Furthermore‚ some forms request department affiliation and reporting structure. Accurate completion of this section is paramount‚ establishing a clear record of who is disclosing potential conflicts. Like updating a Roblox password‚ precise information ensures accountability and facilitates efficient review processes.

Details of the Potential Conflict of Interest

This critical section of the PDF form demands a thorough and precise description of the potential conflict. Declarants must articulate the nature of the conflicting interest – be it financial‚ personal‚ or professional – and its direct relevance to their duties. Specificity is key; vague statements are insufficient.

Details should include names of involved parties‚ the nature of the relationship‚ and the potential impact on objectivity. Similar to regularly changing a Roblox password for security‚ detailed disclosure minimizes risks. The form may also ask about any benefits received or expected‚ and whether the conflict has been previously disclosed. Transparency is paramount for maintaining integrity.

Declaration and Signature Block

The PDF form’s declaration asserts the declarant’s honesty and accuracy in disclosing all relevant information regarding potential conflicts of interest. This section typically includes a statement affirming that the provided details are true and complete to the best of their knowledge.

Crucially‚ this block requires a physical or digital signature‚ along with the printed name and date. Just as securing a Roblox account requires confirming identity‚ a signature legally validates the declaration. Some forms may necessitate witness signatures for added verification. Proper completion of this section is vital; an unsigned form is generally considered invalid and offers no legal protection.

Legal Considerations and Compliance

Specific legal requirements vary by jurisdiction and organization. Some regulations dictate the frequency of form submissions‚ while others outline specific types of relationships requiring disclosure. Maintaining accurate records and adhering to these guidelines is paramount. Organizations should establish clear policies regarding conflict of interest management and provide training to employees.

PDF Format: Advantages and Disadvantages

PDFs offer excellent portability and consistent formatting across different devices‚ crucial for standardized Disclaimer of Interest Forms. They maintain the document’s integrity‚ preventing unauthorized alterations – a key security feature‚ much like regularly changing a Roblox password. However‚ PDFs can be less accessible for individuals using assistive technologies.

Editing PDFs often requires specialized software‚ potentially adding complexity. While digital signatures enhance security‚ ensuring authenticity can be challenging. Compared to online platforms‚ PDFs lack real-time collaboration features. The choice between PDF and other formats depends on the organization’s needs‚ balancing security‚ accessibility‚ and ease of use.

Where to Find Downloadable Disclaimer of Interest Form PDFs

Downloadable Disclaimer of Interest Forms are readily available from several sources. Official Government Websites frequently provide these forms for public use‚ ensuring compliance with legal requirements. These sources often offer the most up-to-date and accurate versions‚ similar to official Roblox guidance on account security.

Alternatively‚ numerous Legal Form Providers offer templates‚ sometimes for a fee. Exercise caution when using third-party providers‚ verifying the form’s validity and relevance to your specific jurisdiction. Always prioritize official sources when possible to avoid outdated or non-compliant documents. Thoroughly review any downloaded form before completion.

Official Government Websites

Government websites are the most reliable source for official Disclaimer of Interest Forms. These forms are typically designed to meet specific legal and regulatory standards‚ ensuring compliance and accuracy. Similar to Roblox’s focus on secure account practices‚ government entities prioritize data integrity.

Look for forms on websites related to ethics commissions‚ public service departments‚ or agencies overseeing financial disclosures. These resources often provide downloadable PDFs directly‚ alongside detailed instructions for completion. Prioritize these sources to guarantee the form’s legitimacy and avoid potential legal issues. Always verify the website’s authenticity before downloading any documents.

Legal Form Providers

Numerous legal form providers offer Disclaimer of Interest Form PDFs‚ presenting a convenient alternative to government websites. These platforms often curate a wide range of legal documents‚ including state-specific variations‚ similar to Roblox offering diverse account options. However‚ exercise caution when using these services.

Ensure the provider is reputable and regularly updates its forms to reflect current legal requirements. Review the form carefully to confirm it aligns with your specific jurisdiction and needs. While convenient‚ these forms may require a purchase or subscription. Always cross-reference with official sources when possible to verify accuracy and completeness before submission.

Filling Out a Disclaimer of Interest Form PDF: A Step-by-Step Guide

Begin by downloading the PDF from a trusted source‚ much like securing your Roblox account with a strong password. Open it using reliable PDF editing software. Carefully read the instructions before starting. Begin with the ‘Identifying Information’ section‚ providing accurate personal details. Next‚ thoroughly detail the ‘Potential Conflict of Interest’‚ being specific and comprehensive.

Proceed to the ‘Declaration and Signature’ block. Ensure all fields are completed before digitally signing or printing for a manual signature. Double-check all entries for errors. Save a copy for your records‚ mirroring the importance of email verification for account recovery.

Using PDF Editing Software

Selecting the right software is crucial‚ similar to choosing robust security for your Roblox password. Adobe Acrobat Reader DC‚ PDFelement‚ and Smallpdf are popular choices‚ offering form-filling capabilities. Open the Disclaimer of Interest form within the software. Utilize the text tool to input information directly into designated fields. Ensure font consistency and readability.

Many programs allow saving directly to the PDF‚ preserving formatting. Explore features like adding comments or highlighting sections if needed. Regularly save your progress to avoid data loss‚ akin to confirming a new password twice. Some software offers digital signature integration for enhanced security and authenticity.

Digital Signatures and Authentication

Employing digital signatures elevates form security‚ mirroring the importance of a strong Roblox password. These signatures verify the document’s authenticity and ensure it hasn’t been tampered with post-signing. Software like Adobe Sign or DocuSign integrates seamlessly with PDF forms.

Authentication methods vary‚ including email verification‚ SMS codes‚ or knowledge-based authentication. A digital certificate‚ issued by a trusted Certificate Authority‚ is essential. This certificate binds your identity to the signature. Properly implemented digital signatures are legally binding in many jurisdictions‚ providing a higher level of assurance than a traditional handwritten signature.

Common Mistakes to Avoid When Completing the Form

Incomplete or inaccurate information is a frequent error‚ mirroring the need for careful Roblox account details. Failing to disclose all potential conflicts‚ even seemingly minor ones‚ can invalidate the disclaimer. Ensure all sections are thoroughly addressed‚ avoiding vague language.

Another common mistake is neglecting to date and sign the form correctly. Digital signatures must be properly authenticated. Avoid using generic statements; be specific about the nature of the conflict. Review the completed form meticulously before submission‚ checking for typos and inconsistencies. Remember‚ honesty and transparency are paramount.

Storage and Record-Keeping Best Practices

Securely store completed Disclaimer of Interest forms‚ mirroring the importance of safeguarding Roblox account credentials. Maintain both physical and digital copies in a centralized‚ access-controlled location. Implement a clear filing system for easy retrieval‚ utilizing consistent naming conventions.

Regularly back up digital copies to prevent data loss‚ employing encryption for enhanced security. Retain records for the legally required period‚ adhering to relevant regulations. Document all access and modifications to the forms. Consider utilizing a document management system for streamlined storage and retrieval‚ ensuring compliance and accountability.

Alternatives to PDF Forms (Online Platforms)

Beyond PDF forms‚ several online platforms offer streamlined Disclaimer of Interest submission. These platforms often provide enhanced security features‚ like SwissID authentication – mirroring Roblox’s security focus – and automated workflows. They can simplify data collection‚ reduce errors‚ and improve tracking capabilities.

Consider platforms offering digital signature integration and audit trails for increased accountability. Some platforms allow for customizable forms and automated reminders‚ ensuring timely completion. Evaluate platform compliance with data privacy regulations. While PDFs remain common‚ online alternatives can offer greater efficiency and security‚ similar to updating Roblox passwords regularly.

Security Considerations for PDF Disclaimer Forms

Protecting sensitive information within PDF Disclaimer of Interest forms is paramount. Like safeguarding a Roblox account with a strong‚ unique password‚ PDFs require robust security measures. Employ password protection and encryption to restrict unauthorized access. Regularly update security protocols to address evolving threats.

Consider digital signatures for authentication and non-repudiation‚ verifying the form’s origin and integrity. Implement access controls‚ limiting who can view‚ edit‚ or print the document. Be cautious of phishing attempts and ensure the PDF source is trustworthy. Regularly review and update security practices‚ mirroring the importance of frequent password changes.

Protecting Sensitive Information

Safeguarding the data within a Disclaimer of Interest form is crucial‚ akin to securing a Roblox account. Sensitive details require meticulous protection against unauthorized access and potential breaches. Implement strong password protection for the PDF itself‚ and consider encryption to render the contents unreadable without proper authorization.

Regularly review access permissions‚ limiting visibility to only those with a legitimate need. Be vigilant against phishing attempts and verify the source of the PDF before opening it. Treat the form with the same care as personal financial or medical records‚ understanding its potential vulnerability. Prioritize data security at every stage.

Password Protection and Encryption

Like changing a Roblox password for account security‚ PDF Disclaimer of Interest forms benefit from robust protection. Password protection adds a first layer of defense‚ restricting access to authorized individuals. However‚ for truly sensitive information‚ encryption is paramount.

Encryption transforms the data into an unreadable format‚ requiring a decryption key. This ensures that even if the PDF falls into the wrong hands‚ the contents remain confidential. Utilize PDF software offering strong encryption algorithms. Regularly update passwords and store decryption keys securely‚ separate from the PDF itself. Employing both methods significantly minimizes risk.

Reviewing and Updating Disclaimer of Interest Forms

Just as Roblox account security necessitates periodic password changes‚ Disclaimer of Interest forms require regular review and updates. Circumstances evolve‚ potentially creating new conflicts or resolving existing ones. Annual reviews are a prudent starting point‚ but more frequent checks are advisable when roles or responsibilities shift.

Ensure all information remains accurate and reflects the current situation. Document any changes made and the rationale behind them. Maintaining an audit trail demonstrates diligence and transparency. Outdated forms offer a false sense of security; proactive updates are crucial for maintaining compliance and ethical standards.

Resources and Further Information

Similar to seeking guidance on Roblox password security‚ understanding Disclaimer of Interest forms benefits from external resources. Official government ethics websites often provide templates and detailed explanations of regulations. Legal form providers offer customizable options‚ though verifying their compliance with applicable laws is essential.

Professional organizations related to your industry may also offer specific guidance. Consulting with legal counsel ensures your forms meet all requirements and adequately protect your interests. Remember‚ staying informed about evolving regulations is crucial for maintaining ethical conduct and avoiding potential legal issues. Prioritize reliable sources and continuous learning.

camp out vbs lessons pdf

Camp Out VBS Lessons PDF: Article Plan (12/10/2025 15:59:36)

Exploring diverse summer camp options – soccer‚ robotics‚ and nature science – alongside inclusive recreation and respite programs‚ highlights enriching experiences for all ages.

Vacation Bible School (VBS) offers immersive‚ themed learning; “Camp Out” fosters community through recreation‚ respite‚ and education‚ inspiring families with engaging activities and resources.

What is Vacation Bible School (VBS)?

Vacation Bible School is a historically significant‚ faith-based summer program offered by many churches. It provides children and youth with an engaging opportunity to learn about biblical teachings in a fun and interactive environment. VBS programs typically span one to five days‚ incorporating themes‚ games‚ crafts‚ music‚ and skits to reinforce lessons.

Beyond religious instruction‚ VBS fosters a sense of community and belonging. It’s a chance for children to make new friends and for volunteers to share their faith. Modern VBS programs‚ like the “Camp Out” theme‚ often emphasize experiential learning‚ mirroring the diverse camp experiences available – from soccer and robotics to nature exploration – creating a memorable and impactful summer experience. It’s a family experience designed to inspire and engage.

The “Camp Out” Theme: Overview

The “Camp Out” Vacation Bible School theme immerses participants in the excitement of the wilderness and the spirit of adventure. It’s designed to evoke feelings of exploration‚ camaraderie‚ and connection with nature‚ mirroring popular summer camp experiences. Lessons often center around themes of courage‚ resilience‚ and trusting in a higher power‚ using the imagery of camping – campfires‚ scavenger hunts‚ and outdoor challenges – as metaphors for faith journeys.

This theme lends itself beautifully to hands-on activities like crafting wilderness-themed decorations and enjoying camp-style snacks. It also provides opportunities for dramatic presentations and campfire songs‚ fostering a sense of community. Like diverse camp options‚ it aims to be rewarding and enriching for all involved‚ creating lasting memories.

Why Choose a “Camp Out” VBS?

A “Camp Out” VBS offers a universally appealing theme‚ resonating with children’s love for adventure and the outdoors. It’s incredibly versatile‚ easily adaptable for various age groups and skill levels‚ much like diverse summer camps catering to players aged 4-18. The theme naturally encourages teamwork through activities like scavenger hunts and building challenges‚ fostering a strong sense of community.

Furthermore‚ it provides a unique opportunity to connect biblical lessons to tangible experiences‚ making faith more relatable. The imagery of overcoming obstacles in the wilderness mirrors life’s challenges‚ teaching resilience and trust. Just as camps inspire and engage families‚ a “Camp Out” VBS can create lasting‚ positive impacts.

Planning Your Camp Out VBS

Successful VBS planning involves setting dates‚ budgeting resources‚ recruiting dedicated volunteers‚ and selecting appropriate curriculum materials – mirroring camp organization.

Setting a Date and Time

Careful consideration of dates and times is crucial for maximizing VBS attendance. Aligning with local school calendars and avoiding major community events will prove beneficial. Evening camps‚ like those offered for soccer skill development‚ demonstrate alternative scheduling possibilities. A week-long intensive program‚ similar to high school preparation camps‚ suggests a concentrated timeframe. Consider the duration – full-day options‚ mirroring Washington Spirit Camps‚ require longer volunteer commitments. Weekday evenings could suit families with busy schedules. Prioritize a timeframe that accommodates both volunteer availability and camper participation‚ ensuring a positive and enriching experience for everyone involved‚ much like the diverse camp offerings available today.

Budgeting for VBS Expenses

Effective budgeting is paramount for a successful VBS. Costs encompass curriculum materials – potentially “Camp Out” VBS lesson PDFs – crafts‚ snacks (camp-themed treats are ideal!)‚ decorations‚ and promotional materials. Consider leveraging free resources like Hipcamp’s community focus for inspiration. Volunteer recruitment reduces staffing costs‚ mirroring the support systems for recreation and respite programs. Explore fundraising opportunities to offset expenses‚ similar to supporting CAMP’s mission. Allocate funds for contingency items‚ like inclement weather alternatives. Prioritize essential items and seek cost-effective solutions‚ ensuring financial responsibility while delivering a high-quality‚ enriching experience for all campers‚ much like diverse camp options available.

Recruiting Volunteers

Successful VBS relies heavily on dedicated volunteers. Mirror the supportive spirit of organizations like CAMP‚ which strengthens individuals through recreation and respite‚ by actively seeking assistance. Target parents‚ youth groups‚ and community members. Clearly define volunteer roles – from craft leaders to snack providers – ensuring a positive experience. Highlight the rewarding aspects of contributing to children’s spiritual growth‚ akin to enriching camp experiences in robotics or nature science. Offer training and appreciation events‚ fostering a team environment. Effective recruitment‚ like supporting a campground community‚ builds a strong foundation for a memorable and impactful “Camp Out” VBS.

Choosing a VBS Curriculum (PDF Resources)

Selecting a “Camp Out” VBS curriculum often involves exploring readily available PDF resources. Numerous providers offer comprehensive packages‚ mirroring the structured programs found in summer camps like soccer or robotics. Prioritize curricula that align with your church’s theological stance and age group needs. Look for materials including lesson plans‚ crafts‚ music‚ and skits – ensuring a well-rounded experience. Consider the cost and ease of implementation. Just as Hipcamp offers a weather guarantee‚ seek curricula with adaptable options for indoor activities. Thoroughly review sample lessons before committing‚ ensuring they foster engagement and spiritual growth‚ similar to enriching camp opportunities.

Core Lesson Components

Integrating Bible stories‚ memory verses‚ skits‚ and wilderness-themed crafts creates a dynamic “Camp Out” VBS experience‚ mirroring enriching summer camp programs.

Bible Story Focus: Key Narratives

Central to a successful “Camp Out” VBS are compelling Bible stories that resonate with the theme of adventure‚ exploration‚ and reliance on faith. Consider narratives like David and Goliath‚ showcasing courage in the wilderness‚ or Noah’s Ark‚ emphasizing trust during challenging times.

The story of Moses leading the Israelites through the desert provides a powerful parallel to a camping journey‚ highlighting guidance and provision. Jonah’s experience‚ though different‚ can illustrate God’s unwavering care even when we stray.

These stories‚ much like the diverse summer camp experiences offered – from soccer to nature science – offer opportunities for interactive lessons and discussions. Emphasize how these biblical figures demonstrated faith and resilience‚ mirroring the spirit of campers engaging in new activities and challenges.

Memory Verse Selection & Application

A carefully chosen memory verse anchors the “Camp Out” VBS experience‚ reinforcing the week’s core message. Verses emphasizing trust‚ courage‚ and God’s provision are particularly fitting. Consider Psalm 23:4 (“Even though I walk through the darkest valley‚ I will fear no evil‚ for you are with me”)‚ or Philippians 4:13 (“I can do all things through Christ who strengthens me”).

Application is key! Don’t just memorize; connect the verse to daily life. Relate it to the challenges campers face – trying new activities (like soccer camp!)‚ overcoming fears‚ or supporting friends.

Encourage campers to use the verse during games‚ crafts‚ and even campfire storytelling‚ fostering a deeper understanding and personal connection‚ much like the enriching experiences offered at diverse camps.

Daily Skits & Dramatic Presentations

Engaging skits bring Bible stories to life‚ captivating campers and reinforcing key lessons. A “Camp Out” theme lends itself to scenarios like explorers discovering God’s faithfulness‚ or campers overcoming obstacles with courage. Keep skits short‚ energetic‚ and age-appropriate.

Incorporate volunteer participation – even brief cameos! Dramatic presentations don’t need elaborate sets; props can be simple and DIY. Consider a skit mirroring the diverse camp experiences available – a robotics challenge‚ a nature exploration‚ or even a soccer game demonstrating teamwork;

These presentations‚ like those fostering recreation and respite‚ should inspire and engage‚ leaving a lasting impression on young hearts.

Craft Activities: Wilderness Theme

Immerse campers in the “Camp Out” experience with nature-inspired crafts! Think building miniature campsites‚ creating “binoculars” from cardboard tubes‚ or designing nature journals for scavenger hunt findings. Utilize readily available materials – leaves‚ twigs‚ stones – fostering creativity and appreciation for the outdoors.

Crafts can tie into Bible stories; for example‚ building an ark after Noah’s story. Consider “tinkering” activities‚ aligning with robotics camps‚ where campers construct simple tools. These projects‚ like inclusive recreation‚ encourage problem-solving and fine motor skills.

Ensure crafts are age-appropriate and offer varying levels of complexity‚ allowing all campers to succeed and feel a sense of accomplishment.

Activities & Games

Engaging activities‚ from outdoor challenges and campfire songs to nature exploration and indoor alternatives‚ create a dynamic “Camp Out” VBS experience for all campers.

Outdoor Games & Challenges

Transform your VBS space into a wilderness adventure with exciting outdoor games! Organize a thrilling scavenger hunt‚ encouraging teamwork and exploration of the natural surroundings. Implement classic camp games like capture the flag or obstacle courses‚ fostering friendly competition and physical activity.

Consider a “wilderness survival” challenge‚ teaching basic knot-tying or shelter-building skills (with appropriate safety measures‚ of course!). Adapt soccer drills – focusing on fundamentals – for a unique twist‚ mirroring the Lions Soccer camp approach. Remember to incorporate age-appropriate challenges‚ ensuring inclusivity for all skill levels. Prioritize safety with clear boundaries and supervision. These activities build camaraderie and reinforce the “Camp Out” theme‚ creating lasting memories for your VBS participants.

Indoor Games for Inclement Weather

Be prepared for unexpected rain! Transition seamlessly to engaging indoor activities. Adapt the energy of outdoor games – like capture the flag – into a hallway version using streamers as “territory.” Organize a “wilderness trivia” game‚ testing knowledge gained from Bible stories and lessons.

Creative crafts‚ such as building miniature campsites or designing nature-themed artwork‚ provide a calming alternative. Incorporate storytelling sessions‚ encouraging campers to share their own “adventure” tales. Consider a robotics challenge‚ inspired by available summer camps‚ to stimulate problem-solving skills. Remember the importance of adaptable programming‚ mirroring the diverse camp options available‚ ensuring fun regardless of the weather. Prioritize a positive atmosphere and continued learning.

Campfire Songs & Storytelling

Emulate the heart of a traditional camp experience‚ even indoors! Gather campers for sing-alongs featuring upbeat‚ faith-based songs and classic campfire tunes. Encourage participation and enthusiasm. Follow with captivating storytelling – retellings of Bible stories with dramatic flair‚ or original narratives about courage and faith in the “wilderness.”

Incorporate elements of service learning by having campers share stories of kindness they’ve witnessed or participated in. Draw inspiration from the enriching opportunities offered at various camps‚ fostering a sense of community. Storytelling can also connect to nature exploration‚ recounting tales of animals or the wonders of creation. This builds a memorable and spiritually enriching experience.

Nature Exploration & Scavenger Hunts

Bring the “camp out” theme to life with immersive nature activities! Organize guided explorations of the surrounding environment – a park‚ garden‚ or even designated areas within the VBS location. Develop themed scavenger hunts‚ challenging campers to find specific natural items (leaves‚ rocks‚ flowers) while reinforcing Bible lesson themes.

Connect these explorations to the idea of God’s creation and His provision. Like the diverse programs offered at summer camps – from nature science to robotics – tailor hunts to different age groups. Encourage observation and appreciation for the natural world‚ mirroring the enriching experiences campers enjoy. This fosters a sense of wonder and reinforces the beauty of God’s design.

Resources & Materials

Locate downloadable “Camp Out” VBS lesson PDFs‚ alongside DIY decoration ideas‚ camp-themed snacks‚ and uplifting music resources for a memorable experience.

Finding “Camp Out” VBS Lesson PDFs

Numerous online platforms offer downloadable “Camp Out” Vacation Bible School lesson PDFs‚ catering to various denominations and teaching styles. Websites specializing in church resources frequently provide comprehensive VBS packages‚ often including printable lesson plans‚ craft templates‚ and skit scripts. A quick internet search using keywords like “Camp Out VBS lessons PDF‚” “free VBS curriculum‚” or “wilderness themed VBS” will yield a wealth of options.

Consider exploring websites of major Christian publishers‚ as they often release annual VBS themes with accompanying digital resources. Many churches also share their VBS materials online‚ creating a collaborative community of educators. Remember to preview the materials to ensure they align with your church’s theological stance and age group needs. Prioritize resources offering a balanced blend of Bible stories‚ engaging activities‚ and opportunities for spiritual growth.

DIY Decoration Ideas

Transform your VBS space into a captivating campsite with resourceful DIY decorations! Utilize brown paper rolls as “logs” and drape green fabric to simulate trees. Construct a “campfire” using red‚ orange‚ and yellow tissue paper layered over crumpled newspaper. Create rustic signage with painted wood planks‚ directing attendees to various “camp” locations.

Incorporate natural elements like pinecones‚ branches‚ and leaves for an authentic wilderness feel. Encourage volunteers and children to contribute handmade decorations‚ fostering a sense of ownership. String fairy lights to mimic stars and create a cozy atmosphere. Remember to prioritize safety and avoid using real flames; These simple‚ cost-effective decorations will enhance the “Camp Out” theme and immerse participants in the adventure!

Snack Ideas: Camp-Themed Treats

Fuel your campers with fun‚ camp-themed snacks! “Trail mix” is a classic – combine pretzels‚ cereal‚ nuts (check for allergies!)‚ and dried fruit. Create “campfire cones” by filling waffle cones with marshmallows‚ chocolate chips‚ and sprinkles. “Bear paws” can be made using peanut butter cookies dipped in chocolate.

Offer “ants on a log” (celery sticks with peanut butter and raisins). For a refreshing treat‚ serve “pond water” (blue raspberry lemonade). Consider individual snack bags for hygiene and portion control. Remember to accommodate dietary restrictions and allergies. These tasty treats will add to the immersive “Camp Out” experience and keep energy levels high throughout the VBS activities!

Music & Worship Resources

Enhance your “Camp Out” VBS with uplifting music and worship! Incorporate campfire songs like “This Little Light of Mine” and “Kumbaya” for a traditional feel. Seek out contemporary Christian songs with themes of adventure‚ faith‚ and nature.

Create a dedicated worship space resembling a campsite‚ complete with a “fire pit” (safely simulated‚ of course!). Utilize instrumental music during quieter moments like prayer or reflection. Consider incorporating actions and movements with songs to engage younger campers. Remember to obtain necessary licensing for any copyrighted music used. Music fosters a spirit of community and reinforces the VBS’s core message of faith and fellowship.

Adapting for Different Age Groups

Tailoring activities – from soccer skills to nature exploration – ensures inclusivity‚ catering to diverse learners and fostering rewarding experiences for campers aged 5-15.

Preschool (Ages 3-5) Adaptations

For our youngest campers‚ ages 3-5‚ adaptations are key to a successful “Camp Out” VBS experience. Simplify crafts‚ focusing on large motor skills like tearing paper for “campfire” flames or using chunky crayons for nature scenes. Storytelling should be highly interactive‚ utilizing puppets or flannelgraph to bring Bible narratives to life.

Shorten activity times to maintain attention spans‚ and incorporate plenty of movement breaks – think animal walks or simple obstacle courses. Snack time can become part of the theme with “trail mix” or “bear paw” cookies. Emphasis should be on sensory exploration and playful learning‚ mirroring the inclusive recreation programs mentioned. Remember to provide ample adult supervision and assistance‚ fostering a safe and nurturing environment where little adventurers can thrive.

Elementary (Ages 6-12) Adaptations

Elementary students (ages 6-12) benefit from a “Camp Out” VBS that balances structured learning with engaging challenges. Crafts can be more detailed‚ incorporating skills like knot-tying (basic) or building miniature shelters. Bible story lessons should encourage discussion and critical thinking‚ prompting kids to apply the narratives to their own lives.

Introduce team-based games and scavenger hunts‚ fostering collaboration and problem-solving skills – mirroring the competitive play found in soccer camps. Incorporate elements of nature exploration‚ perhaps identifying local plants or learning about animal tracks. Consider incorporating debate or service learning activities‚ aligning with broader camp offerings. Allow for some choice in activities to cater to diverse interests and skill levels‚ ensuring a rewarding and enriching experience for all.

Inclusion Strategies for Diverse Learners

Creating an inclusive “Camp Out” VBS requires intentional adaptation. Offer multi-sensory learning experiences – visual aids‚ tactile crafts‚ and auditory storytelling – to cater to different learning styles. Simplify instructions and break down tasks into smaller‚ manageable steps. Pair students strategically‚ fostering peer support and mentorship‚ similar to team dynamics in soccer camps.

Provide alternative activity options for those who struggle with physical challenges or sensory sensitivities. Ensure all materials are accessible and adaptable. Recognize and celebrate neurodiversity‚ valuing each child’s unique contributions. Like programs supporting individuals with special needs (CAMP)‚ prioritize patience‚ understanding‚ and a welcoming environment where every camper feels valued and empowered to participate fully.

Post-VBS Follow-Up

Strengthening community bonds through thank you notes‚ feedback collection‚ and continued lessons at home mirrors CAMP’s focus on recreation‚ respite‚ and education.

Thank You Notes to Volunteers

Expressing sincere gratitude to VBS volunteers is paramount‚ mirroring the supportive spirit of organizations like CAMP‚ which champions individuals and their caregivers. Handwritten notes demonstrate genuine appreciation for their time‚ energy‚ and dedication to creating a memorable “Camp Out” experience. Acknowledge specific contributions – leading crafts‚ assisting with games‚ or providing childcare – to personalize the message.

Consider a small volunteer appreciation event post-VBS‚ perhaps a casual picnic or coffee gathering‚ to foster camaraderie. Highlight the impact of their service‚ emphasizing how they strengthened the program and inspired campers. This reinforces a positive volunteer culture‚ encouraging continued involvement in future VBS endeavors and echoing CAMP’s commitment to community building.

Parent Feedback & Evaluation

Gathering parent feedback is crucial for VBS improvement‚ akin to evaluating enriching camp experiences like robotics or nature science programs. Utilize a concise survey – online or paper-based – to assess satisfaction with the “Camp Out” theme‚ lessons‚ activities‚ and volunteer interactions. Questions should focus on what parents valued most and areas for potential enhancement.

Analyze responses to identify trends and address concerns proactively. This data informs future VBS planning‚ ensuring continued relevance and engagement. Consider open-ended questions to allow for detailed comments. Like CAMP’s dedication to strengthening families‚ parent input strengthens the VBS program‚ fostering a collaborative and responsive environment.

Continuing the Lessons at Home

Extend the “Camp Out” VBS experience beyond the week! Provide parents with a simple “Family Devotion” guide‚ reinforcing the daily Bible stories and memory verses. Include suggested activities like nature walks – mirroring camp exploration – or creating a family “campfire” with storytelling.

Share links to relevant online resources‚ similar to the diverse camp options available (soccer‚ debate‚ etc.)‚ that support continued spiritual growth. Encourage families to discuss how they can apply the VBS lessons to their daily lives‚ fostering a lasting impact. Just as CAMP inspires families‚ VBS can ignite faith at home‚ creating a continuous learning journey.

Future VBS Planning Considerations

Reflect on this year’s “Camp Out” VBS – what resonated with campers and volunteers? Gather feedback through surveys‚ mirroring parent evaluations‚ to identify areas for improvement. Consider diversifying activities‚ drawing inspiration from varied camp models like robotics or service learning‚ to engage a wider range of interests.

Explore new curriculum options‚ ensuring alignment with your church’s values. Budget proactively‚ anticipating expenses and seeking volunteer support early. Remember the importance of inclusivity‚ adapting programs for diverse learners‚ just as CAMP supports individuals with special needs. Prioritize creating a rewarding and enriching experience for all involved.

brp audio portable system manual

BRP Audio Portable System Manual: A Comprehensive Guide

This manual details the BRP Audio Portable System, including setup, Bluetooth pairing, operation, water safety, charging, troubleshooting, and specifications.
Access PDF downloads and support!

Welcome to the BRP Audio Portable System experience! This robust, fully submersible sound system is designed for adventure, offering premium audio quality wherever life takes you.
Compatible with Can-Am MTX, it boasts Bluetooth connectivity and USB-C PD charging.

This manual provides comprehensive instructions for initial setup, operation, and maintenance. Discover how to maximize your enjoyment, including safe water usage guidelines and troubleshooting tips.
Access PDF versions for convenient reference and explore related services like Aruba Webmail for support.

Understanding the System Components

The BRP Audio Portable System comprises several key elements. These include the main speaker unit, featuring a rechargeable battery and waterproof design, and the integrated Bluetooth module (MiTek BRP Audio Portable BT Module).

A USB-C PD charging port facilitates efficient power replenishment. The system’s Krill Audio System delivers high-fidelity sound. Familiarize yourself with these components and their functions to ensure optimal performance and longevity. Installation instructions (295101147) are available for specific models.

Initial Setup and Pairing

Before first use, fully charge the BRP Audio Portable System using the provided USB-C PD adapter. Power on the unit; it’s ready for pairing. Navigate to the Bluetooth settings on your device and search for available devices.

Locate and select “BRP” from the list to establish a connection. Successful pairing is indicated by an audible tone and/or visual confirmation. Ensure Bluetooth is enabled on your device for seamless audio streaming. Refer to the manual for detailed pairing instructions.

Bluetooth Pairing Instructions

To initiate Bluetooth pairing, ensure the BRP Audio Portable System is powered on. On your smartphone or device, activate Bluetooth functionality within the settings menu. The system will become discoverable. Scan for available Bluetooth devices; “BRP” should appear in the list.

Select “BRP” to begin the pairing process. If prompted, enter the pairing code “0000” (if applicable). A successful connection is confirmed by an audible signal and/or a visual indicator on the system. Now enjoy wireless audio!

Powering On and Off

To power on the BRP Audio Portable System, press and hold the power button for approximately two seconds. A visual indicator, such as an illuminated LED, will confirm activation. To power off the system, repeat this process – press and hold the power button for two seconds.

Ensure the system is completely powered down when not in use to conserve battery life. Avoid rapidly cycling the power on and off, as this may affect performance. Proper shutdown extends the system’s longevity.

Operating the Audio System

The BRP Audio Portable System offers intuitive operation. Once paired via Bluetooth, control playback directly from your connected device. The system features integrated controls for volume adjustment and track navigation. Utilize the designated buttons to increase or decrease volume levels for optimal listening.

Seamlessly skip forward or backward through your playlist with dedicated track selection controls. Enjoy a user-friendly experience designed for convenience and enhanced audio enjoyment.

Volume Control and Playback

Adjusting the volume is straightforward: utilize the clearly marked buttons on the unit to increase or decrease the audio level to your preference. Playback control is managed through your Bluetooth-connected device. Start, pause, and resume music seamlessly. The system supports standard playback functions like play/pause, skip forward, and skip backward.

Ensure optimal sound quality by balancing the volume level with the surrounding environment. Enjoy uninterrupted audio during your adventures!

Track Selection and Navigation

Navigating your music library is entirely controlled via the Bluetooth-connected device – smartphone, tablet, or other compatible source. Utilize your device’s native controls to select tracks, create playlists, and manage your audio experience. The BRP Audio Portable System functions as a wireless speaker, mirroring your device’s playback commands.

Seamlessly skip forward or backward through songs, adjust the order, and enjoy your favorite tunes without directly interacting with the audio system itself.

Waterproof and Floating Capabilities

The BRP Audio Portable System is designed for aquatic adventures, boasting full submersion capabilities and a floating design. This allows worry-free enjoyment on the water, whether relaxing poolside or engaging in water sports. However, prioritize safety; while waterproof, prolonged or extreme conditions require caution.

The system’s buoyancy ensures it remains afloat, simplifying retrieval if accidentally dropped. Always inspect for damage post-exposure and adhere to cleaning guidelines to maintain optimal performance and longevity.

Safety Precautions for Water Use

When using the BRP Audio Portable System near or in water, exercise extreme caution. While fully submersible, avoid prolonged exposure to saltwater, as it can cause corrosion. Never use the system during thunderstorms or in areas with strong currents.

Always supervise the device and ensure it remains within reach. Inspect for any damage before and after water use. Avoid operating near depths exceeding the system’s capabilities. Prioritize personal safety and follow all local water safety regulations.

Cleaning and Maintenance After Water Exposure

Following water exposure, immediately rinse the BRP Audio Portable System with fresh water to remove salt, sand, or debris. Gently wipe the exterior with a soft, damp cloth. Avoid using harsh chemicals or abrasive cleaners, as they can damage the finish.

Ensure the charging port is completely dry before connecting the USB-C PD adapter. Periodically inspect the seals for any signs of damage and address them promptly. Proper cleaning extends the system’s lifespan and maintains optimal performance.

Charging the System

To charge your BRP Audio Portable System, utilize the provided USB-C PD power adapter and cable. Locate the charging port on the unit and connect securely. A full charge typically takes several hours, depending on the battery level.

Charging indicators will display the charging status. Avoid using non-approved adapters, as they may damage the battery. Proper charging ensures optimal battery life and system performance. Refer to the specifications for detailed charging information.

Charging Port and Adapter Specifications (USB-C PD)

The BRP Audio Portable System utilizes a USB-C Power Delivery (PD) charging port for fast and efficient charging. The recommended adapter input is 5V/3A, 9V/3A, or 12V/3A.

Ensure the adapter supports the USB-C PD standard for optimal performance. Using a non-PD compliant adapter may result in slower charging speeds or incompatibility. The charging port is located on the system’s exterior, protected by a waterproof cover.

Charging Indicators and Battery Life

The BRP Audio Portable System features LED indicators to display charging status. A pulsing red light signifies charging is in progress, while a solid red light indicates a full charge. Battery life varies depending on volume level and usage.

Expect approximately 8-12 hours of playback on a full charge at moderate volume. Low battery is indicated by a flashing red light, prompting immediate recharging for uninterrupted audio enjoyment.

Troubleshooting Common Issues

Experiencing issues with your BRP Audio Portable System? First, for Bluetooth connection problems, ensure the system is charged and in pairing mode. Forget the device on your source and re-pair.

If sound quality is poor, check the audio source and volume levels. Ensure no obstructions interfere with the Bluetooth signal. For complete submersion, verify proper sealing. If problems persist, consult the PDF manual or contact BRP support for assistance.

Bluetooth Connection Problems

Difficulty pairing your BRP Audio Portable System via Bluetooth? Ensure the speaker is sufficiently charged, as low battery can hinder pairing. Activate pairing mode on the system and, on your device, search for available Bluetooth devices.

If the system doesn’t appear, try “forgetting” it from your device’s Bluetooth settings and re-initiating the pairing process. Confirm no other devices are interfering with the connection. Refer to the manual’s Bluetooth instructions for detailed steps.

Sound Quality Issues

Experiencing distorted or low-quality sound from your BRP Audio Portable System? First, verify the volume levels on both the speaker and your connected device. Ensure the audio source file isn’t corrupted or of poor quality.

If using Bluetooth, move closer to the speaker to minimize potential interference. Check for obstructions between the devices. A full battery charge often improves audio performance. Consult the manual for optimal settings and troubleshooting tips.

Technical Specifications

The BRP Audio Portable System boasts a rechargeable battery power source, delivering extended playtime; Connectivity is achieved via Bluetooth technology. Specifically, it utilizes a modern Bluetooth version for stable pairing. Charging is streamlined with a USB-C PD power adapter (specifications detailed elsewhere).

The Krill Audio System is fully submersible. Detailed specifications, including battery capacity and Bluetooth range, are available in the comprehensive PDF manual. This system is designed for premium audio on the go.

Power Source and Battery Type

The BRP Audio Portable System operates on a rechargeable battery, eliminating the need for constant replacements. The system’s power source is designed for extended use, providing hours of uninterrupted audio enjoyment. Specific battery type details, including capacity (mAh) and chemistry (Lithium-ion), are outlined in the full product specifications document.

Charging is conveniently handled via USB-C PD, ensuring efficient power replenishment. Refer to the PDF manual for detailed battery performance characteristics and optimal charging practices.

Connectivity Options (Bluetooth Version)

The BRP Audio Portable System utilizes Bluetooth technology for seamless wireless connectivity to your smartphones, tablets, and other compatible devices. The system supports a specific Bluetooth version – details are available in the comprehensive PDF manual. Ensure your device’s Bluetooth is enabled to search for and pair with the “BRP” audio system.

This wireless connection provides a stable and reliable audio stream, allowing for convenient music playback without the hassle of cables. Check the manual for range limitations.

Safety Information and Warnings (California Prop 65)

This BRP Audio Portable System contains chemicals known to the State of California to cause cancer and reproductive harm, as per California Proposition 65. Please review the detailed warning information included in the product manual and on the official BRP website.

Always operate the system responsibly and adhere to all safety guidelines. Avoid prolonged exposure to loud volumes and ensure proper handling to prevent damage or injury. Refer to the PDF manual for complete safety instructions.

Installation Instructions (If Applicable ⎼ Model Specific)

For Can-Am MTX compatibility, refer to the specific installation guide 295101147 included with your BRP Audio Portable System. This guide details mounting procedures and electrical connections for seamless integration. Ensure proper alignment and secure fastening of all components.

Consult the PDF manual for detailed diagrams and step-by-step instructions. Improper installation may void the warranty and compromise system performance. Professional installation is recommended for those unfamiliar with vehicle audio systems.

Legal Notice and Warranty Information

BRP owns all rights to this BRP Audio Portable System and its accompanying documentation (© 2003-2025). Unauthorized reproduction or distribution is prohibited. The warranty covers defects in materials and workmanship for a specified period from the date of purchase.

This warranty does not cover damage from misuse, accidents, or improper installation. See the full warranty details in the included documentation or on the BRP website. California Proposition 65 warning: may contain chemicals known to the State of California to cause cancer.

BRP Audio Premium System Overview (Can-Am MTX Compatibility)

The BRP Audio Premium System elevates your experience, designed for seamless integration with Can-Am MTX vehicles. This system delivers superior sound quality and robust performance. Explore enhanced features and controls tailored for off-road adventures.

Access the system’s full potential through dedicated controls within your MTX vehicle. Download the user manual (PDF) for detailed installation instructions and compatibility information. BRP continues to innovate, offering premium audio solutions for enthusiasts.

Accessing Manuals and Support (PDF Downloads)

Comprehensive support for your BRP Audio Portable System is readily available online. Easily download the complete user manual in PDF format for detailed instructions on setup, operation, and troubleshooting. Find answers to frequently asked questions and access helpful resources.

BRP provides dedicated support channels to assist you. Explore the official website for the latest updates, firmware downloads, and warranty information. Ensure optimal performance and longevity of your audio system with these valuable resources.

Webmail Access and Related Services (Aruba Webmail)

Please note: References to “Aruba Webmail” appear in source data and are unrelated to the BRP Audio Portable System itself. This section acknowledges their presence within the provided text. While BRP doesn’t directly offer webmail services, understanding this context is important.

Aruba Webmail provides access to email, calendars, contacts, and task lists; It’s a secure platform for managing digital communications. However, this information is included due to its appearance in the source material and does not pertain to the audio system’s functionality.

System Features and Advanced Functions

The BRP Audio Portable System boasts full submersion capabilities and floats on water, enhancing recreational experiences. It utilizes Bluetooth connectivity for seamless audio streaming from paired devices. The system is designed for potential integration with other BRP products, specifically the Can-Am MTX series, offering expanded functionality.

Future updates may introduce enhanced features and improved performance. The system’s robust design ensures durability, while the USB-C PD charging provides efficient power replenishment.

Integration with Other BRP Products

The BRP Audio Portable System demonstrates compatibility, notably with the Can-Am MTX series, expanding audio options for recreational vehicles. This integration allows for a unified entertainment experience across various BRP platforms. Seamless connectivity enhances control and functionality, potentially utilizing existing vehicle interfaces.

Further integration possibilities with other BRP products are under development, aiming to create a cohesive ecosystem. This includes exploring features like shared playlists and synchronized audio experiences across multiple devices.

Potential for Future Updates

BRP is committed to enhancing the Audio Portable System through ongoing software and firmware updates. These updates will focus on improving Bluetooth connectivity, refining sound quality, and adding new features based on user feedback. Expect potential enhancements to integration with other BRP products, expanding the system’s capabilities.

Future updates may also address compatibility with newer devices and operating systems, ensuring a consistently optimal user experience. Users can access these updates via PDF downloads and dedicated support channels.

sculpey cooking instructions

Sculpey Cooking Instructions: A Comprehensive Guide (Updated 12/10/2025)

Today’s date is 12/10/2025 16:35:10. This guide details baking Sculpey, emphasizing temperature and time based on thickness, starting with 275°F (135°C) for Original Sculpey.

Understanding Sculpey Clay Types

Sculpey offers a diverse range of polymer clays, each with unique properties impacting baking requirements. Understanding these differences is crucial for successful projects. Originally, Sculpey was the standard, known for its affordability and ease of use, but it’s generally softer and less durable after baking compared to newer formulations.

Sculpey III represents an improvement, offering increased strength and flexibility. However, it still tends to be more brittle than the Premo! Sculpey line. Premo! Sculpey is a professional-grade clay celebrated for its exceptional strength, vibrant colors, and smooth texture. It’s a favorite among artists creating detailed sculptures and jewelry.

The baking temperature remains consistent across all Sculpey types – 275°F (135°C) – but baking time varies significantly based on thickness. Choosing the right clay for your project depends on the desired outcome; softer pieces benefit from Original Sculpey, while durable creations demand Premo! Sculpey. Always refer to the packaging for specific recommendations related to the clay type you’ve selected.

Original Sculpey vs. Sculpey III vs. Premo! Sculpey

Comparing these Sculpey varieties reveals distinct characteristics impacting project suitability and baking outcomes. Original Sculpey, the classic, is ideal for beginners and crafts needing a softer finish, but it’s the least durable. It’s prone to cracking with stress and isn’t recommended for intricate, frequently handled pieces.

Sculpey III bridges the gap, offering enhanced strength compared to Original Sculpey. It’s a good all-around choice for various projects, providing a balance between flexibility and durability. However, it can still exhibit some brittleness, particularly in thin sections.

Premo! Sculpey stands out as the most robust option, favored by experienced artists. Its superior strength and flexibility make it perfect for detailed sculptures, jewelry, and items requiring long-term durability. Premo! Sculpey also holds detail exceptionally well and boasts a smoother texture. While all bake at 275°F (135°C), Premo! Sculpey generally requires slightly longer baking times for thicker pieces to ensure complete curing.

Essential Tools for Baking Sculpey

Successfully baking Sculpey requires more than just an oven; specific tools ensure even curing and prevent mishaps. A dedicated oven thermometer is paramount, as household ovens often deviate from set temperatures, impacting the clay’s polymerization. Digital thermometers offer the most accurate readings.

Aluminum foil is crucial for tenting, a technique used to shield delicate colors from scorching or browning during baking. Parchment paper prevents sticking and provides a clean baking surface. Ceramic tiles or glass baking dishes are excellent alternatives to foil, distributing heat evenly.

Long-handled tools, like metal sculpting tools or tweezers, are essential for safely placing and removing hot Sculpey pieces from the oven. A timer is non-negotiable, ensuring precise baking times based on thickness. Finally, a well-ventilated area is vital, as baking Sculpey can release a slight odor. Consider a dedicated baking sheet solely for clay projects to avoid cross-contamination with food.

Preparing Your Sculpey for Baking

Before introducing your Sculpey creation to the oven, meticulous preparation is key to a successful bake. First, ensure all fingerprints and surface imperfections are smoothed away using tools or gentle rubbing with your fingers. This prevents unwanted textures from becoming permanently fixed during curing.

Support structures are vital for delicate or complex pieces. Use crumpled aluminum foil or baking beans to prop up overhanging elements, preventing sagging or distortion. Consider the clay’s thickness throughout the piece; thinner sections will require shorter baking times, potentially necessitating adjustments during the process.

Proper placement on the baking surface is also crucial. Avoid direct contact with the oven’s heating elements. A ceramic tile or parchment paper-lined baking sheet provides an ideal, heat-diffusing base. Finally, double-check for any embedded objects like wires or armatures, ensuring they are oven-safe and won’t melt or cause hazards during baking.

Conditioning the Clay

Properly conditioning Sculpey is paramount for achieving a strong, durable finished piece. New, unopened packages benefit greatly from this process, as does clay that has been stored for an extended period. Conditioning involves kneading the clay to warm it and make it pliable, improving its texture and workability.

The goal is to evenly distribute the plasticizers within the clay. Use a dedicated clay conditioning machine for larger quantities, or employ your hands. If using your hands, work the clay by repeatedly folding, rolling, and pressing it. Avoid creating air bubbles, as these can weaken the final product or cause explosions during baking.

A well-conditioned clay will be smooth, firm, and won’t crumble easily. It should feel similar to playdough but with more resistance. Insufficient conditioning can lead to cracking, brittleness, and poor adhesion of components. Remember, consistent conditioning yields superior results and a more enjoyable sculpting experience.

Sculpey Baking Temperatures: The Core Principle

Understanding the relationship between temperature and time is crucial for successfully baking Sculpey clay. Unlike conventional cooking, Sculpey doesn’t require a specific temperature for a set duration; instead, it needs to reach a sufficient internal temperature to fully cure and harden. This is achieved through a combination of heat and time.

The recommended baking temperature is generally 275°F (135°C), but variations exist depending on the specific Sculpey type. Lower temperatures necessitate longer baking times, while higher temperatures risk burning or discoloration. Maintaining a consistent temperature throughout the baking process is vital for uniform curing.

A minimum temperature is essential for proper curing, regardless of baking time. Insufficient heat will result in soft, brittle, or incompletely hardened clay. Utilizing an oven thermometer ensures accurate temperature readings, as oven dials can be unreliable. Precise temperature control guarantees a durable and long-lasting Sculpey creation.

Recommended Baking Temperature for Original Sculpey

For Original Sculpey, the universally recommended baking temperature is 275°F (135°C). This temperature provides the optimal balance between curing the clay thoroughly and minimizing the risk of discoloration or burning. It’s a foundational guideline for achieving durable and vibrant results with this classic polymer clay.

However, remember that baking time is directly correlated with the thickness of your Sculpey piece. A standard rule of thumb is 15 minutes per ¼ inch of thickness, but this is a starting point. Always prioritize checking for proper curing after the initial baking period.

Preheating your oven to 275°F (135°C) is essential before placing your Sculpey creations inside. This ensures consistent heat distribution and prevents uneven curing. Consider using the tenting method to further protect colors and prevent potential darkening during the baking process. Accurate temperature monitoring with an oven thermometer is highly recommended.

Recommended Baking Temperature for Sculpey III

Sculpey III also benefits from a baking temperature of 275°F (135°C), mirroring the recommendation for Original Sculpey. This consistent temperature ensures proper polymerization and hardness across both clay types, providing a reliable foundation for your projects. Maintaining this heat level is crucial for achieving the desired durability and preventing issues like brittleness.

Like Original Sculpey, baking time for Sculpey III is dictated by thickness – approximately 15 minutes for every ¼ inch. However, Sculpey III can be slightly more prone to discoloration at higher temperatures, so precise temperature control is even more important. Utilizing an oven thermometer is strongly advised.

To mitigate potential color changes, consider employing the tenting method during baking. This involves loosely covering your Sculpey piece with aluminum foil to diffuse the heat. Remember, a minimum temperature is required for proper curing, regardless of baking duration. Careful monitoring and adherence to these guidelines will yield optimal results.

Recommended Baking Temperature for Premo! Sculpey

Premo! Sculpey distinguishes itself with a slightly lower recommended baking temperature of 275°F (135°C). While seemingly identical to Original Sculpey and Sculpey III, this subtle difference contributes to its enhanced flexibility and strength after baking. Maintaining this temperature is paramount for unlocking Premo!’s unique properties.

As with other Sculpey varieties, the baking time remains proportional to thickness – 15 minutes per ¼ inch. However, Premo! Sculpey generally exhibits greater resistance to discoloration, offering a bit more leeway in temperature control. Nevertheless, an oven thermometer remains a valuable tool for accuracy.

If you notice any color shifting, especially with vibrant hues, the tenting method can be employed. Loosely covering the piece with aluminum foil helps to distribute heat evenly. Remember, achieving a minimum temperature is essential for complete curing, irrespective of the time spent in the oven. Consistent results are best achieved through careful adherence to these guidelines.

Baking Time Based on Thickness

Determining the correct baking time is intrinsically linked to the thickness of your Sculpey creation; A fundamental principle governs this process: the thicker the piece, the longer it requires to fully cure and achieve optimal strength and durability. Ignoring this correlation can lead to either under-baked, fragile pieces or over-baked, discolored results.

The universally accepted guideline is 15 minutes per ¼ inch of thickness. For instance, a piece measuring ½ inch thick would necessitate a baking time of 30 minutes, while a ¼ inch piece requires 15 minutes. This rule serves as a reliable starting point, but individual oven variations can influence the outcome.

Always prioritize complete curing over strict adherence to the time estimate. Utilizing an oven thermometer ensures accurate temperature maintenance, a crucial factor in achieving consistent results. Remember that a minimum temperature must be reached for proper polymerization, regardless of the baking duration. Careful observation and experimentation will refine your technique.

Calculating Baking Time: A Detailed Breakdown

Accurately calculating baking time for Sculpey involves a systematic approach, primarily centered around measuring the thickest point of your creation. This measurement, in inches, forms the basis for determining the total baking duration needed to ensure complete polymerization and a durable finished product.

Begin by identifying the thickest section of your Sculpey piece. If it’s uneven, use a ruler or calipers for precision. Once you have this measurement, convert it to ¼ inch increments. For example, a piece 1 ½ inches thick contains six ¼ inch sections.

Multiply the number of ¼ inch sections by 15 minutes. In our previous example (1 ½ inches thick), the calculation would be 6 x 15 minutes = 90 minutes. This provides a solid initial baking time. However, remember to always verify oven temperature with a thermometer and consider tenting to prevent discoloration.

Consistent temperature is key; a minimum temperature is required for curing, irrespective of time.

The 15 Minutes Per ¼ Inch Rule

The cornerstone of successful Sculpey baking lies in the “15 minutes per ¼ inch” rule. This guideline provides a foundational timeframe for ensuring your creations are thoroughly cured, achieving optimal strength and durability. It’s a simple yet remarkably effective method for calculating baking duration.

To apply this rule, first determine the thickest part of your Sculpey sculpture. Precise measurement is crucial; use a ruler or calipers for accuracy. Then, divide that thickness into ¼ inch segments. For instance, a piece measuring 1 inch thick contains four ¼ inch sections.

Next, multiply the number of ¼ inch sections by 15 minutes. Continuing our example, 4 sections x 15 minutes/section equals a total baking time of 60 minutes. This calculation offers a reliable starting point, but always confirm your oven’s accuracy with a separate thermometer.

Remember, this is a guideline, and factors like clay type and oven variations can influence the final result. Consistent temperature is vital for proper curing.

Using an Oven Thermometer for Accuracy

Achieving consistent and accurate baking temperatures is paramount when working with Sculpey clay. Relying solely on your oven’s dial can be misleading, as ovens often deviate significantly from their set temperatures. An oven thermometer is an indispensable tool for ensuring proper curing and preventing issues like brittleness or underbaked pieces.

Invest in a reliable oven thermometer – a dial-type or digital model will suffice. Place the thermometer inside your oven, ideally in the center, away from heating elements. Allow the oven to preheat to your desired temperature (e.g., 275°F/135°C) and monitor the thermometer’s reading.

Compare the thermometer’s reading to your oven’s set temperature. If there’s a discrepancy, adjust your oven’s dial accordingly. Continue monitoring until the thermometer consistently displays the correct temperature. This calibration process is crucial for repeatable results.

Regularly check the thermometer’s accuracy, especially after prolonged use. A properly calibrated oven, verified with a thermometer, guarantees your Sculpey creations are baked to perfection.

Preventing Discoloration During Baking

One common concern when baking Sculpey is potential discoloration, particularly with vibrant or translucent colors. Prolonged exposure to heat can sometimes cause subtle shifts in hue or a slight darkening of the clay. Fortunately, several techniques can minimize this effect and preserve your intended color palette.

The “tent baking” method is highly recommended. This involves loosely covering your Sculpey creations with aluminum foil during the baking process. The foil acts as a shield, diffusing the heat and reducing direct exposure to the oven’s elements. Ensure the foil doesn’t touch the clay directly, as this can cause marks.

For particularly sensitive colors, consider a double-layer tent or using parchment paper beneath the foil. Additionally, baking at the lower end of the recommended temperature range can help mitigate discoloration. Remember to adjust baking time accordingly to ensure proper curing.

Monitoring your pieces closely during baking is also crucial. If you notice any significant color changes, reduce the baking time or adjust the tenting method.

Tent Baking Method Explained

The tent baking method is a crucial technique for preventing discoloration and ensuring even heating when baking Sculpey clay. It involves creating a protective barrier around your creations within the oven, shielding them from direct heat exposure. This is particularly important for vibrant colors or translucent clays prone to darkening.

To create a tent, simply take a sheet of heavy-duty aluminum foil, larger than the piece you’re baking. Gently drape the foil over your Sculpey, ensuring it doesn’t directly touch the clay’s surface – this can leave marks. The foil should form a loose “tent” shape, allowing air circulation while diffusing the heat.

Alternatively, you can use an oven-safe glass or ceramic container inverted over your piece, creating a similar tent effect. Ensure there’s sufficient space between the container and the clay for airflow. This method is especially useful for smaller creations.

Remember to monitor the tent during baking to ensure it remains stable and doesn’t collapse onto the clay. Proper tenting significantly improves baking results and color preservation.

Dealing with Thin Pieces & Burning

Thin pieces of Sculpey are significantly more susceptible to burning during the baking process due to their reduced mass and faster heat absorption. This is a common issue, especially with delicate details or intricate designs. Careful temperature control and reduced baking times are essential to prevent scorching.

To mitigate burning, consider lowering the baking temperature slightly, particularly for very thin sections. Utilizing the tent baking method, as previously described, provides an extra layer of protection by diffusing the heat. Regularly checking the piece during baking is also crucial.

If you notice any signs of burning – a darkened or charred appearance – immediately remove the piece from the oven; Even slight burning can compromise the structural integrity of the clay. For extremely delicate pieces, baking them on a bed of fiber batting can help insulate them from direct heat.

Remember, a minimum temperature is required for proper curing, so reducing it too much can result in soft, uncured clay. Finding the right balance is key.

Baking Multiple Colors Simultaneously

Baking Sculpey pieces of different colors together is generally safe, but requires attention to potential color shifting or bleeding, especially with vibrant or deeply pigmented clays. While most modern Sculpey formulations are designed to minimize this, it’s still a consideration.

To prevent unwanted color transfer, ensure all pieces are thoroughly cured. Underbaked clay is more prone to bleeding. Utilizing the tent baking method can also help to stabilize colors and reduce the risk of fading or alteration during the baking process. This creates a more even heat distribution.

Consider the specific colors you’re using. Darker colors, particularly reds and blues, are more likely to potentially affect lighter shades. If you’re concerned, test a small sample with the colors combined before baking the entire piece.

Maintaining the recommended baking temperature and time for the specific Sculpey type is crucial for consistent results across all colors. Avoid exceeding the recommended temperature, as this can exacerbate color changes.

Post-Baking: Cooling and Finishing

Allowing your Sculpey creations to cool completely after baking is paramount. Avoid handling the pieces while they are still warm, as they will be fragile and susceptible to damage. A gradual cooling process prevents cracking or warping. Resist the urge to rush this step; patience yields better results.

Once cooled, assess the curing. A properly baked piece will be firm and solid throughout. If any softness remains, it indicates insufficient baking and requires further time in the oven. Brittle pieces suggest overbaking, which can compromise their structural integrity.

Finishing techniques can enhance your Sculpey creations. Sanding removes imperfections and creates a smooth surface. Polishing adds shine and luster. Acrylic paints, varnishes, and sealants provide color customization and protection.

Consider the intended use when selecting finishing materials. For jewelry, a durable sealant is essential. For display pieces, aesthetic appeal may be the primary focus. Proper finishing elevates the final product.

Checking for Proper Curing

Determining if your Sculpey is fully cured is crucial for the longevity and durability of your creations. A simple bend test can reveal a lot; a properly baked piece should exhibit firmness and resist flexing. If it bends or feels soft in any area, it requires additional baking time.

Inspect for brittleness. While firmness is desired, excessive brittleness indicates overbaking. Overbaked Sculpey can become fragile and prone to cracking or shattering. Finding the right balance is key to achieving optimal curing.

A visual inspection can also be helpful. Look for any dull or unbaked areas, particularly in thicker sections. These areas may require additional baking. Consistent color throughout the piece suggests even curing.

Remember, minimum temperature is vital for proper curing, regardless of baking time. Ensure your oven reaches the recommended temperature for your specific Sculpey clay type. A reliable oven thermometer is a valuable tool for accurate temperature monitoring.

Troubleshooting Common Baking Issues

Encountering problems after baking? Several issues can arise, but most are easily addressed. If your Sculpey remains soft post-baking, it likely indicates insufficient baking time or an inaccurate oven temperature. Increase baking time in 5-minute increments, ensuring the correct temperature is maintained.

Brittle Sculpey often results from overbaking. While tempting to ensure thorough curing, excessive heat can compromise the clay’s integrity. Reduce baking time in future attempts. Consider using the tenting method to help regulate temperature and prevent scorching.

Discoloration can occur, especially with vibrant colors. The tenting method – covering the piece loosely with aluminum foil – helps shield it from direct heat and minimizes color changes. Ensure adequate ventilation during baking.

Burning is a concern with thin pieces. Reduce baking time significantly for delicate elements; Monitor closely and consider lowering the oven temperature slightly. Accurate temperature control is paramount for successful results.

Sculpey That’s Still Soft After Baking

Discovering your Sculpey is still pliable after baking is frustrating, but usually fixable. The most common cause is insufficient baking time. Remember, baking time is directly related to thickness – the ¼ inch per 15 minutes rule is a good starting point, but adjustments are often needed.

An inaccurate oven temperature is another frequent culprit. Always use an oven thermometer to verify your oven’s actual temperature, as many ovens deviate from their set point. A minimum temperature is crucial for proper curing, regardless of time.

If underbaked, return the piece to the oven and bake for an additional 5-10 minutes. Check frequently to avoid overbaking. Ensure the entire piece is uniformly heated. Larger creations may require longer baking times.

Consider the clay type; different Sculpey formulations have varying curing requirements. Refer to the manufacturer’s instructions for specific recommendations. Consistent temperature and sufficient time are key to achieving a fully cured, hardened result.

Sculpey That’s Brittle After Baking

Encountering brittle Sculpey after baking indicates overbaking, leading to a loss of plasticity and increased fragility. This often happens when baking times exceed recommendations based on thickness, or when the oven temperature is too high.

Overbaking causes the polymer to become scorched and weakened, resulting in a piece prone to cracking or breaking. While you can’t “unbake” Sculpey, understanding the cause helps prevent future issues.

To mitigate brittleness in future projects, carefully monitor baking time and temperature. Utilize an oven thermometer to ensure accuracy. Consider the “tenting” method to prevent discoloration and potential overheating, especially with vibrant colors.

For thinner pieces, significantly reduce baking time to avoid overcuring. Remember, a minimum temperature is necessary for curing, but exceeding it for extended periods leads to brittleness. Proper conditioning of the clay before baking also contributes to flexibility.

Storing Baked Sculpey Creations

Proper storage of your baked Sculpey creations ensures their longevity and protects them from damage. Once fully cooled, handle pieces with care, as they can still be somewhat delicate immediately after baking.

Dust is the primary enemy of finished Sculpey pieces. Store them in a clean, dry environment, ideally in a display case, box, or container with a lid. Avoid direct sunlight, which can cause fading over time, particularly with brightly colored creations.

For individual pieces, consider wrapping them in acid-free tissue paper before placing them in a container. This provides an extra layer of protection against scratches and abrasions. Avoid plastic wrap, as it can sometimes react with the polymer clay.

If displaying your creations, choose a stable surface away from high-traffic areas to prevent accidental knocks or falls. Regular gentle dusting with a soft brush will keep them looking their best for years to come.

Resources for Further Learning

Expanding your knowledge of Sculpey techniques and baking processes is a continuous journey. Numerous online resources offer detailed tutorials, troubleshooting advice, and inspiration for your polymer clay projects. Google Drive provides access to various file types, including PDFs and videos, which can be incredibly helpful.

The official Sculpey website is an excellent starting point, offering product information, project ideas, and frequently asked questions. Many independent artists and instructors also maintain blogs and YouTube channels dedicated to polymer clay artistry.

Online forums and communities provide a platform to connect with fellow Sculpey enthusiasts, share your work, and seek advice from experienced crafters. These spaces are invaluable for learning new techniques and overcoming challenges.

Remember to utilize Google Drive for organizing and accessing your collected resources, ensuring they are readily available whenever inspiration strikes. Continuous learning will elevate your Sculpey creations to new heights!