Lake Geneva Fishing Guide Service: A Comprehensive Guide (Updated 01/22/2026)
Lake Geneva offers exceptional angling experiences, demanding specialized knowledge for success.
A fishing guide service provides invaluable expertise, navigating diverse conditions and maximizing your catch potential.
Selecting the right guide ensures a productive and enjoyable outing on this beautiful lake.
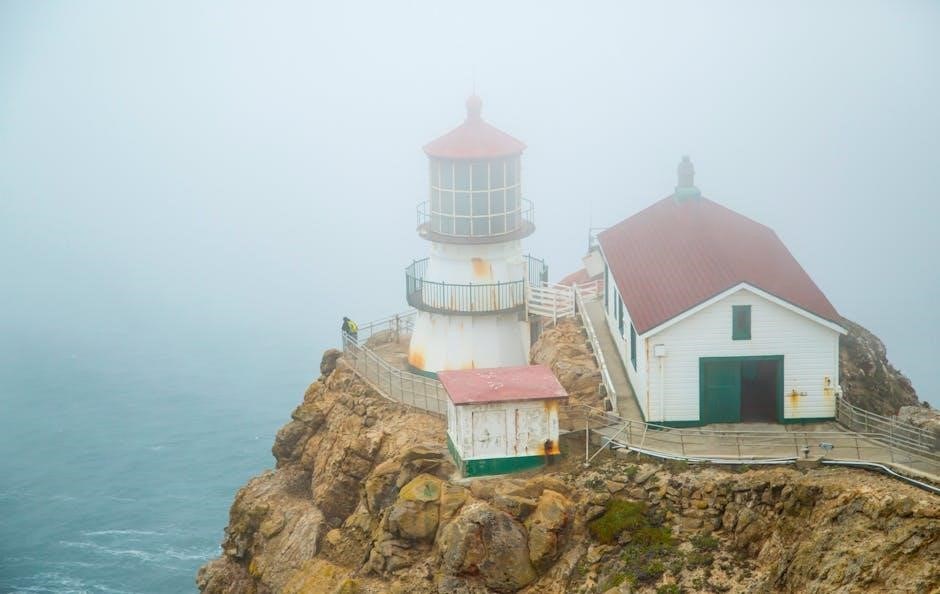
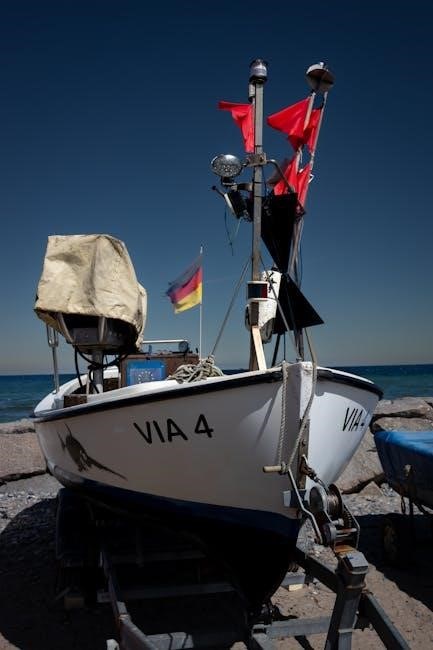
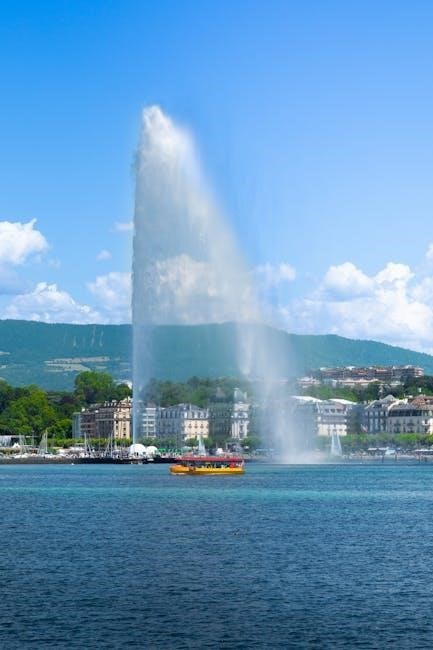
Lake Geneva, a stunning glacial lake straddling Wisconsin and Illinois, is renowned for its diverse fish populations and picturesque scenery. However, successfully navigating its waters and consistently landing fish requires more than just basic angling skills. The lake’s unique characteristics – varying depths, underwater structures, and seasonal fish movements – present challenges even for experienced anglers.
This is where a dedicated Lake Geneva fishing guide service becomes invaluable. These services offer a wealth of local knowledge, honed over years of experience on the lake. Guides understand the subtle nuances of fish behavior, the most productive fishing spots at different times of the year, and the most effective techniques for targeting specific species. They eliminate the guesswork, saving you time, money, and frustration.
A professional guide doesn’t just take you to where the fish are; they teach you how to catch them. They provide expert instruction on casting, lure selection, and fish fighting techniques, enhancing your angling abilities. Furthermore, a reputable guide service handles all the necessary equipment – rods, reels, tackle, and safety gear – allowing you to focus solely on the thrill of the catch. Whether you’re a seasoned angler or a complete beginner, a Lake Geneva fishing guide service can transform your fishing experience into an unforgettable adventure.
II. Popular Fish Species in Lake Geneva
Lake Geneva boasts a remarkable variety of fish species, attracting anglers with diverse preferences. A skilled fishing guide service understands the habits and habitats of each, tailoring trips for optimal success. Among the most sought-after are Lake Trout, known for their size and fighting spirit, often targeted through trolling in deeper waters.
Walleye, prized for their delicious flavor, are another popular choice, frequently found near weed beds and drop-offs. Northern Pike, aggressive predators, provide thrilling action for anglers employing casting and retrieval techniques. Smallmouth Bass, abundant throughout the lake, offer a challenging and rewarding experience, particularly around rocky structures.
Beyond these primary species, anglers can also encounter Largemouth Bass, Panfish (Crappie, Bluegill), and even Muskie. A knowledgeable guide will assess current conditions and fish activity to determine the best strategy for targeting your desired species. They’ll provide insights into seasonal patterns, preferred baits, and effective presentation methods, maximizing your chances of a successful and enjoyable fishing trip on Lake Geneva. Choosing a guide specializing in your target species is highly recommended.
III. Lake Trout Fishing
Lake Trout fishing on Lake Geneva is a premier angling experience, often requiring the expertise of a dedicated fishing guide service. These cold-water predators thrive in the lake’s deeper sections, demanding specialized techniques to locate and entice them. Trolling is the most effective method, utilizing downriggers or leadcore line to present lures at precise depths.
Successful Lake Trout trips rely on understanding thermoclines and locating areas with abundant baitfish. Guides employ sophisticated sonar technology to identify these hotspots. Popular lures include spoons, flasher-fly combinations, and diving crankbaits, mimicking the lake trout’s natural prey. Varying speeds and lure presentations are crucial for triggering strikes.
A skilled guide will also consider seasonal patterns, as Lake Trout behavior changes throughout the year. Spring and fall typically offer the most consistent action. Proper equipment, including sturdy rods, reels with sufficient line capacity, and appropriate tackle, is essential. A Lake Geneva fishing guide ensures you have everything needed for a productive and memorable Lake Trout adventure.
IV. Walleye Fishing
Walleye fishing on Lake Geneva presents a rewarding challenge, best tackled with the assistance of a knowledgeable fishing guide service. These elusive fish often inhabit areas with structure – weed edges, rocky reefs, and submerged timber – requiring precise lure presentation and boat control. Trolling and casting are both effective techniques, depending on the time of year and walleye location.

During warmer months, walleye tend to suspend in cooler water, making trolling with crankbaits or spinner rigs a productive strategy. Guides utilize GPS and sonar to navigate along productive contours and maintain consistent lure depths. In spring and fall, casting jigs and soft plastics to shallow, weedy areas can yield impressive results.
Understanding walleye behavior, including their sensitivity to light and current, is crucial for success. A skilled Lake Geneva fishing guide will adapt their approach based on prevailing conditions. They’ll also provide insights into optimal lure colors and retrieves. Proper equipment, including sensitive rods and reliable reels, enhances your chances of landing these prized fish.
V. Northern Pike Fishing
Northern Pike fishing on Lake Geneva is an exhilarating experience, and a reputable fishing guide service significantly increases your odds of hooking into these toothy predators. Pike are ambush hunters, frequently found lurking in weed beds, near fallen timber, or along drop-offs. Successful pike fishing demands aggressive presentations and durable tackle.
Casting large spinnerbaits, spoons, or crankbaits through weed lines is a highly effective technique. Guides often employ a stop-and-go retrieve, triggering strikes from waiting pike. Trolling with large lures is also productive, particularly in open water. Steel leaders are essential to prevent pike from biting through your line.
Lake Geneva’s pike population boasts impressive size, making for memorable battles. A skilled guide understands pike behavior, including their preference for cooler water and low-light conditions. They’ll also advise on appropriate lure sizes and colors, maximizing your chances of a successful outing. Safety is paramount when handling pike, given their sharp teeth and powerful jaws.
VI. Smallmouth Bass Fishing
Smallmouth Bass fishing on Lake Geneva is a favorite among anglers, and a knowledgeable fishing guide service can unlock the lake’s best bass spots. These fish prefer rocky structures, submerged humps, and clear water, making Lake Geneva an ideal habitat. Successful bass fishing requires a versatile approach and understanding of their seasonal movements.
Popular techniques include casting tubes, jigs, and crankbaits around rocky points and drop-offs. Drop-shotting with finesse worms is effective for suspended bass. During the spawn, targeting shallow, protected bays is key. A skilled guide will utilize sonar to locate structure and identify bass holding areas.
Lake Geneva’s smallmouth bass are known for their aggressive strikes and fighting spirit. A guide will provide insights into lure selection, retrieve techniques, and optimal fishing times. They’ll also emphasize catch-and-release practices to ensure the sustainability of the fishery. Expect a dynamic and rewarding experience targeting these prized gamefish.
VII. Choosing the Right Lake Geneva Fishing Guide Service
Selecting the ideal Lake Geneva fishing guide service is crucial for a successful and memorable experience. Several key factors differentiate reputable guides from the rest. Prioritize services with extensive local knowledge, demonstrating a deep understanding of the lake’s structure, fish behavior, and seasonal patterns.
Check online reviews and testimonials to gauge past client satisfaction. A professional guide will possess proper licensing and insurance, ensuring your safety and legal compliance. Inquire about the boat’s condition and available equipment – modern fish finders, comfortable seating, and well-maintained tackle are essential.
Communication is key; a good guide will actively listen to your preferences and tailor the trip accordingly. Discuss target species, preferred fishing techniques, and any physical limitations. Don’t hesitate to ask about their success rates and cancellation policies. A transparent and responsive guide builds confidence and sets the stage for a fantastic day on the water.

VIII. Factors to Consider: Experience & Expertise
When evaluating a Lake Geneva fishing guide service, prioritize experience and expertise above all else. A seasoned guide isn’t simply familiar with the lake; they possess an intuitive understanding of fish movements, influenced by weather, season, and water conditions. Years spent on Lake Geneva translate to a higher probability of locating productive fishing spots.
Look for guides with specialized knowledge of the species you intend to target – Lake Trout, Walleye, Northern Pike, or Smallmouth Bass. Expertise extends beyond location; it encompasses proficiency in various fishing techniques, including trolling, casting, and ice fishing.
Inquire about the guide’s certifications or affiliations with reputable fishing organizations. A commitment to continuous learning demonstrates a dedication to staying current with best practices. Don’t underestimate the value of a guide who can adapt to changing circumstances and provide insightful commentary on the local ecosystem;
IX. Factors to Consider: Boat & Equipment Quality
The quality of the boat and fishing equipment significantly impacts your Lake Geneva fishing experience. A well-maintained vessel ensures safety, comfort, and efficient navigation of the lake. Look for boats equipped with modern fish finders, GPS technology, and reliable safety features like life vests and first-aid kits.
Equally important is the condition of the fishing gear. High-quality rods, reels, and tackle increase your chances of landing a prized catch. Ensure the guide provides a variety of equipment suitable for different species and fishing techniques. Properly maintained equipment minimizes malfunctions and maximizes performance.
Consider the boat’s size and layout. A spacious boat offers ample room for anglers and their gear, enhancing comfort during longer trips. Cleanliness and organization are also indicators of a professional and attentive fishing guide service. Don’t hesitate to inquire about the boat’s age and maintenance schedule.
X. Factors to Consider: Licensing & Insurance
When selecting a Lake Geneva fishing guide service, verifying proper licensing and insurance is paramount for your protection and peace of mind. A reputable guide will possess a valid Wisconsin fishing guide license, demonstrating their adherence to state regulations and qualifications.
Crucially, the guide service should carry comprehensive liability insurance. This insurance safeguards you against potential accidents, injuries, or property damage that may occur during the fishing trip. Confirming insurance coverage is a non-negotiable step in ensuring a safe and responsible experience.
Inquire about the guide’s certifications, such as First Aid and CPR training. These certifications demonstrate a commitment to safety and preparedness. A professional fishing guide prioritizes the well-being of their clients and adheres to ethical angling practices. Don’t hesitate to request proof of licensing and insurance before booking a trip.
XI. Fishing Techniques Used by Lake Geneva Guides
Experienced Lake Geneva fishing guides employ a diverse range of techniques tailored to target specific species and prevailing conditions. Trolling is a cornerstone method, particularly effective for Lake Trout and Walleye, utilizing planer boards and downriggers to present lures at precise depths;

For Smallmouth Bass and Northern Pike, casting techniques dominate. Guides skillfully utilize various lures – crankbaits, spinnerbaits, and jigs – targeting structure like weed beds, rock piles, and submerged timber. They adapt presentations based on water clarity, temperature, and fish behavior.
During the winter months, ice fishing becomes prominent. Guides provide access to prime ice fishing locations, utilizing portable shelters and specialized equipment. They demonstrate effective jigging techniques and understand the nuances of locating fish beneath the ice. A skilled guide’s expertise maximizes your chances of success, regardless of the chosen technique.
XII. Trolling Techniques for Lake Trout & Walleye
Lake Geneva guides masterfully employ trolling techniques for Lake Trout and Walleye, adapting to seasonal fish locations and depths. Downriggers are crucial, allowing precise lure presentation at targeted depths where these fish suspend. Varying cable lengths and weights are key to reaching the productive zone.
Planer boards spread lines wide, covering more water and avoiding boat wake disturbance. This technique is particularly effective for Walleye, often trolled with crankbaits mimicking baitfish. Guides carefully monitor sonar to identify fish schools and adjust trolling patterns accordingly.
Lure selection is vital; spoons and flutter spoons excel for Lake Trout, while crankbaits and spinners attract Walleye. Speed control is paramount – typically between 1.5 and 3 mph – maintaining optimal lure action. Experienced guides continuously refine their approach, ensuring consistent contact with fish throughout the trip.
XIII. Casting Techniques for Bass & Pike
Lake Geneva fishing guides utilize diverse casting techniques to target Smallmouth Bass and Northern Pike, adapting to structure and seasonal patterns. For Bass, finesse techniques like drop-shotting and Texas rigging excel around rocky structures and weed edges, presenting baits subtly. Jig fishing is also prominent, allowing for vertical presentations and enticing strikes from bottom-hugging Bass.
Pike fishing demands aggressive presentations. Guides favor casting large spinnerbaits, bucktails, and crankbaits along weed lines and near submerged timber. Retrieval speed is crucial, varying to trigger reaction strikes from these ambush predators. Accurate casting is essential, placing lures precisely into likely holding areas.
Topwater techniques, like using frogs or buzzbaits, can be incredibly effective during warmer months, creating exciting visual strikes. Guides emphasize proper lure weight and rod action to maximize casting distance and control, ensuring anglers reach prime Pike and Bass locations.
XIV. Ice Fishing on Lake Geneva (Winter Season)
Lake Geneva transforms into a winter wonderland, offering unique ice fishing opportunities. A fishing guide service provides crucial expertise for safe and productive outings. Guides meticulously assess ice conditions, utilizing ice augers and safety equipment to ensure angler well-being. They locate prime fishing spots using sonar and knowledge of underwater structure.
Popular techniques include tip-ups for Northern Pike, allowing anglers to cover a larger area, and jigging for Lake Trout and Panfish. Guides often set up heated shelters for comfort during extended trips. They provide all necessary equipment, including ice rods, reels, and a variety of lures.
Understanding Lake Geneva’s winter fish behavior is key. Guides know where Pike and Trout congregate under the ice, maximizing catch rates. Safety briefings are standard, covering ice thickness guidelines and emergency procedures. Ice fishing with a guide offers a thrilling and secure winter angling experience.
XV. Best Times to Fish Lake Geneva
Determining the optimal fishing times on Lake Geneva significantly increases your success, and a knowledgeable fishing guide service is invaluable. Spring (April-May) offers excellent Walleye and Northern Pike fishing as they move into shallower waters for spawning. Summer (June-August) is prime time for Smallmouth Bass, with topwater action and productive weedline fishing.
Fall (September-October) sees a resurgence in Lake Trout activity as they prepare for winter, and Walleye become more aggressive. A guide understands seasonal patterns and adjusts tactics accordingly. Early morning and late evening generally provide the best action, particularly for bass.
Weather patterns also play a crucial role; overcast days often stimulate fish activity. Guides monitor weather forecasts and adapt fishing plans to maximize opportunities. Booking a trip with a local expert ensures you’re fishing during peak periods, increasing your chances of a memorable catch on Lake Geneva.
XVI. Seasonal Fishing Calendar
A Lake Geneva fishing guide service leverages a detailed seasonal calendar for optimal results. Spring (April-May) focuses on Walleye and Northern Pike pre-spawn and spawn, utilizing shallow water techniques. Summer (June-August) shifts to Smallmouth Bass, targeting weed edges and structure with various lures and presentations.
Fall (September-October) is exceptional for Lake Trout as they move deeper, alongside continued Walleye action. Guides employ trolling and jigging methods. Winter (December-February) brings ice fishing opportunities for Lake Trout, Pike, and Panfish, requiring specialized equipment and safety protocols provided by the service.

Throughout the year, a skilled guide monitors water temperatures, clarity, and fish behavior. This calendar isn’t rigid; conditions dictate adjustments. A reputable Lake Geneva guide adapts to ensure consistent fishing success, maximizing your chances of landing trophy fish during each season.
XVII. Weather Considerations & Safety
A premier Lake Geneva fishing guide service prioritizes client safety, closely monitoring weather patterns. Lake Geneva’s weather can change rapidly, demanding vigilance. Guides continuously check forecasts for wind, waves, and potential storms, adjusting plans accordingly. They possess comprehensive knowledge of safe harbor locations and emergency procedures.
Sudden squalls are common, necessitating immediate action. A professional guide equips the boat with essential safety gear: life vests for all passengers, a marine radio for communication, and a first-aid kit. They’ll proactively postpone or shorten trips if conditions become hazardous, prioritizing well-being over catching fish.
Clients should heed the guide’s instructions regarding appropriate clothing – layers are crucial – and sun protection. Understanding potential risks and trusting the guide’s expertise ensures a secure and enjoyable fishing experience on Lake Geneva.
XVIII. Lake Geneva Fishing Regulations & Licensing
A reputable Lake Geneva fishing guide service assumes responsibility for ensuring full compliance with Wisconsin Department of Natural Resources (DNR) fishing regulations. These regulations are subject to change, making current knowledge essential. Guides stay updated on size limits, bag limits, and seasonal closures for all species.
Before your trip, the guide will verify that all anglers possess valid Wisconsin fishing licenses. They can provide guidance on obtaining licenses online or at local vendors. Ignoring regulations can result in hefty fines and legal repercussions, which a professional guide actively prevents.
Furthermore, guides are well-versed in specific Lake Geneva rules, such as restrictions in certain areas or limitations on bait types. They’ll explain these rules clearly, promoting responsible angling practices and preserving the lake’s ecosystem for future generations. Choosing a service committed to ethical and legal fishing is paramount.
XIX. Cost of a Lake Geneva Fishing Guide Service
The cost of a Lake Geneva fishing guide service varies based on several factors, including the duration of the trip, the number of anglers, and the species targeted. Half-day trips (typically 4-6 hours) generally range from $400 to $600, while full-day excursions (8-10 hours) can cost between $600 and $1000 or more.
Additional expenses to consider include the cost of Wisconsin fishing licenses (around $30-$80 per person, depending on residency and license type), bait, and any fish cleaning services requested. Some guides offer package deals that incorporate these extras.
Premium services, such as specialized techniques for specific species like Lake Trout or Musky, or the use of advanced equipment, may command higher rates. It’s crucial to clarify all costs upfront with the guide service to avoid unexpected charges. Remember, investing in a quality guide enhances your chances of a successful and memorable fishing experience.
XX. What to Expect on a Guided Fishing Trip
A guided fishing trip on Lake Geneva typically begins with a pre-trip discussion where the guide assesses your fishing experience and target species preferences. Expect a detailed safety briefing covering boat operation and emergency procedures. All necessary fishing equipment – rods, reels, tackle, and bait – is usually provided, though confirming this beforehand is wise.
The guide will navigate to prime fishing locations based on current conditions and fish behavior, employing various techniques like trolling or casting. They’ll offer instruction on proper casting, reeling, and fish-fighting techniques, catering to all skill levels.
Throughout the trip, the guide will share insights into Lake Geneva’s ecosystem and fish habits. They’ll handle fish handling and, if desired, cleaning. Expect a personalized experience focused on maximizing your catch and enjoyment. Remember to bring appropriate clothing, sunscreen, and a camera to capture your angling adventure!
XXI. Top-Rated Lake Geneva Fishing Guide Services
Several highly-regarded Lake Geneva fishing guide services consistently receive positive reviews. Geneva Lake Fishing Guide, led by Captain Mike, is known for its expertise in targeting Lake Trout and Walleye, offering both half-day and full-day excursions. They provide all equipment and cater to both novice and experienced anglers.
Lake Geneva Guide Service, operated by Captain Dave, specializes in Smallmouth Bass and Northern Pike fishing, utilizing advanced sonar technology to locate fish. They emphasize a personalized approach, tailoring each trip to the client’s preferences.
Swiss Angler Fishing receives acclaim for its knowledgeable guides and well-maintained boats. They offer ice fishing trips during the winter months, providing heated shelters and all necessary gear. When selecting a service, consider their specialization, customer testimonials, and commitment to safety and responsible fishing practices. Booking in advance is highly recommended, especially during peak season.