This manual guides users through the Ricoh GR III’s features, offering detailed instructions for optimal performance and creative control. It’s essential for maximizing this camera’s potential.
What is the Ricoh GR III?
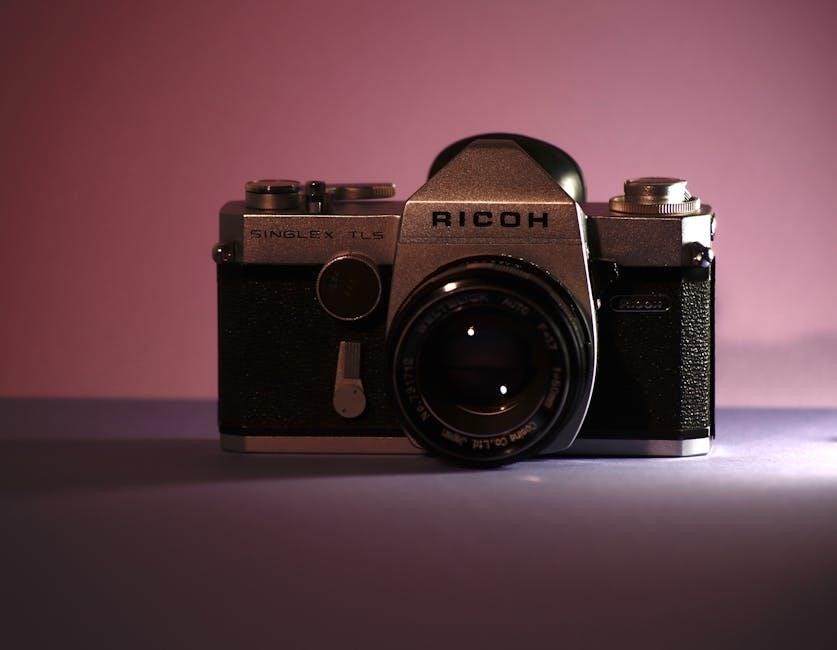
The Ricoh GR III is a remarkably compact and capable digital camera, renowned for its exceptional image quality despite its small size. It features a large APS-C sensor and a fixed 28mm equivalent lens, making it ideal for street photography and everyday shooting.
This camera prioritizes simplicity and responsiveness, offering a unique shooting experience. Its discreet design allows for unobtrusive capture, while advanced features like Snap Focus and built-in Wi-Fi enhance usability. The GR III is designed for photographers seeking a high-quality, pocketable camera.
Why Use a Manual?
While the Ricoh GR III is user-friendly, a manual unlocks its full potential. It provides in-depth explanations of all features, from basic operations to advanced customization options. Understanding the camera’s intricacies allows for greater creative control and troubleshooting.
This manual goes beyond simple instructions, offering insights into optimal settings for various shooting scenarios. It empowers users to move beyond automatic modes and truly master the GR III, resulting in consistently improved photographs and a more rewarding photographic experience.

Setting Up Your Ricoh GR III
Proper initial setup is crucial for a seamless experience. This section details the steps for powering on, charging, and preparing your GR III for immediate use.
Initial Camera Setup
Upon first powering on your Ricoh GR III, you’ll be prompted to select your language and set the date and time. Carefully navigate these initial settings using the directional buttons and the OK button to confirm each selection. Pay close attention to the time zone setting to ensure accurate image timestamps.
The camera will then ask you to confirm your preferred shooting mode. While you can change this later, selecting a starting point helps familiarize you with the interface. Finally, the GR III may prompt you to register your camera for warranty purposes – consider doing so for future support.
Charging the Battery
The Ricoh GR III utilizes a USB-C connection for charging its battery. Connect the provided USB cable to the camera and a USB power source – a computer or a USB wall adapter will work. A charging indicator light illuminates on the camera’s side, typically red while charging and turning off or changing color when complete.
Full charging typically takes around 2-3 hours. It’s recommended to use a dedicated USB wall adapter for faster charging speeds. Avoid using the camera while it’s charging, as this can potentially impact battery health and charging efficiency.
Inserting and Formatting the SD Card
The Ricoh GR III requires a microSDHC or microSDXC card for image storage. Locate the SD card slot on the camera’s side, typically secured with a small latch. Gently insert the card until it clicks into place. Do not force it!
Upon initial use, or when reusing a card, formatting is recommended. Navigate to the camera’s menu, find the “Format Card” option, and confirm. Formatting erases all data on the card, so back up any important files beforehand. Using a formatted card ensures optimal compatibility and performance.
Understanding the Camera Controls
Familiarizing yourself with the GR III’s buttons, dials, and menu system is crucial. This section details each control’s function for intuitive operation and customization.
Basic Button and Dial Functions
The Ricoh GR III features a streamlined control layout. The main dial adjusts aperture in Aperture Priority mode, or functions as a control dial in Manual mode. The front dial controls shutter speed, or exposure compensation. The AE-L/AF-L button locks exposure and focus, vital for recomposing shots. The ‘FUNC’ button provides quick access to frequently used settings like ISO, white balance, and image quality.
The directional buttons navigate menus and select options. The ‘MENU’ button opens the full menu system, while the ‘DISPLAY’ button toggles information overlays on the LCD screen. Understanding these core functions unlocks efficient and intuitive camera operation.
Menu Navigation

Accessing the Ricoh GR III’s menu is done via the ‘MENU’ button. The menu is logically organized into six tabs: Shooting, Image, Sound, Setup, Wireless, and My Settings. Use the directional buttons to highlight menu items and press the ‘FUNC’ button to select.
Navigating submenus is equally straightforward. Pressing the directional buttons up or down reveals further options within each category. The ‘DISPLAY’ button acts as a ‘back’ button, returning you to the previous menu. Customizing ‘My Settings’ allows quick access to frequently used functions, streamlining your workflow.
Customization Options
The Ricoh GR III offers extensive customization. Users can tailor button functions via the ‘Customization’ menu, assigning preferred settings to the ADJ. lever and control dials. ‘My Settings’ allows saving and recalling personalized camera setups for different shooting scenarios – a powerful feature for quick adjustments.
Further personalization includes display options, sound settings, and file naming conventions. You can also adjust the auto-review time and customize the information displayed during playback. These options ensure the camera adapts to your shooting style, enhancing efficiency and control.
Shooting Modes and Features
Explore diverse shooting modes, including Aperture Priority, Shutter Priority, and full Manual control, alongside unique features like Snap Focus for instant capture.
Aperture Priority Mode
Aperture Priority (Av) mode allows photographers to control the lens aperture, directly influencing depth of field and creative blur. The camera automatically selects the appropriate shutter speed for correct exposure. This mode is ideal for portraits, landscapes, and situations where controlling depth of field is paramount. Experiment with wider apertures (lower f-numbers) for shallow depth of field and blurred backgrounds, or narrower apertures (higher f-numbers) for greater sharpness throughout the image. Remember to monitor the selected shutter speed to avoid motion blur, especially in low-light conditions. Understanding the relationship between aperture, shutter speed, and ISO is key to mastering this versatile mode.
Shutter Priority Mode
Shutter Priority (Tv) mode empowers photographers to dictate the shutter speed, freezing motion or creating intentional blur. The camera automatically adjusts the aperture to achieve proper exposure. This mode excels in action photography, capturing fast-moving subjects with clarity, or in artistic scenarios where motion blur is desired, like flowing water. Faster shutter speeds (e.g., 1/500s) freeze action, while slower speeds (e.g., 1/30s) introduce blur. Be mindful of the resulting aperture; very wide apertures may impact image sharpness. Mastering Tv mode requires understanding the interplay between shutter speed, aperture, and ISO.

Manual Mode
Manual (M) mode grants complete creative control over both aperture and shutter speed, allowing photographers to precisely dictate exposure. This mode is ideal for challenging lighting conditions or when a specific aesthetic is desired. Understanding the exposure triangle – aperture, shutter speed, and ISO – is crucial for successful manual shooting. The Ricoh GR III’s exposure compensation display assists in achieving correct exposure. While demanding, Manual mode unlocks the full potential of the camera, fostering a deeper understanding of photographic principles and artistic expression.
Focusing and Image Settings
Explore autofocus options and manual techniques to achieve sharp images. Customize image quality settings, choosing between JPEG for convenience or RAW for editing flexibility.
Autofocus Modes
The Ricoh GR III offers a variety of autofocus (AF) modes to suit different shooting scenarios. Standard AF is ideal for everyday photography, quickly locking focus on your subject. Continuous AF excels when tracking moving subjects, maintaining focus as they change position. Snap Focus is a unique feature, pre-setting a fixed focus distance for incredibly fast capture – perfect for street photography.
Additionally, the camera provides subject tracking capabilities and face detection to enhance accuracy. You can select AF points manually or let the camera automatically choose the optimal point. Understanding these modes allows you to tailor the AF system to your specific needs, ensuring consistently sharp and well-focused images.
Manual Focus Techniques
While the GR III’s autofocus is excellent, mastering manual focus unlocks creative control. Utilize focus peaking, which highlights in-focus areas with color overlays, for precise adjustments. Zooming in on the LCD screen during manual focus is crucial for critical sharpness, especially with shallow depth of field.
The GR III’s snap focus feature can also be employed as a form of pre-focused manual control. Practice smooth, deliberate focus ring adjustments to achieve your desired aesthetic. Remember, manual focus requires patience and a keen eye, but rewards you with unparalleled precision and artistic expression.
Image Quality Settings (JPEG, RAW)
The Ricoh GR III offers both JPEG and RAW image capture options. JPEGs are convenient, ready-to-use files, ideal for quick sharing and require no post-processing. However, RAW files retain significantly more image data, providing maximum flexibility during editing.
Choosing RAW allows for extensive adjustments to exposure, white balance, and detail recovery without sacrificing image quality. Consider your workflow; if extensive editing is planned, RAW is preferred. For immediate results, JPEGs suffice. The GR III also offers various JPEG quality levels to balance file size and detail.
Advanced Features and Functions

Explore the GR III’s unique capabilities, including Snap Focus for street photography, the Intervalometer for time-lapses, and diverse image effects to enhance creativity.
Snap Focus
Snap Focus is a powerful feature on the Ricoh GR III, ideal for street photography and capturing fleeting moments. It allows you to pre-set a focus distance, meaning the camera instantly focuses at that point when the shutter button is pressed. This eliminates autofocus hunting and dramatically speeds up response time.
To activate Snap Focus, select it from the shooting menu. You then adjust the focus distance using the lens ring or dial. Experiment with different distances to suit your shooting style. It’s particularly effective when anticipating action or needing a quick, decisive shot. Mastering Snap Focus unlocks a new level of responsiveness with your GR III.
Intervalometer
The Ricoh GR III’s built-in intervalometer opens up exciting possibilities for time-lapse photography. This function allows the camera to automatically capture images at pre-defined intervals over an extended period. You can set the interval duration (from seconds to hours), the number of shots, and the start delay.
Access the intervalometer through the camera’s menu system. Experiment with different settings to achieve desired effects – capturing cloud movements, cityscapes, or even flower blooming. The resulting images can then be compiled into a time-lapse video using editing software. It’s a fantastic tool for creative expression and documenting slow-changing subjects.
Image Effects and Filters
The Ricoh GR III offers a range of image effects and filters to enhance your photographs directly within the camera. These include options like “Bleach Bypass” for a unique, desaturated look, “High Contrast” for dramatic results, and “Positive Film” to simulate classic film stock. You can also adjust color filters, adding warmth or coolness to your images.
These effects are easily accessible through the camera’s menu. Experimenting with these tools allows for creative control without post-processing. Remember that applying effects reduces the ability to edit the image later, so consider your workflow. Preview the effects on the LCD screen before capturing the shot to ensure the desired aesthetic.
Troubleshooting Common Issues
This section addresses frequent problems, like the camera failing to power on, poor image quality, or connectivity difficulties, offering solutions for a smooth experience.
Camera Not Turning On
If your Ricoh GR III fails to power on, begin by verifying the battery charge. Ensure it’s properly inserted and has sufficient power – connect it to a charger and observe if the charging indicator illuminates. Next, check the power switch position; sometimes, it may not be fully engaged.
Also, inspect the battery contacts within the camera compartment for any dirt or corrosion, cleaning them gently if necessary. If the issue persists, attempt a reset by removing and reinserting the battery. As a last resort, consult the Ricoh support website for further assistance or potential service options.
Image Quality Problems
Experiencing subpar image quality with your Ricoh GR III? First, confirm your chosen image settings. Are you shooting in JPEG or RAW? RAW offers greater flexibility for post-processing. Check the image quality setting within the menu – higher resolutions demand more storage space but yield sharper results.
Also, verify your focus accuracy; blurry images are a common culprit. Ensure the lens is clean and free of smudges. Experiment with different autofocus modes or consider manual focus for precise control. Finally, review your exposure settings – underexposed or overexposed images can appear unsatisfactory.
Connectivity Issues
Troubleshooting connectivity with your Ricoh GR III? Begin by ensuring Bluetooth is enabled on both the camera and your smartphone. Verify the GR III is in pairing mode, as outlined in the manual. If pairing fails, try restarting both devices. For Wi-Fi connectivity, confirm you’ve entered the correct password.
Check for firmware updates on the Ricoh website, as these often address connectivity bugs. If using a computer, ensure the necessary drivers are installed. Finally, distance can impact Bluetooth range; bring the devices closer together for a stable connection.